Setup and use JupyterHub (TLJH) on AWS EC2
JupyterHub is a multi-user, container-friendly version of the Jupyter Notebook. However, it can be difficult to setup. This blog post will make you less likely to run into issues in this 15+ step process.
Video Tutorial
A Jupyter Notebook is an open source application used throughout academia and industry. The interactive computing application consists of cells that render explanatory text written using the Markdown syntax and cells that execute programming code (including Python, R, Julia, and Scala). This means that notebooks can contain text, code, and visualizations in the same document. A Jupyter notebook can be used on your local machine or, as I covered in a previous tutorial, in the cloud. However, the problem is that a Jupyter Notebook is only designed for single users. JupyterHub was designed to solve this problem. JupyterHub is a multi-user, container-friendly (e.g., Docker, Kubernetes, etc.) version of the Jupyter Notebook designed for organizations with many benefits including the ability to:
- Manage users and authentication (e.g., PAM, OAuth, SSO, etc.)
- Create shareable, scalable, and customizable computational resources and data science environments in the cloud (e.g., AWS, Azure, Google Cloud, etc.) or on your own hardware (on-premise)
- Unburden users with installation and maintenance tasks.
JupyterHub comes in two distributions:
- Zero-to-JupyterHub (ZTJH), a multi-node version of JupyterHub based on Kubernetes
- The Littlest JupyterHub (TLJH), is a single-node version of JupyterHub.
This tutorial goes a little beyond the great official JupyterHub tutorial on how to set up JupyterHub (TLJH) on AWS in the hope that the images and YouTube video will make you less likely to run into issues in this 15+ step process.
1). Go to the Amazon Web Services’ website and click Sign In (create an AWS Account if you don’t have one).
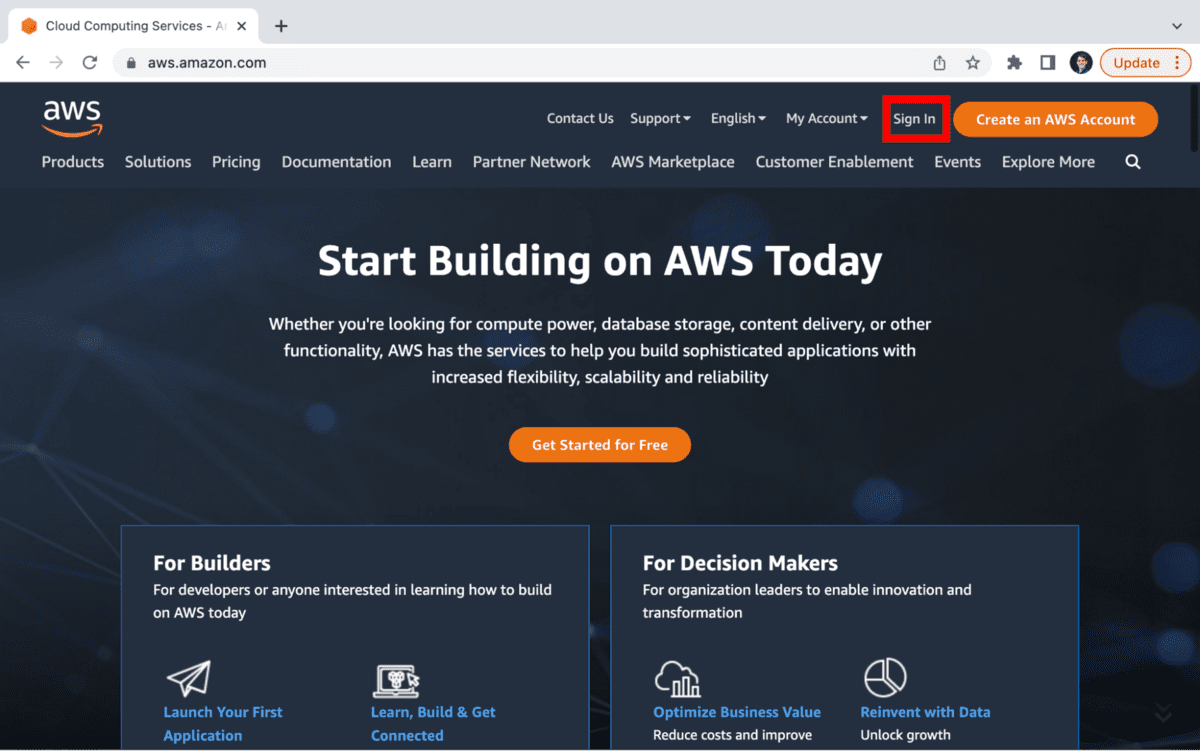
On the Sign in page, choose either Root user (A) or IAM user (B). Enter your email. If you are an IAM user, make sure to have the appropriate permissions so that you can at least create an AWS EC2 instance.
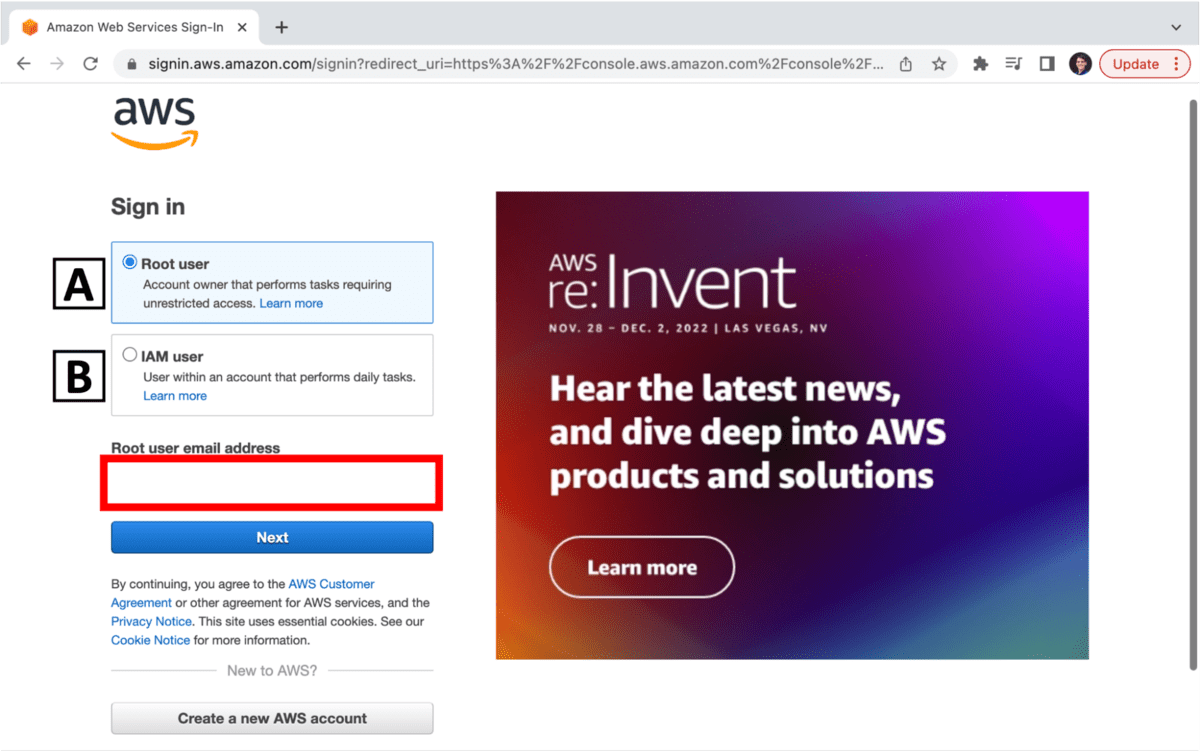
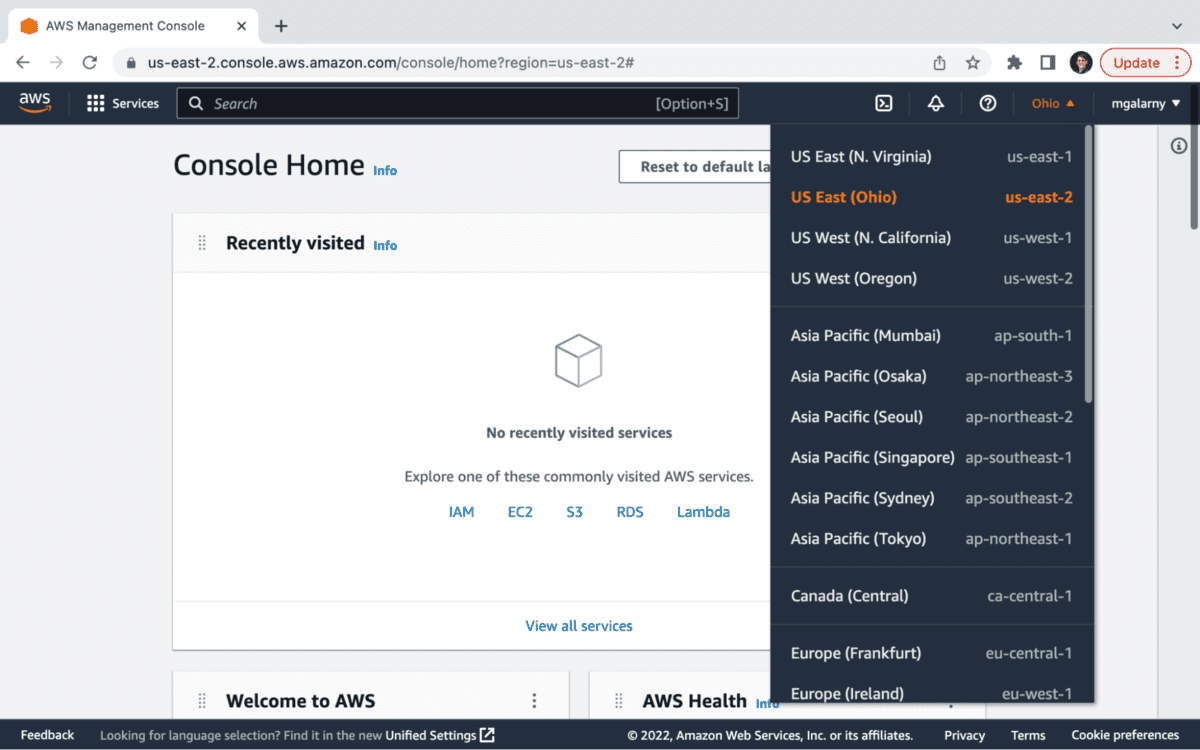
The official tutorial highlights that you should choose an AWS region based on where your JupyterHub users are located.
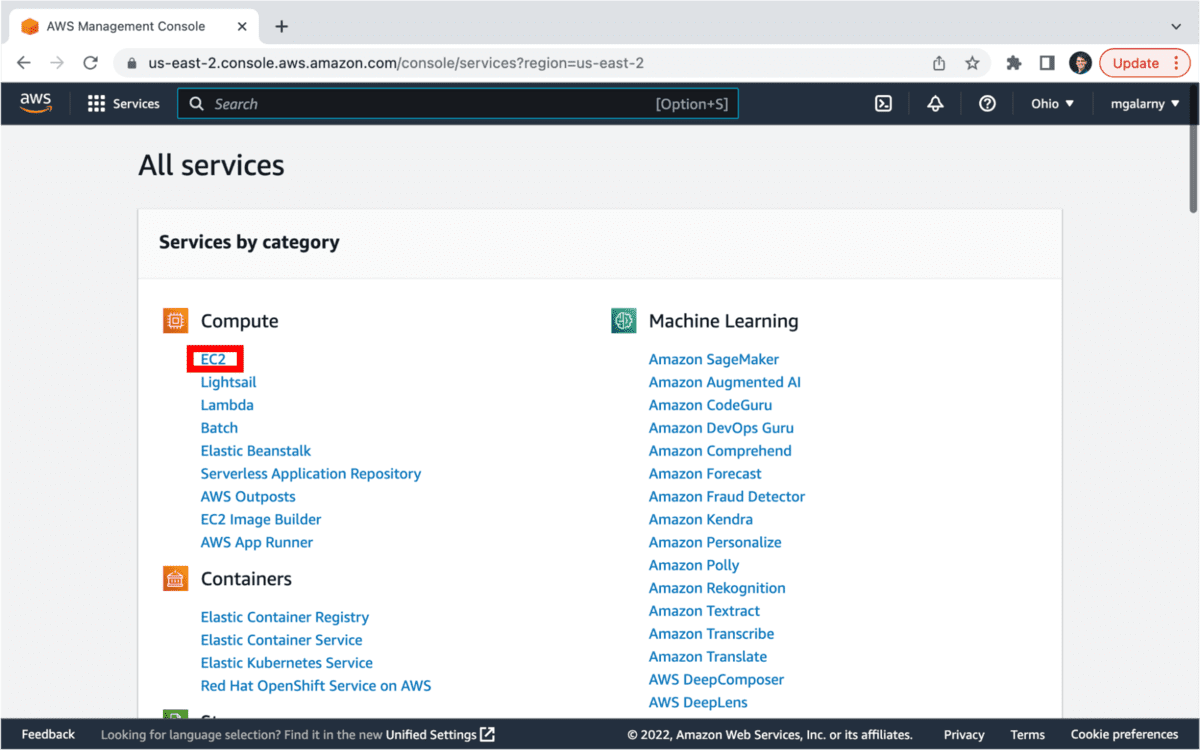
2). Click on EC2. If you don’t see it, use the Search bar at the top of the screen and type in EC2.
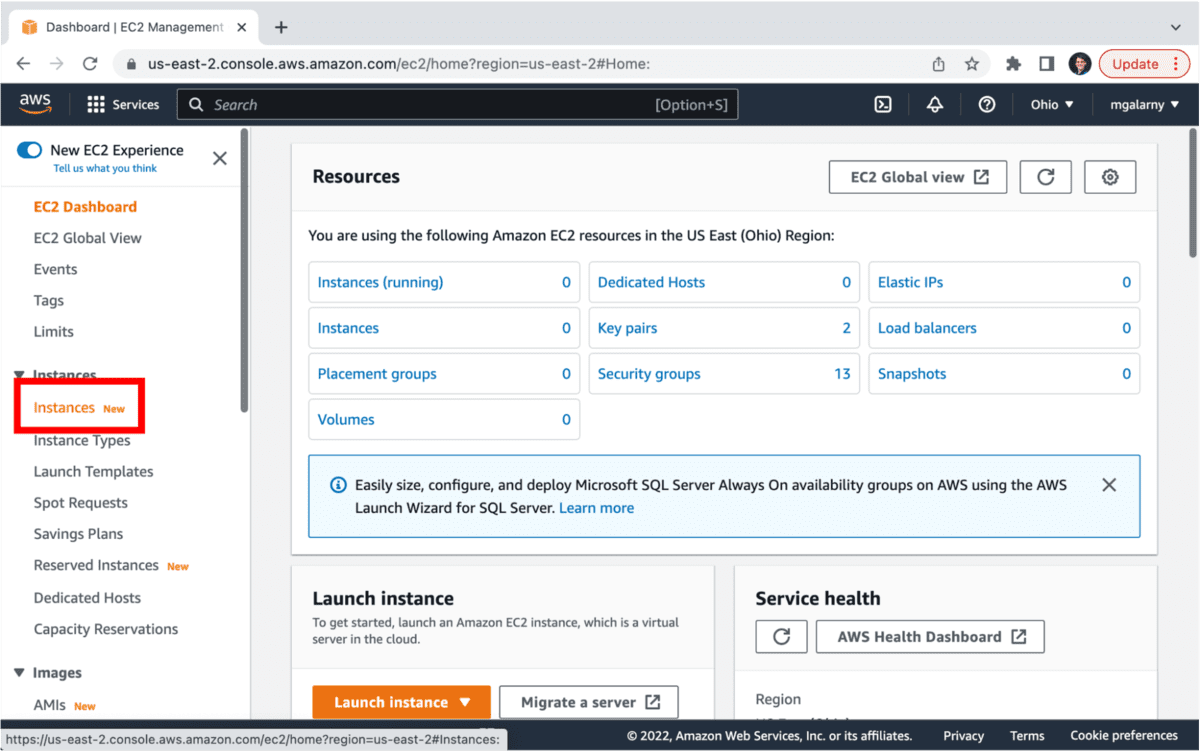
3). On the Dashboard | EC2 Management Console, click on Instances. If this screen looks a little different, note that I have toggled on New EC2 Experience.
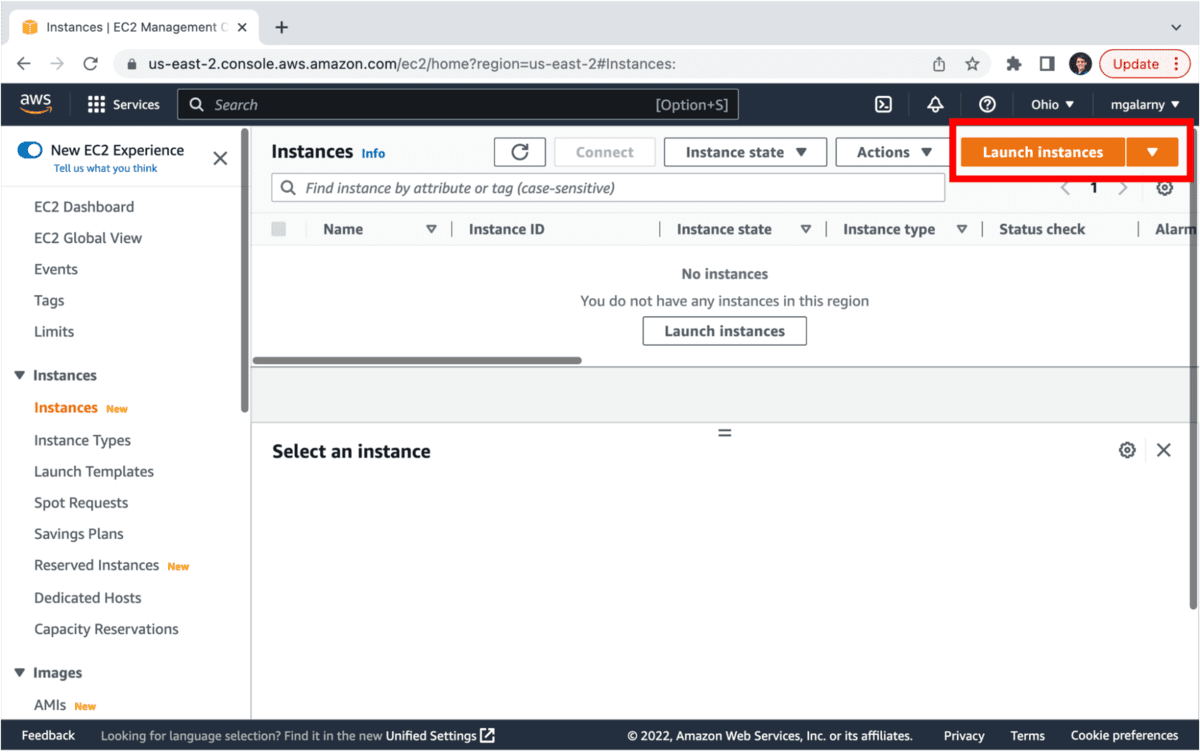
4). Click on Launch Instances (the button could also be labeled Launch Instance).
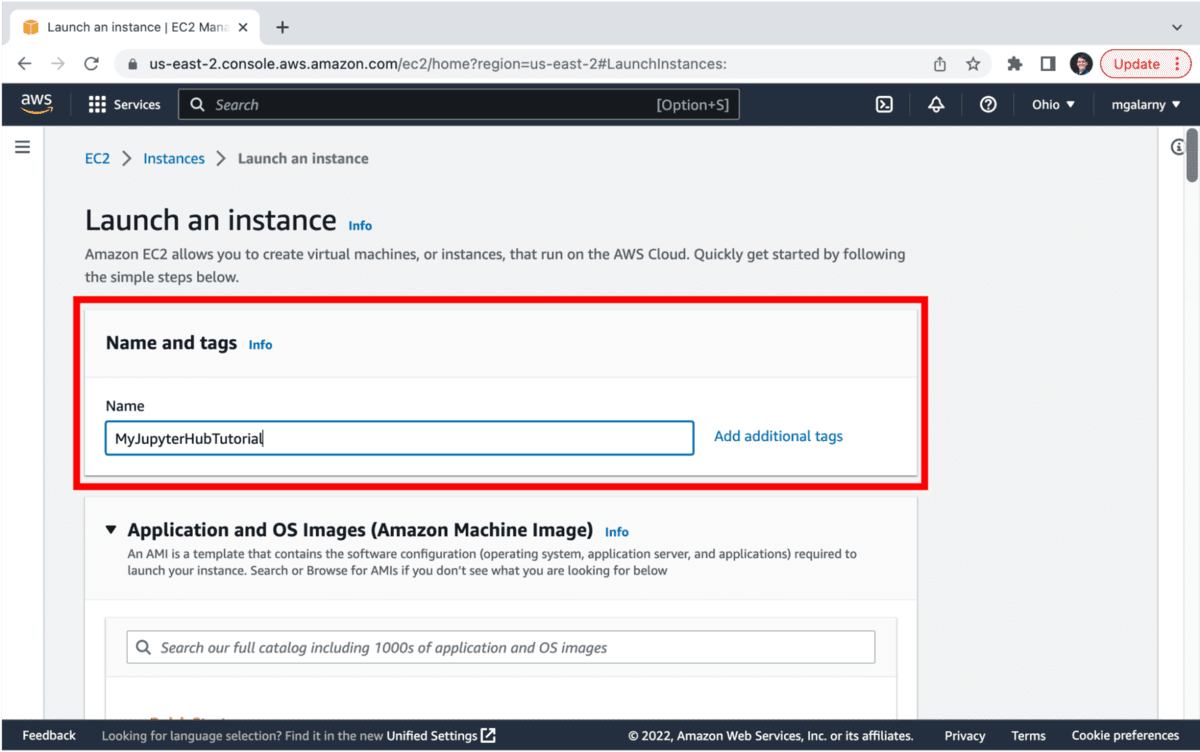
5). Name and [optionally] add tags to your instance. AWS says that “a tag is a label that you assign to an AWS resource.” I recommend you give your instance a name and tags that identify what the instance will be used for (e.g., MyJupyterHubTutorial).
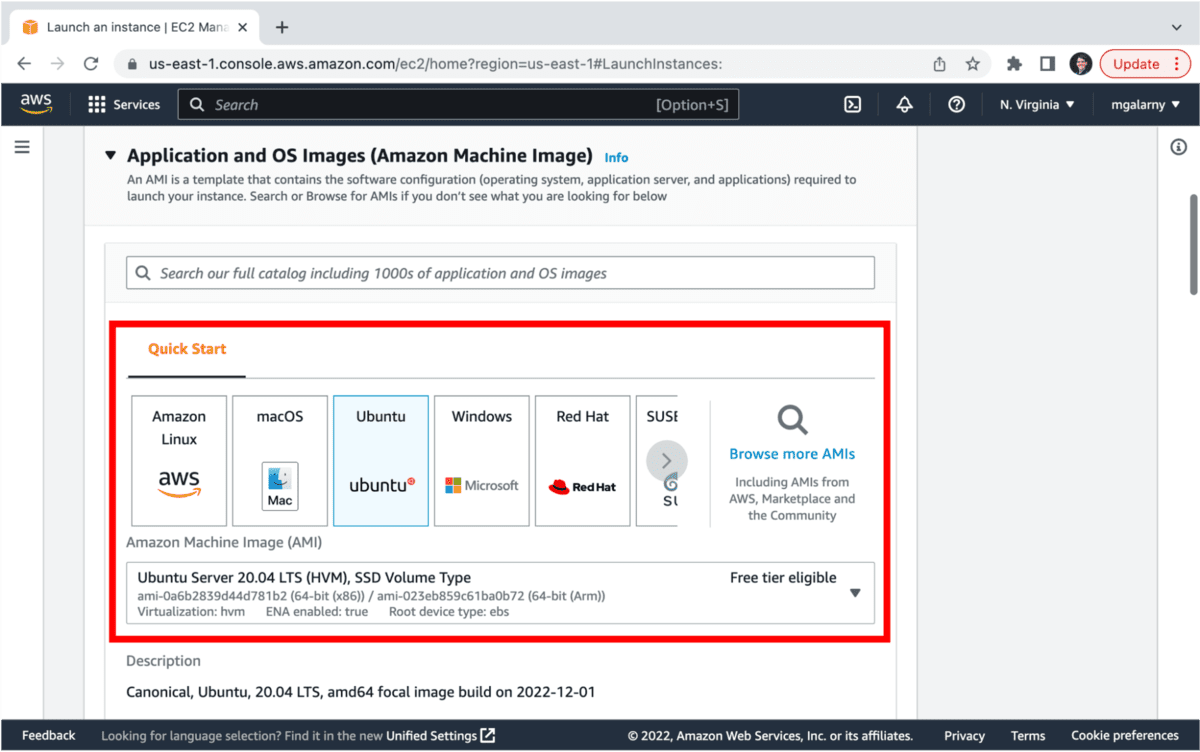
6). Go to Application and OS Images (Amazon Machine Image) and choose Ubuntu version 18.04 LTS, Ubuntu 20.04 LTS (what this tutorial uses), Ubuntu 22.04 LTS (see the Potential Errors section if you want to choose this AMI), or whatever else TLJH supports.
7). Go to Instance type. Before choosing an instance, I highly recommend checking out how much each instance costs plus JupyterHub’s guide on estimating how much memory / GPU / disk space you need based on the number of concurrent users. Basically, at a minimum, you need to use a server with 1GB+ (basically t2.micro or greater) of RAM, but I have found 8GB+ (t2.large or greater) to suit my needs (teaching and practicing data science). If I know that people using JupyterHub will be doing tasks that need to use multiple cores (especially with Ray/Dask/Spark), I pick something that has more vCPU (t2.micro: 1 vCPU, t2.large: 2vCPU, t2.2xlarge: 8vCPU).

Make sure to remember that using AWS costs money (unless you have free credits).
8). Go to Key pair (login). Select an existing key pair or Create new key pair (shown in the images below). If you create a key pair, make sure to download and keep it somewhere safe. You won’t be able to replace it. Selecting a key pair is an important step as you will need a key to be able to SSH to your instance or easily download files.

After clicking on Create new key pair, type in your key pair name (e.g., MyJupyterHubTutorial_pem) and click on Create Key Pair (bottom right in the screenshot below).
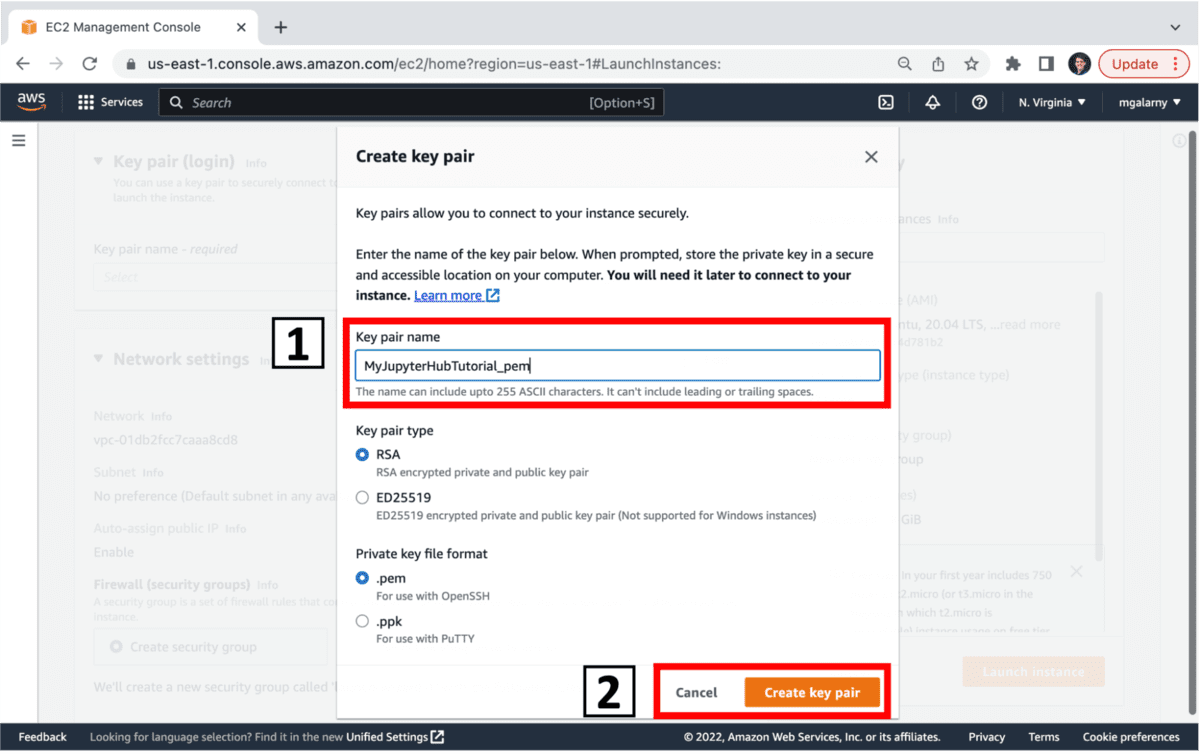
Note: if you use windows, you can choose ppk instead. However, I am a fan of using GOW on windows (as seen in my connect to EC2 Instance using SSH tutorial) which makes it so you can use a pem file on Windows (instead of needing PuTTY).
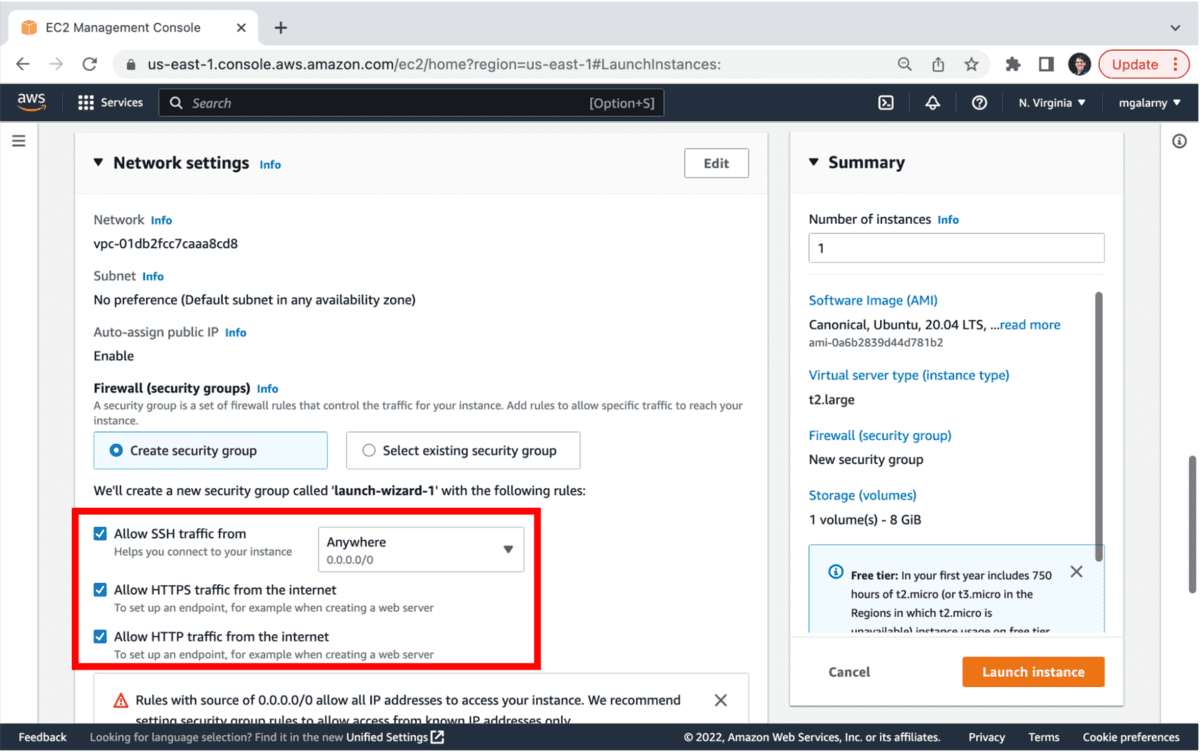
9). Go to Network settings. This is the part of the tutorial where you can either create security group or select an existing security group. This will impact how your instance can be accessed. In this tutorial, you will probably want to add check the following
- Allow SSH traffic from
- Allow HTTPS traffic from the internet (you can enable HTTPS after launching your EC2 instance)
- Allow HTTP traffic from the internet
Clicking on these options will create 3 security groups.
Optionally, you can also view these security groups by clicking on Edit. This will also allow you to change your security group name.
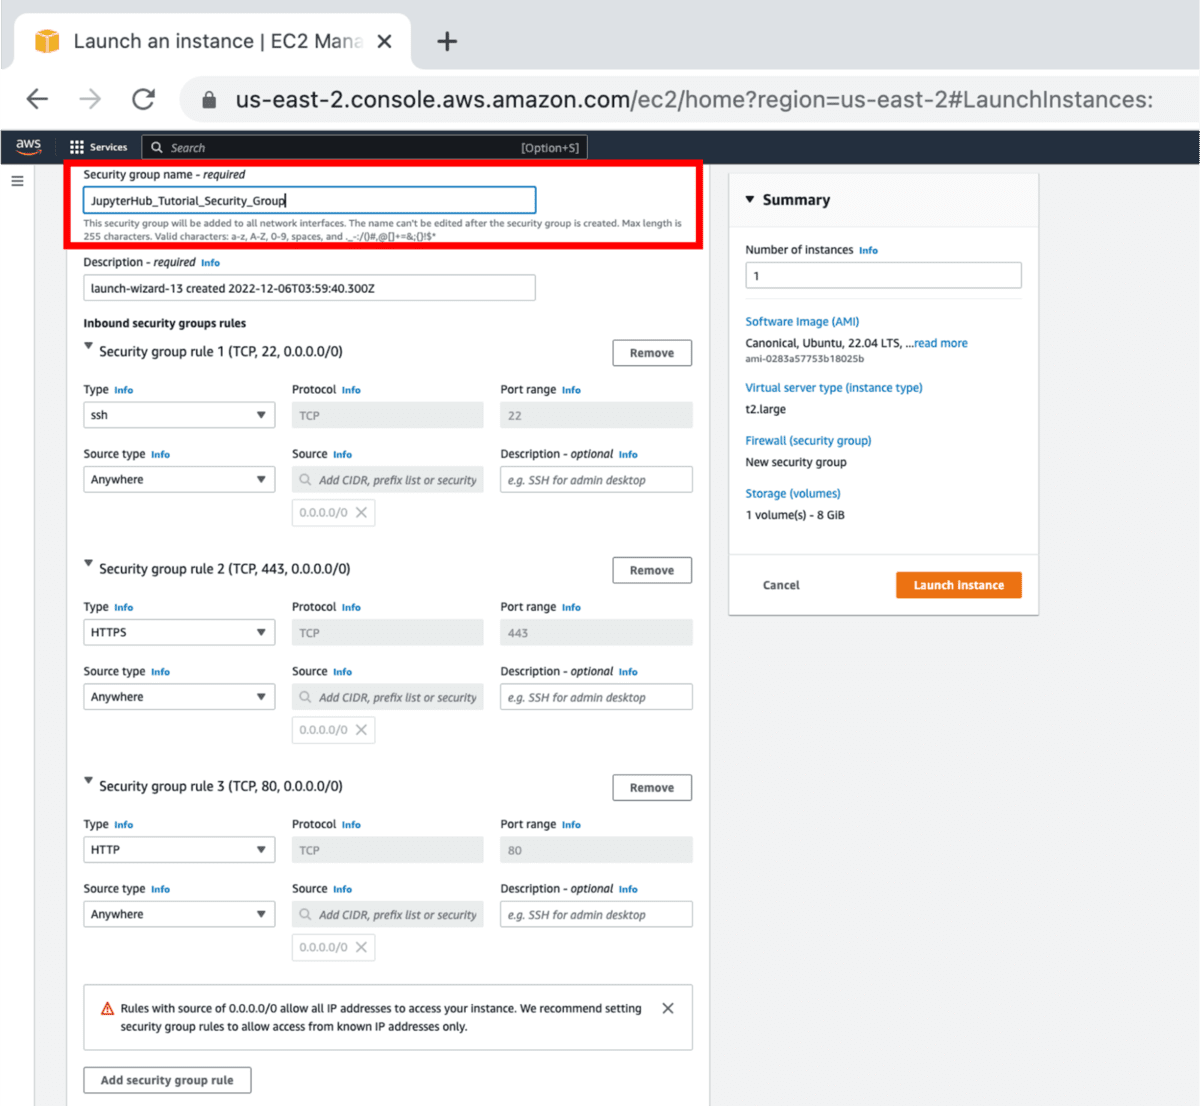
In this image, security group 1 allows SSHing using port 22 (image from when I tried using Ubuntu 22.04 instead of Ubuntu 20.04).
10). Go to Configure storage. This allows you to choose how much storage you want (# of GiB) as well as the volume type (e.g., gp2, gp3, io1, io2, sc1, st1, standard). For this tutorial, I am going with the default storage (gp2) for the AMI I choose in step 6.

In this image, security group 1 allows SSHing using port 22 (image from when I tried using Ubuntu 22.04 instead of Ubuntu 20.04).Let me know if you prefer a different storage type for JupyterHub like gp3. It looks to be more cost-effective than gp2.
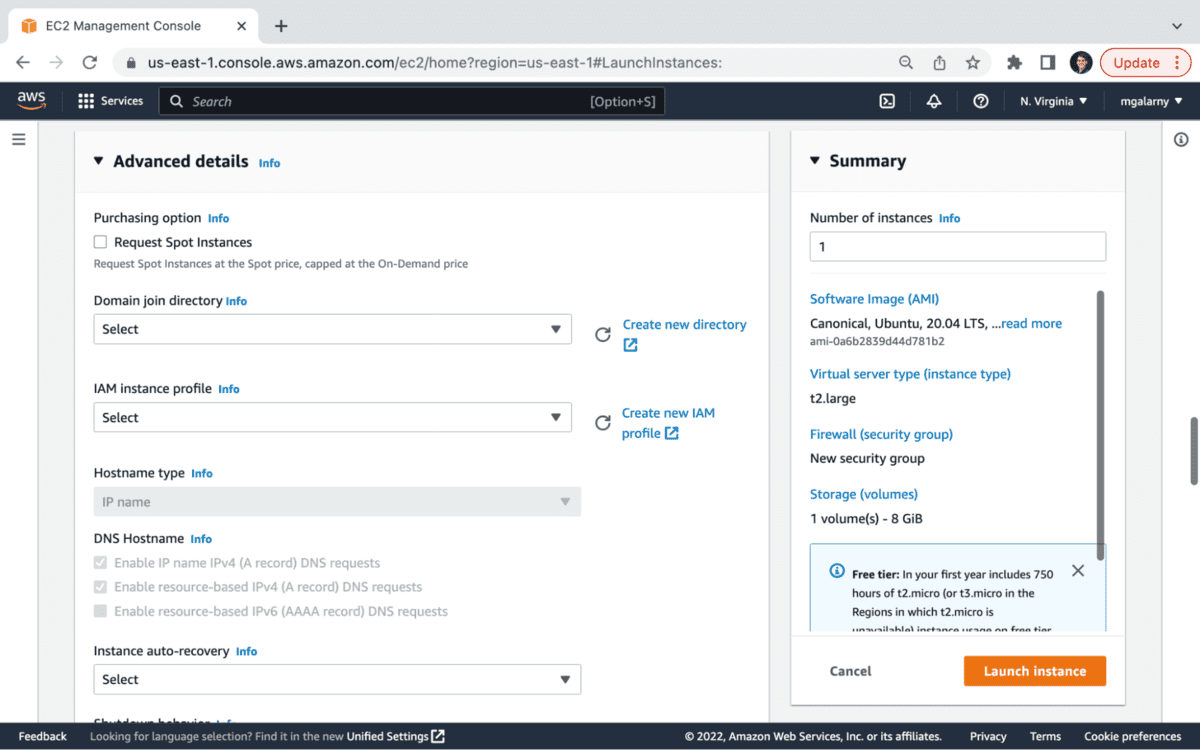
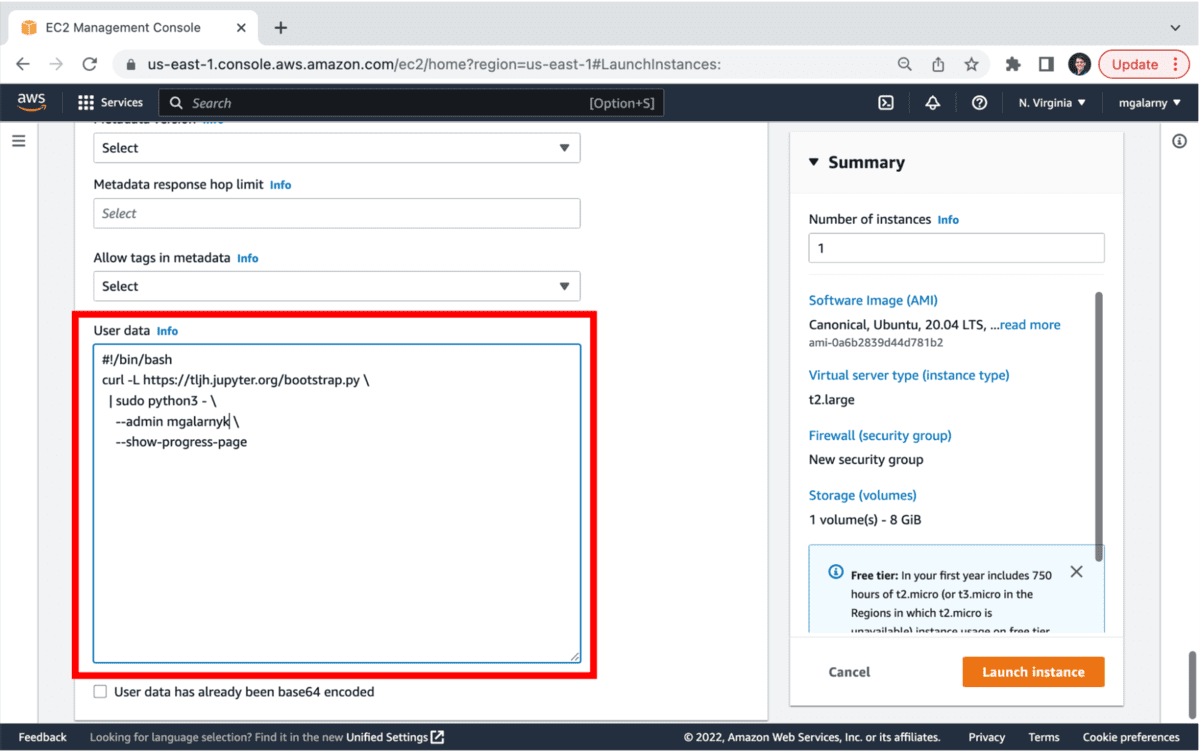
11) Go to Advanced details and scroll down to User data.
This step is about providing a command script that runs when you launch your instance. The installer script below will install JupyterHub (what does the installer do). Before proceeding to paste the text into User data, at a minimum, you will need to replace <admin-user-name> with the admin user (e.g., mgalarnyk). There is no password set in the script as it will be set up later in this tutorial. However, the installer script can be modified to add passwords, add additional admin users, install python packages in the user environment, and install plugins.
#!/bin/bash
curl -L https://tljh.jupyter.org/bootstrap.py \
| sudo python3 - \
--admin <admin-user-name> \
--show-progress-page
Code Caption: The code --show-progress-page will create a temporary “TLJH is building” progress page shortly after the instance is launched, which will allow you to see pretty quickly whether the installation is going well.
Note, if you want to make changes after launching JupyterHub, you can always install additional conda, pip, or apt packages, as well as add/remove admin users.
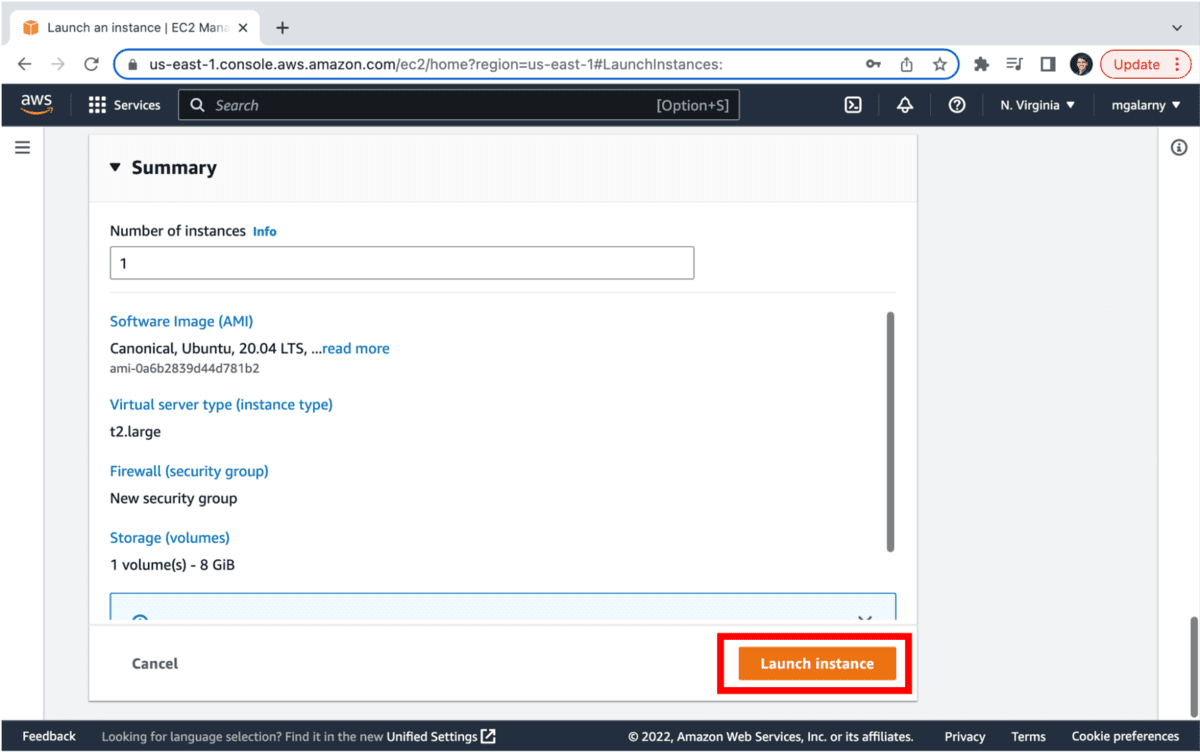
12). Go to Summary and click on Launch instance.
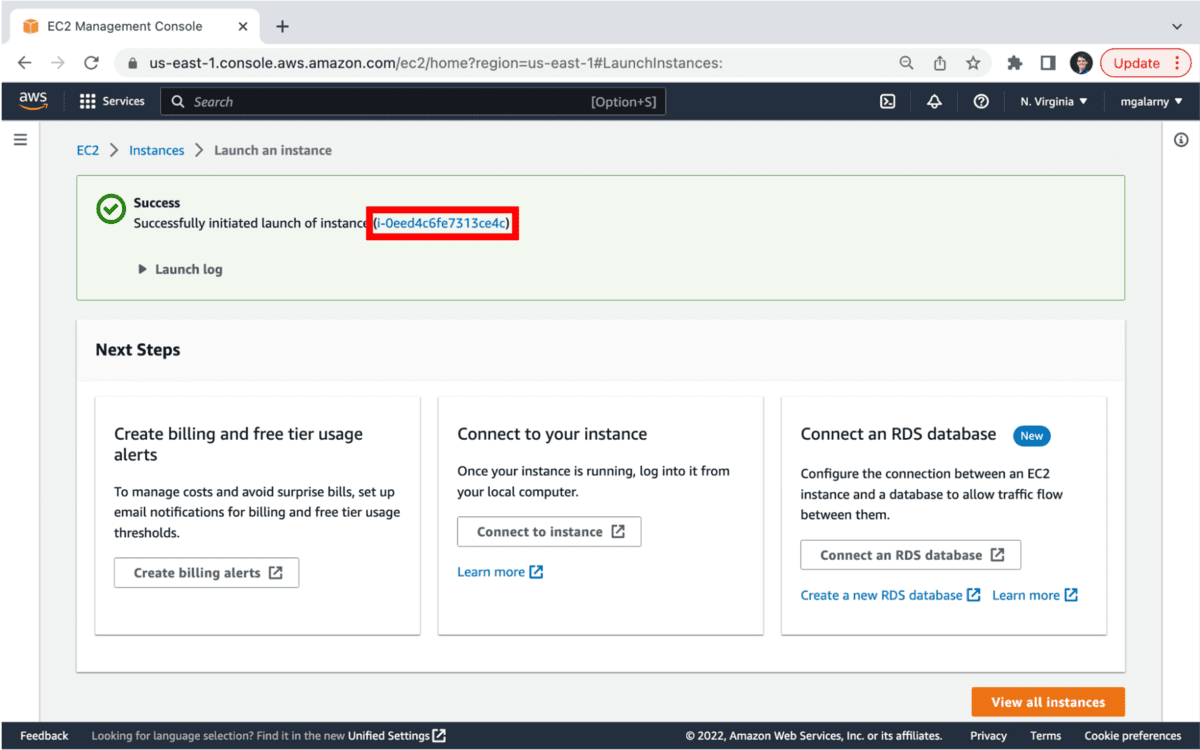
13). On the Launch Status notification screen, click on the link. It will take you to the EC2 Management Console.
14). You should now be in the EC2 Management Console. This step will require a little patience as you need to wait for the JupyterHub installation to complete. The official documentation says that this can take 10+ minutes (it was much quicker for me).
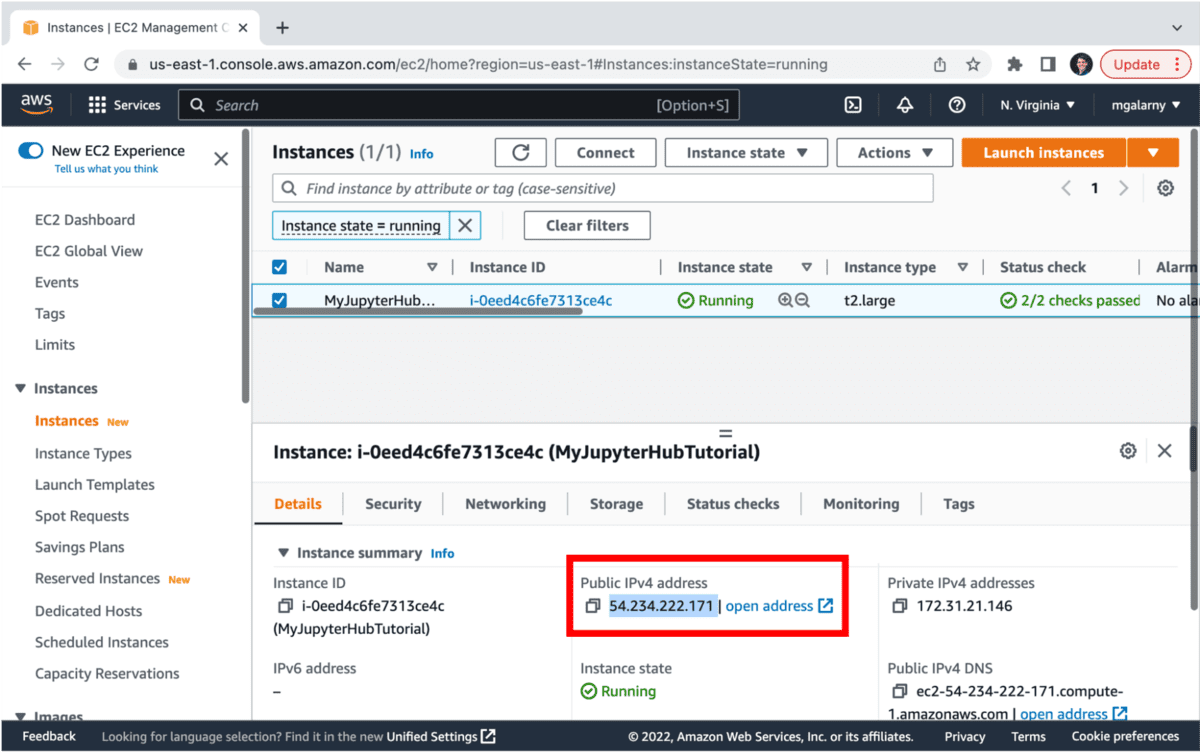
This is one location where you can find your Public address
You can see if your server is setting up by copying the Public address into your browser (I prefer chrome).
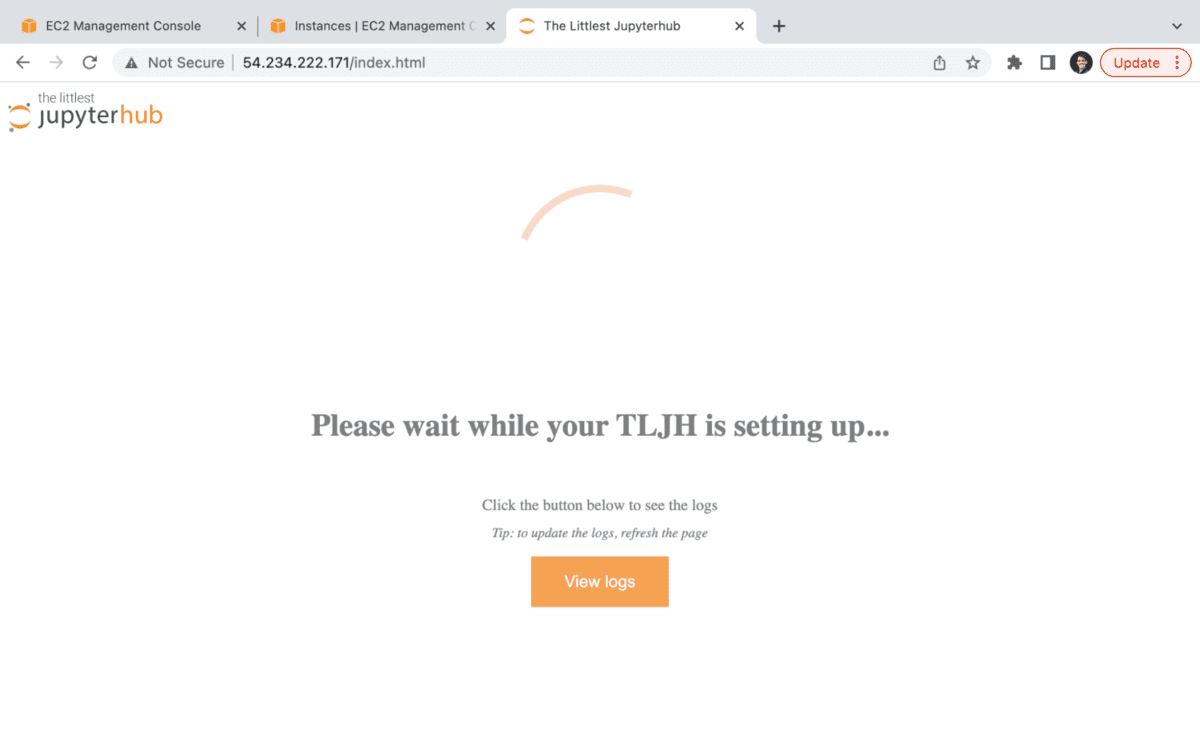
After a couple of minutes, copy the Public address into a new tab and you’ll be asked to sign in.

You can learn how to setup HTTPS and SSL for JupyterHub here.
15). Enter in the admin username you specified in step 11 (e.g., mgalarnyk) and enter in a password which can be 7 characters or longer.
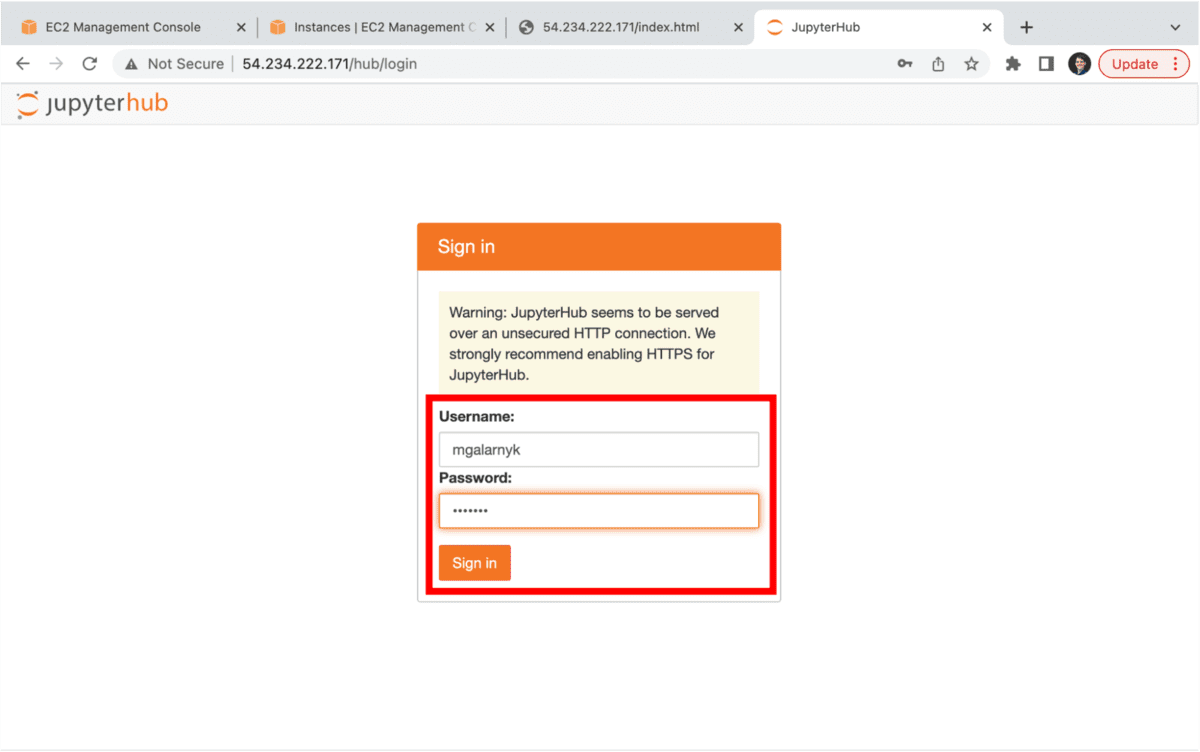
Note that the installer script in step 11 could have been modified to add passwords, add additional admin users, install python packages in the user environment, and install plugins.
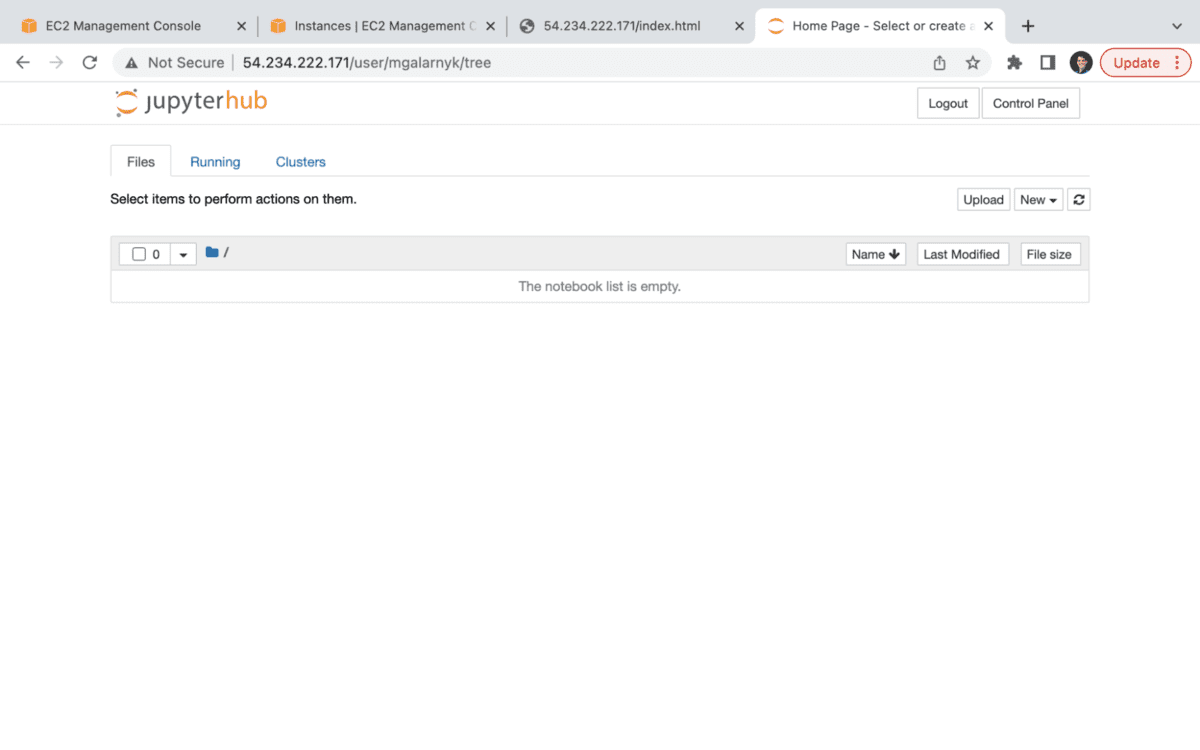
Click on Sign in and you are welcome to JupyterHub!
If you want to make changes after launching JupyterHub, you can always install additional conda, pip, or apt packages, as well as add/remove admin users.
Potential Errors
404 page not found
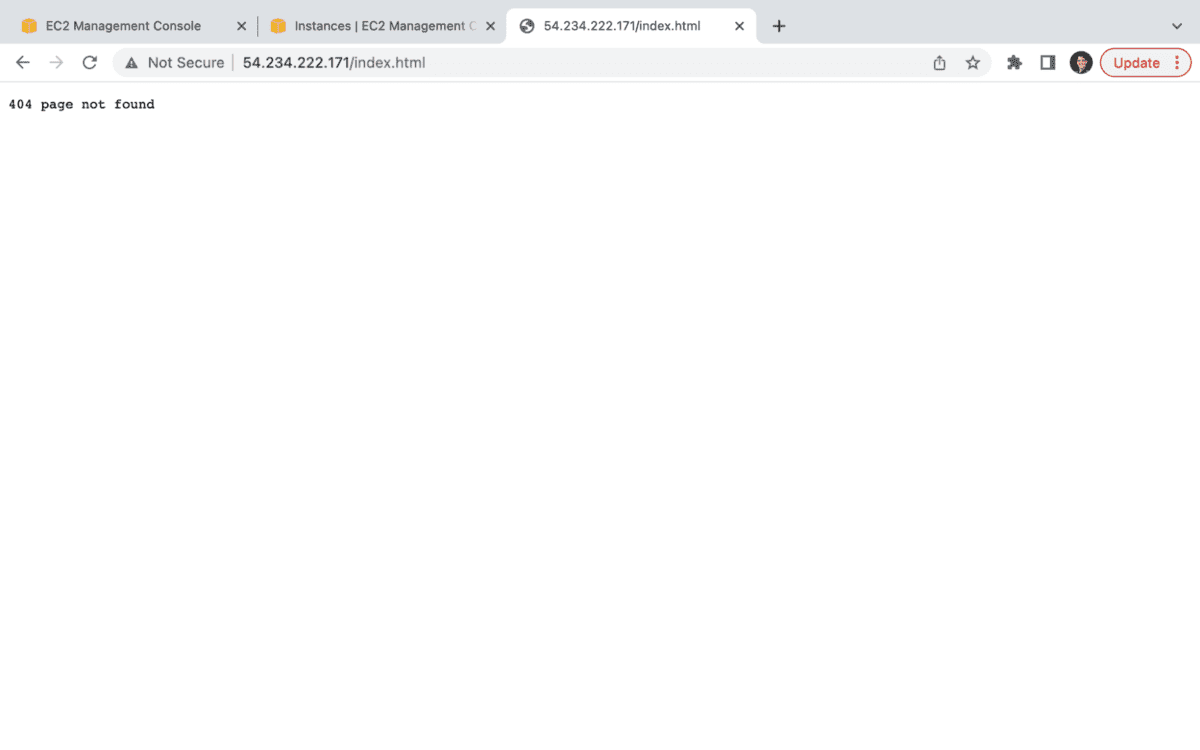
There are many reasons you may get this error. If you get this error after the “please wait while your TLJH is setting up” screen, it might be as simple as copying the address into another tab.
‘Connection Refused’ error after restarting server
Check out the official documentation to learn how to solve this issue.
This site can’t be reached
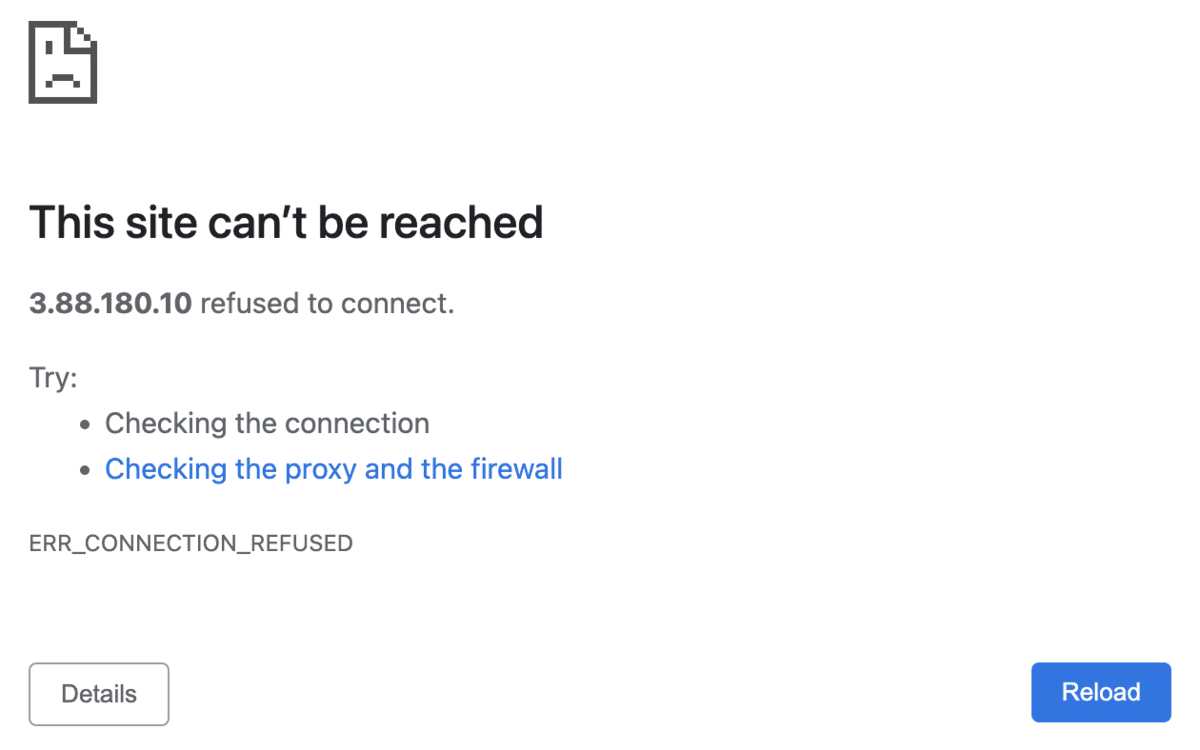
I originally wanted to create this tutorial using Ubuntu 22.04, but I was getting this error when I put the IP address in the browser (of course there are other reasons you can get error). If you want to use Ubuntu 22.04, one possible way to solve this would be check the System Log in the EC2 Management Console to verify its a curl issue and to change the installer script using advice from this askubuntu post.
Conclusion
This tutorial went over how to setup Jupyterhub (TLJH) on AWS. Installations can take significant time to set up and take even more time to manage. If you prefer not to deal with installing and maintaining a server, you can use a product like Saturn Cloud. Regardless, if you have questions or thoughts on the tutorial, feel free to reach out through YouTube or Twitter.
Michael Galarnyk is a Data Science Professional, and works in Product Marketing Content Lead at Parallel Domain.