Data Augmentation For Bounding Boxes: Rethinking image transforms for object detection
Data Augmentation is one way to battle this shortage of data, by artificially augmenting our dataset. In fact, the technique has proven to be so successful that it's become a staple of deep learning systems.
By Ayoosh Kathuria, Research Intern
When it comes to getting good performances from deep learning tasks, the more data the merrier. However, we may only have limited data with us. Data Augmentation is one way to battle this shortage of data, by artificially augmenting our dataset. In fact, the technique has proven to be so successful that it's become a staple of deep learning systems.
Why does Data Augmentation work?
A very straightforward way to understand why data augmentation works is by thinking of it as a way to artificially expand our dataset. As is the case with deep learning applications, the more data, the merrier.
Another way to understand why data augmentation works so well is by thinking of it as added noise to our dataset. This is especially true in case of online data augmentation, or augmenting every data sample stochastically each time we feed it to the training loop.
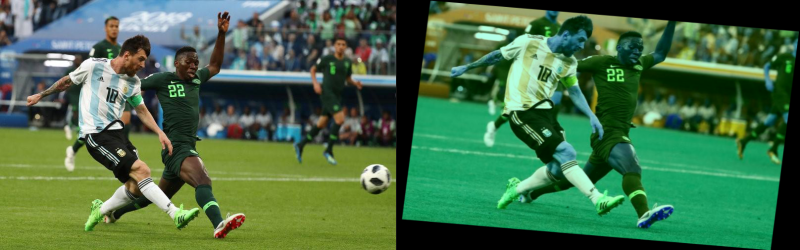
Left: Original Image, Right: Augmented Image.
Each time the neural network sees the same image, it's a bit different due to the stochastic data augmentation being applied to it. This difference can be seen as noise being added to our data sample each time, and this noise forces the neural network to learn generalised features instead of overfitting on the dataset.
GitHub Repo
Everything from this article and the entire augmentation library can be found in the following Github Repo.
https://github.com/Paperspace/DataAugmentationForObjectDetection
Documentation
The documentation for this project can be found by opening the docs/build/html/index.html in your browser or at this link.
This series has 4 parts.
- Part 1: Basic Design and Horizontal Flipping
- Part 2: Scaling and Translation
- Part 3: Rotation and Shearing
- Part 4: Baking augmentation into input pipelines
Object Detection for Bounding Boxes
Now, a lot of deep learning libraries like torchvision, keras, and specialised libraries on Github provide data augmentation for classification training tasks. However, the support for data augmentation for object detection tasks is still missing. For example, an augmentation which horizontally flips the image for classification tasks will like look the one above.
However, doing the same augmentation for an object detection tasks also requires you to update the bounding box. For example, this.
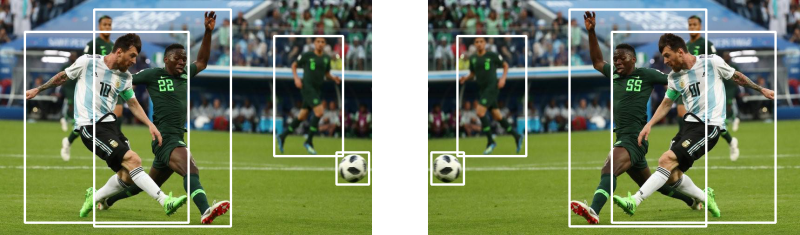
Change of Bounding Boxes during Horizontal Flip
It's this sort of data augmentation, or specifically, the detection equivalent of the major data augmentation techniques requiring us to update the bounding boxes, that we will cover in these article. To be precise, here is the exact list of augmentations we will be covering.
- Horizontal Flip (As shown above)
- Scaling and Translating

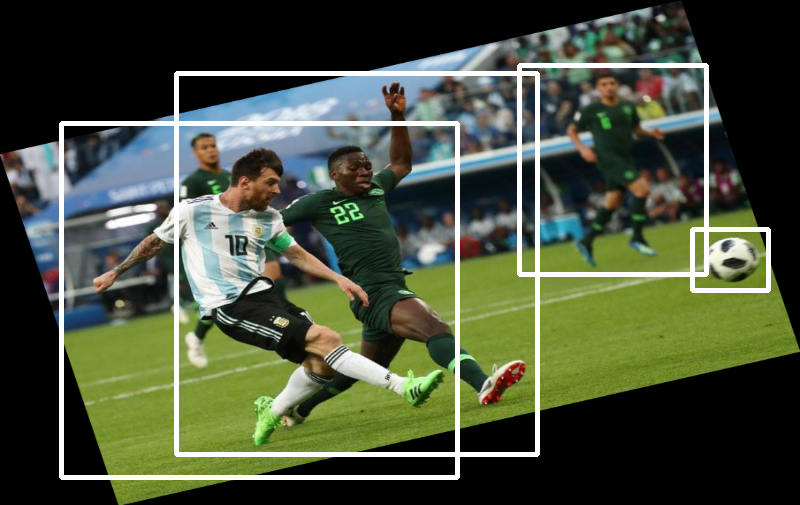
- Rotation
- Shearing
- Resizing for input to the neural network
Technical Details
We will be basing our little data augmentation library on Numpy and OpenCV.
We will define our augmentations as classes, instances of which can be called to perform augmentation. We will define a uniform way to define these classes so that you can also write your own data augmentations.
We will also define a Data Augmentation that does nothing of it's own, but combines data augmentations so that they can be applied in a Sequence.
For each Data Augmentation, we will define two variants of it, a stochastic one and a deterministic one. In the stochastic one, the augmentation happens randomly, whereas in deterministic, the parameters of the augmentation (like the angle to be rotated are held fixed).
Example Data Augmentation: Horizontal Flip
This article will outline the general approach to writing an augmentation. We will also go over some utility functions that will help us visualise detections, and some other stuff. So, let's get started.
Format for Storing Annotation
For every image, we store the bounding box annotations in a numpy array with N rows and 5 columns. Here, N represents the number of objects in the image, while the five columns represent:
- The top left x coordinate
- The top left y coordinate
- The right bottom x coordinate
- The right bottom y coordinate
- The class of the object
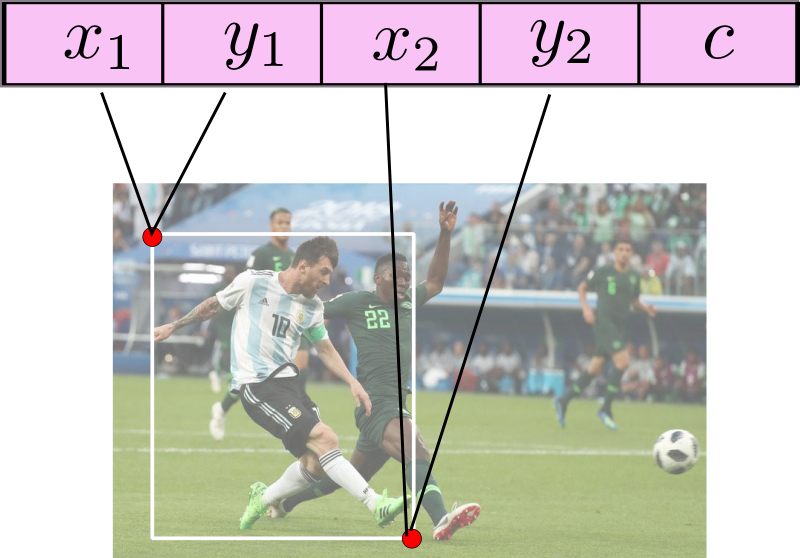
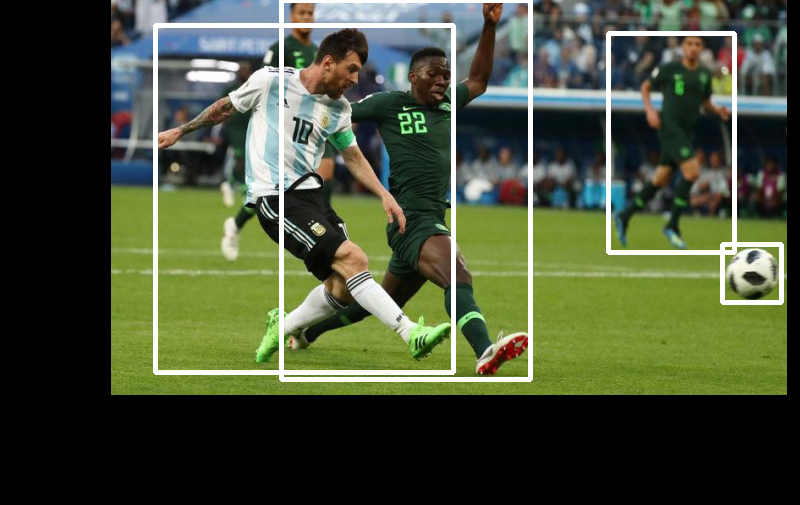
Format for storing Bounding Box Annotations
I know a lot of datasets, and annotation tools store annotations in other formats, so, I'd leave it you to turn whatever storage format your data annotations are stored in, into the format described above.
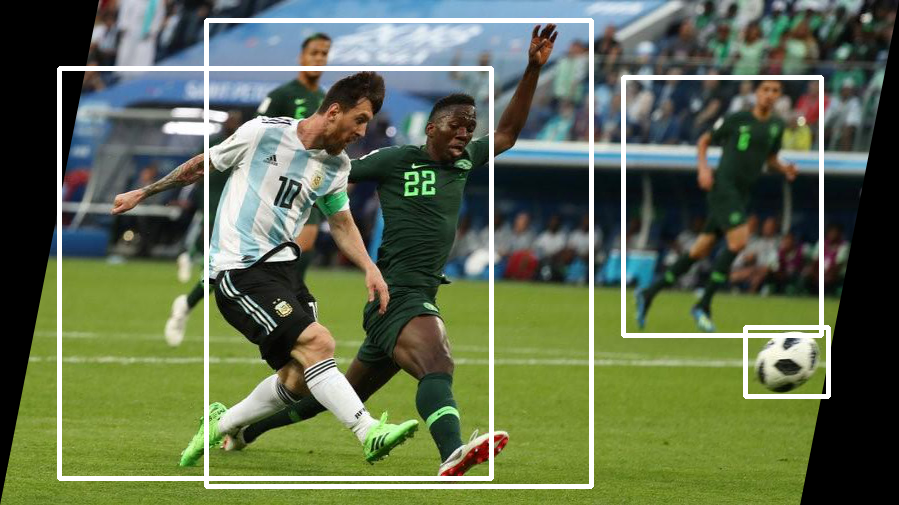
And yes, for demonstration purposes we are going to use the following image of Lionel Messi scoring a beauty of a goal against Nigeria.
File Organisation
We keep our code in 2 files, data_aug.py and bbox_util.py. The first file is going to contain the code for augmentations while the second file will contain the code for helper functions.
Both these files will live inside a folder called data_aug
Let us assume that you have to use these data augmentations in your training loop. I'll let you figure out how you extract your images and make sure annotations are in proper format.
However, for sake of keeping thing simple, let us use only one image at a time. You can easily move this code inside the loop, or your data fetching function to extend the functionality.
Clone the github repo in the folder containing the file of your training code, or the file where you need to make of the augmentation.
git clone https://github.com/Paperspace/DataAugmentationForObjectDetection