Deploy a Dockerized FastAPI App to Google Cloud Platform
A short guide to deploying a Dockerized Python app to Google Cloud Platform using Cloud Run and a SQL instance.
By Edward Krueger, Senior Data Scientist and Tech Lead & Douglas Franklin, Aspiring Data Scientist and Teaching Assistant
In this article, we will discuss FastAPI and Docker. Then we will use these technologies to create and deploy a data API on GCP quickly and easily.
Here is the GitHub repository for this project.
For more information on the app code and structure, check out this article.
We use pipenv for this project, but you don't have to.
What is FastAPI?

”FastAPI is a modern, fast (high-performance), web framework for building APIs with Python 3.6+ based on standard Python type hints.” — — — FastAPI Documentation
FastAPI is an API based on Pydantic and Starlette. FastAPI uses Pydantic to define a schema and validate data. Starlette is a lightweight ASGI framework/toolkit, which is ideal for building high-performance async services.
Other python microservice frameworks don’t integrate with SQLAlchemy easily. For example, It is common to use Flask with a package called Flask-SQLAlchemy. There is no FastAPI-SQLALchemly because FastAPI integrates well with vanilla SQLAlchemy! Additionally, FastAPI integrates well with many packages, including many ORMs and allows you to use most relational databases.
Input validation is delegated to FastAPI. This means that if an integer is submitted in a string field, an appropriate error message will be returned.
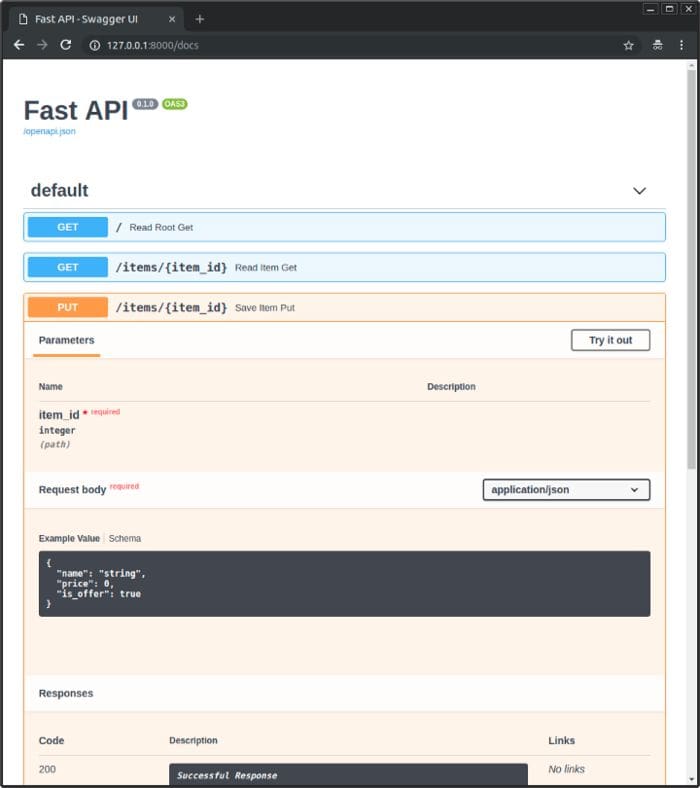
FastAPI utilizes ASGI web services' asynchronous capabilities, so we will be using the async web server, uvicorn, to serve our app. Another great feature of FastAPI is that it automatically generates documentation for itself based on OpenAPI and Swagger UI. Check out how good they look.

FastAPI Documentation
This interface can even be used to debug your application. Now that we know a bit about FastAPI, we will discuss Docker and our Dockerfile before we upload the image to the cloud.
Docker and Dockerfiles

By Brandon Dyck on Unsplash
Docker is the best way to put apps into production. Docker uses a Dockerfile to build a container. The built container is stored in Google Container Registry where it can be deployed. Docker containers can be built locally and will run on any system running Docker.
GCP Cloud Build allows you to build containers remotely using the instructions contained in Dockerfiles. Remote builds are easy to integrate into CI/CD pipelines. They also save local computational time and energy as Docker uses lots of RAM.
Here is the Dockerfile we used for this project:
Example Dockerfile
The first line of every Dockerfile begins with FROM. This is where we import our OS or programming language. The next line, starting with ENV, sets our environment variable ENV to APP_HOME / app.
These lines are part of the Python cloud platform structure and you can read more about them in the documentation.
The WORKDIR line sets our working directory to /app. Then, the Copy line makes local files available in the docker container.
The next three lines involve setting up the environment and executing it on the server. The RUN command can be followed with any bash code you would like executed. We use RUN to install pipenv. Then use pipenv to install our dependencies. Finally, the CMDline executes our HTTP server gunicorn, binds our container to $PORT, assigns the port a worker, specifies the number of threads to use at that port and finally states the path to the app asapp.main:app.
You can add a .dockerignore file to exclude files from your container image. The .dockerignore is used to keep files out of your container. For example, you likely do not want to include your test suite in your container.
To exclude files from being uploaded to Cloud Build, add a.gcloudignore file. Since Cloud Build copies your files to the cloud, you may want to omit images or data to cut down on storage costs.
If you would like to use these, be sure to check out the documentation for .dockerignore and .gcloudignore files, however, know that the pattern is the same as a .gitignore !
Docker Images and Google Container Registry
Now, once we have our Dockerfile ready, build your container image using Cloud Build by running the following command from the directory containing the Dockerfile:
gcloud builds submit --tag gcr.io/PROJECT-ID/container-nameNote: Replace PROJECT-ID with your GCP project ID and container-name with your container name. You can view your project ID by running the command gcloud config get-value project.
This Docker image now accessible at the GCP container registry or GCR and can be accessed via URL with Cloud Run.
Deploy the container image using the CLI
If you prefer using the GUI, skip to the next section.
- Deploy using the following command:
gcloud run deploy --image gcr.io/PROJECT-ID/container-name --platform managedNote: Replace PROJECT-ID with your GCP project ID and container-name with your containers’ name. You can view your project ID by running the command gcloud config get-value project.
2. You will be prompted for service name and region: select the service name and region of your choice.
3. You will be prompted to allow unauthenticated invocations: respond y if you want public access, and n to limit IP access to resources in the same google project.
4. Wait a few moments until the deployment is complete. On success, the command line displays the service URL.
5. Visit your deployed container by opening the service URL in a web browser.
Deploy the container image using the GUI
Now that we have a container image stored in GCR, we are ready to deploy our application. Visit GCP cloud run and click create service, be sure to set up billing as required.

Select the region you would like to serve and specify a unique service name. Then choose between public or private access to your application by choosing unauthenticated or authenticated, respectively.
Now we use our GCR container image URL from above. Paste the URL into the space or click select and find it using a dropdown list. Check out the advanced settings to specify server hardware, container port and additional commands, maximum requests and scaling behaviors.

Selecting a Container image from GCR
Click create when you’re ready to build and deploy!
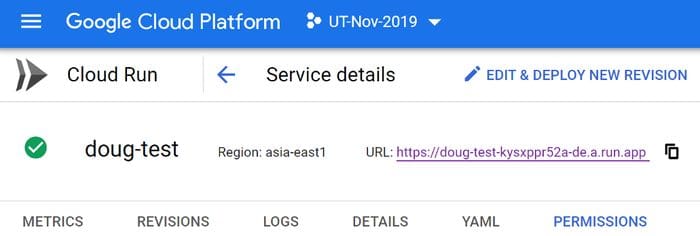
You’ll be brought to the GCP Cloud Run service details page where you can manage the service and view metrics and build logs.

Services details
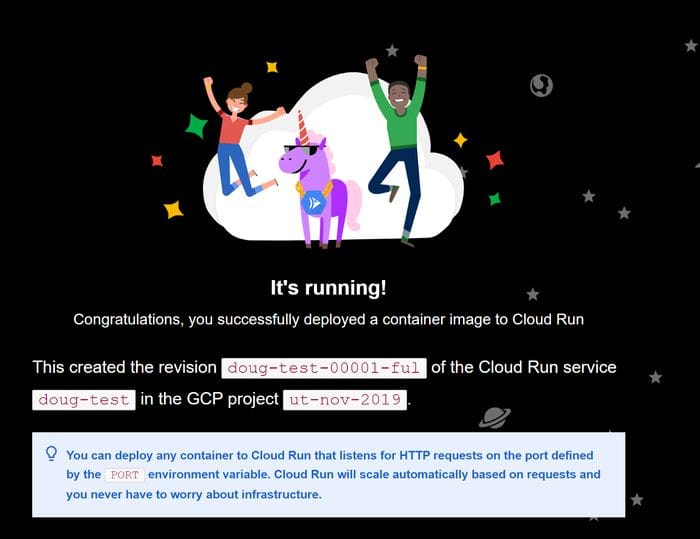
Click the URL to view your deployed application!

Woohoo!
Congratulations! You have just deployed an application packaged in a container image to Cloud Run. Cloud Run automatically and horizontally scales your container image to handle the received requests, then scales down when demand decreases. You only pay for the CPU, memory, and networking consumed during request handling.
That being said, be sure to shut down your services when you do not want to pay for them!
GCP Database Set up and Deployment
Go to the cloud console and set up billing if you haven’t already. Now you can create an SQL instance.
Select the SQL dialect you would like to use, we are using MySQL.

Set an instance ID, password, and location.
Connecting the MySQL Instance to your Cloud Run Service
Setting a new Cloud SQL connection, like any configuration change, leads to the creation of a new Cloud Run revision. To connect your cloud service to your cloud database instance:
- Go to Cloud Run
- Configure the service:
If you are adding a Cloud SQL connection to a new service:
- You need to have your service containerized and uploaded to the Container Registry.
- Click CREATE SERVICE.
If you are adding Cloud SQL connections to an existing service:
- Click on the service name.
- Click DEPLOY NEW REVISION.
3. Enable connecting to a Cloud SQL:
- Click SHOW OPTIONAL SETTINGS:

- If you are adding a connection to a Cloud SQL instance in your project, select the desired Cloud SQL instance from the dropdown menu after clicking add connection.
- If you are using a Cloud SQL instance from another project, select connection string in the dropdown and then enter the full instance connection name in the format PROJECT-ID:REGION:INSTANCE-ID.
4. Click Create or Deploy.
In either case, we’ll want our connection string to look like the one below for now.
mysql://ael7qci22z1qwer:nn9keetiyertrwdf@c584asdfgjnm02sk.cbetxkdfhwsb.us-east-1.rds.gcp.com:3306/fq14casdf1rb3y3nWe’ll need to change the DB connection string so that it uses the Pymysql driver.
In a text editor, remove the mysql and add in its place mysql+pymysql and then save the updated string as your SQL connection.
mysql+pymysql://ael7qci22z1qwer:nn9keetiyertrwdf@c584asdfgjnm02sk.cbetxkdfhwsb.us-east-1.rds.gcp.com:3306/fq14casdf1rb3y3nNote that you do not have to use GCP’s SQL. If you are using a third-party database, you can add the connection string as a VAR instead of Cloud SQL and input your connection string.
Hiding connection strings with .env
Locally, create a new file called .env and add the connection string for your cloud database as DB_CONN,shown below.
DB_CONN=”mysql+pymysql://root:PASSWORD@HOSTNAME:3306/records_db”Note: Running pipenv shell gives us access to these hidden environmental variables. Similarly, we can access the hidden variables in Python with os.
MySQL_DB_CONN = os.getenv(“DB_CONN”)Be sure to add the above line to your database.py file so that it is ready to connect to the cloud!
This .env file now contains sensitive information and should be added to your .gitignore so that it doesn't end up somewhere publicly visible.
Now that we have our app and database in the cloud let’s ensure our system works correctly.
Loading the Database
Once you can see the GCP database, you are ready to load the database with a load script. The following gist is our load.py script.mm
load.py
Let’s run this load script to see if we can post to our DB.
First, run the following line to enter your virtual environment.
pipenv shellThen run your load.py script.
python load.pyVisit the remote app address and see if your data has been added to the cloud database. Be sure to check your build logs to find tracebacks if you run into any issues!
For more clarification on this loading process or setting up your app in a modular way, visit our Medium guide to building a data API! That article explains the code above in detail.
Conclusion
In this article, we learned a little about environment management with pipenv and how to Dockerize apps. Then we covered how to store a Docker container in Google Container Registry and deploy the container with the Cloud Build CLI and GUI. Next, we set up a cloud SQL database and connected it to our FastAPI app. Lastly, we covered running load.py locally to load our database. Note that if your app collects data itself, you only need to deploy the app and database, then the deployed app will populate the database as it collects data.
Here is a link to the GitHub repository with our code for this project.
Edward Krueger is a Senior Data Scientist and Technical Lead at Business Laboratory and an Instructor at McCombs School of Business at The University of Texas at Austin.
Douglas Franklin is a Teaching Assistant at McCombs School of Business at The University of Texas at Austin.
Original. Reposted with permission.
Related:
- A Simple Way to Time Code in Python
- Production-Ready Machine Learning NLP API with FastAPI and spaCy
- MongoDB in the Cloud: Three Solutions for 2021
