Social User Authentication in Django Framework
Learn how to perform social user authentication in the Django web app using third-party services like Google.
Image by Author
Introduction
Django is a free, open-source web framework in Python. It follows the model-view-controller architectural pattern and provides a built-in admin interface, Object-relational mapping (ORM), and a template engine, among other features. Django's primary goal is to make it easier for developers to build and maintain web applications by providing a high-level, reusable set of components for everyday tasks such as handling user authentication, creating and managing databases, and handling HTTP requests and responses.
This article will discuss how we can perform social authentication in a Django app using Google. Social authentication, also known as social login or sign-in, is a method of authenticating users using their existing social media accounts, such as Facebook, Google, or Twitter, instead of creating a new account specifically for the website or application.
The benefits of using social authentication over a traditional authentication system are that it eliminates the need for users to create and remember yet another username and password, reducing friction and increasing the likelihood of users signing up for the website or application. Also, it improves the user experience by allowing users to sign in with their existing social media accounts. Social authentication provides a more seamless and familiar user experience.
Getting the Client ID and Client Secret Key from Google Console
- Login to the Google Console Platform. You can use that link to login.
- Create a new project if you don’t have one already.
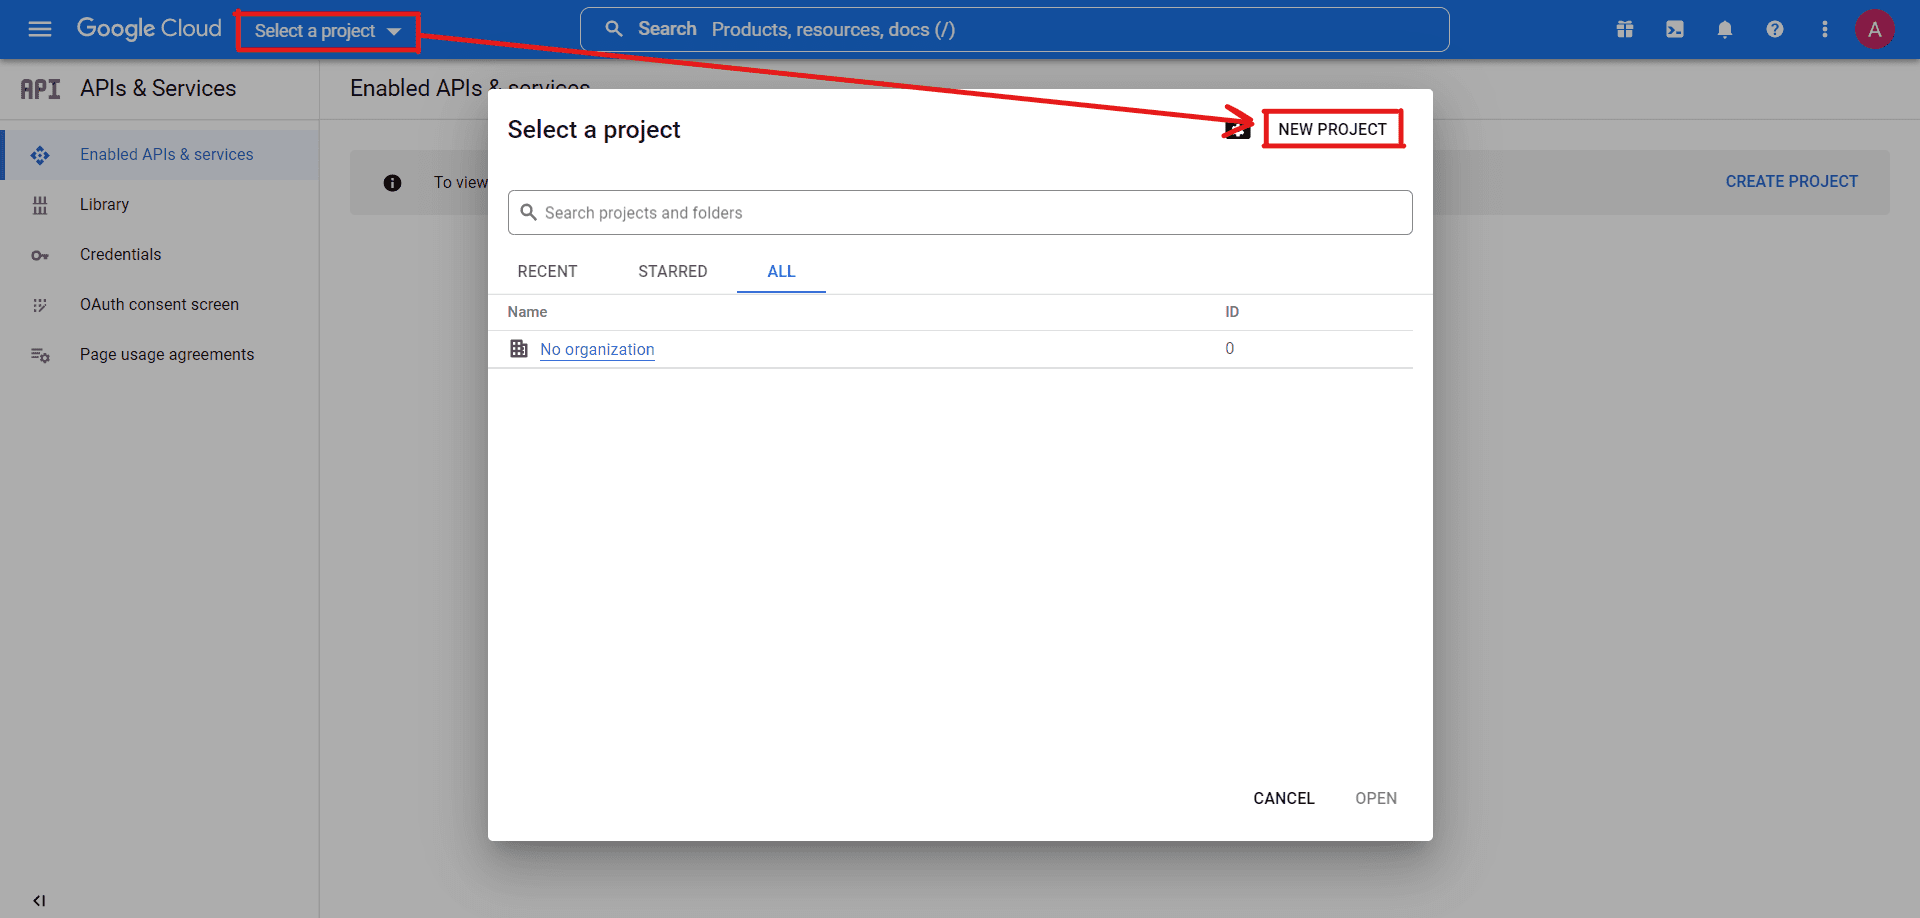
Image by Author
- After creating the project, we need to configure the OAuth Screen. This screen is shown when a client tries to authenticate your website using Google Auth. It contains the summary of your app and all the required policies.
- Click on the button as shown below.
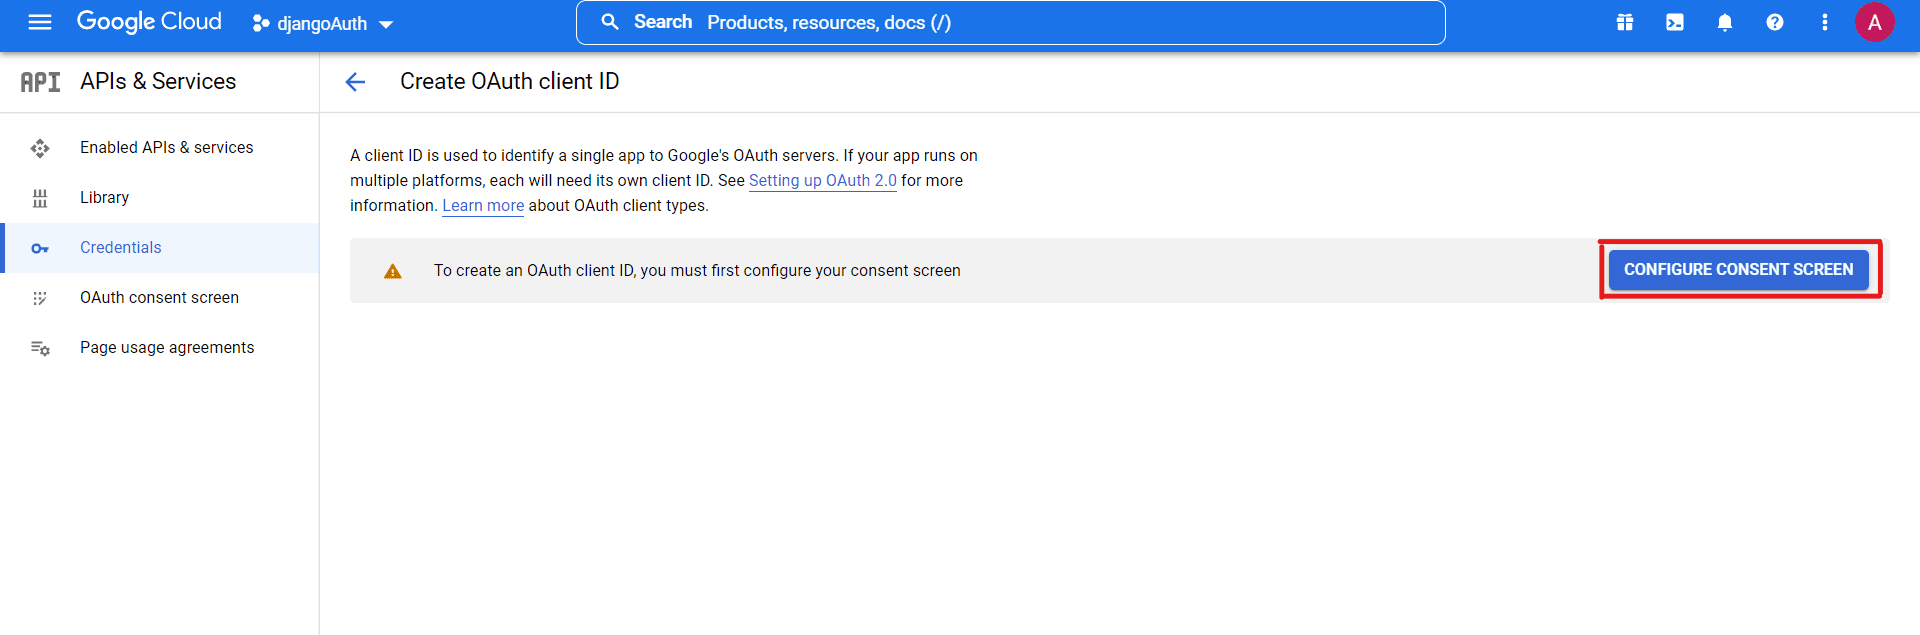
Image by Author
- Select the User Type as External and click on Create Button.

Image by Author
- Fill in all the required details and continue.
- Leave the section of Authorized Domain empty, as we are currently testing our app on the local server. If you host your website with a proper domain name, then you have to enter the domain name of your website here.
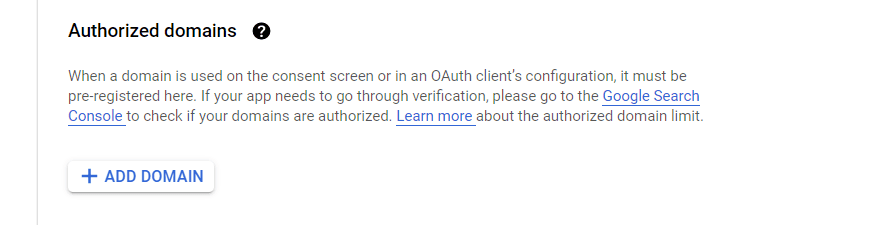
Image by Author
- Leave the other steps, like Scops and Test Users, empty.
- After configuring the OAuth Screen, navigate to
Credentials << CREATE CREDENTIALS << OAuth client ID
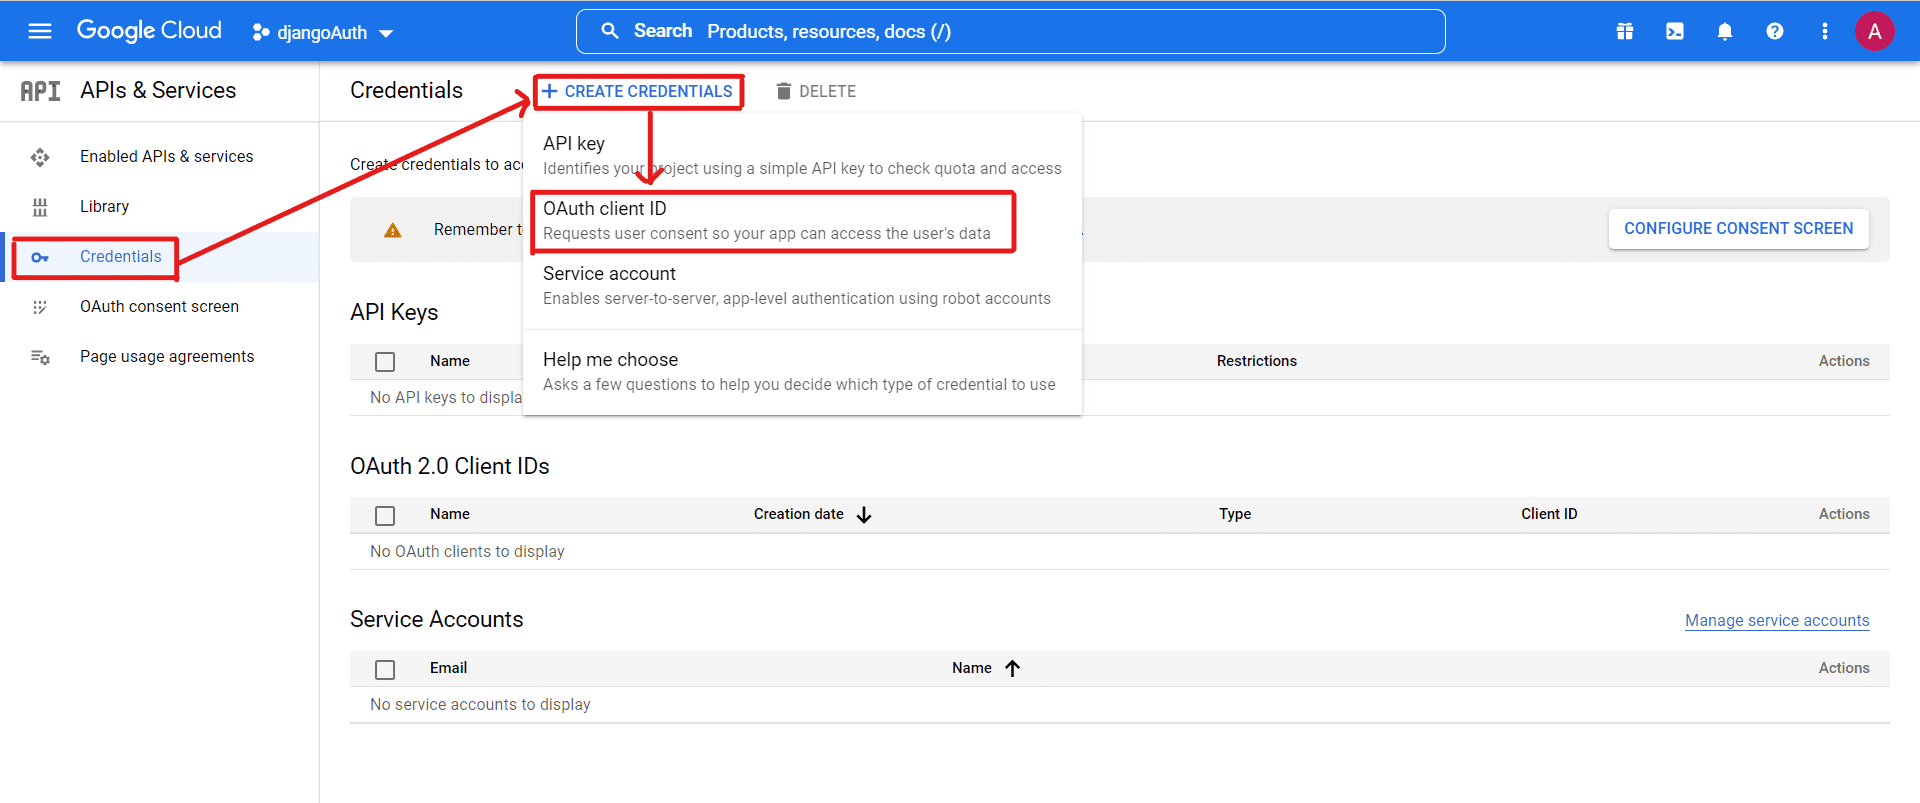
Image by Author
- Select the application type as Web Application.
- Fill in all the required information and click Create Button.
Note: Add Authorized Redirect URLs, as we currently run our application on the local host. You can change the redirect URLs according to your domain name.
http://127.0.0.1:8000/accounts/google/login/callback/
http://localhost:8000/accounts/google/login/callback/
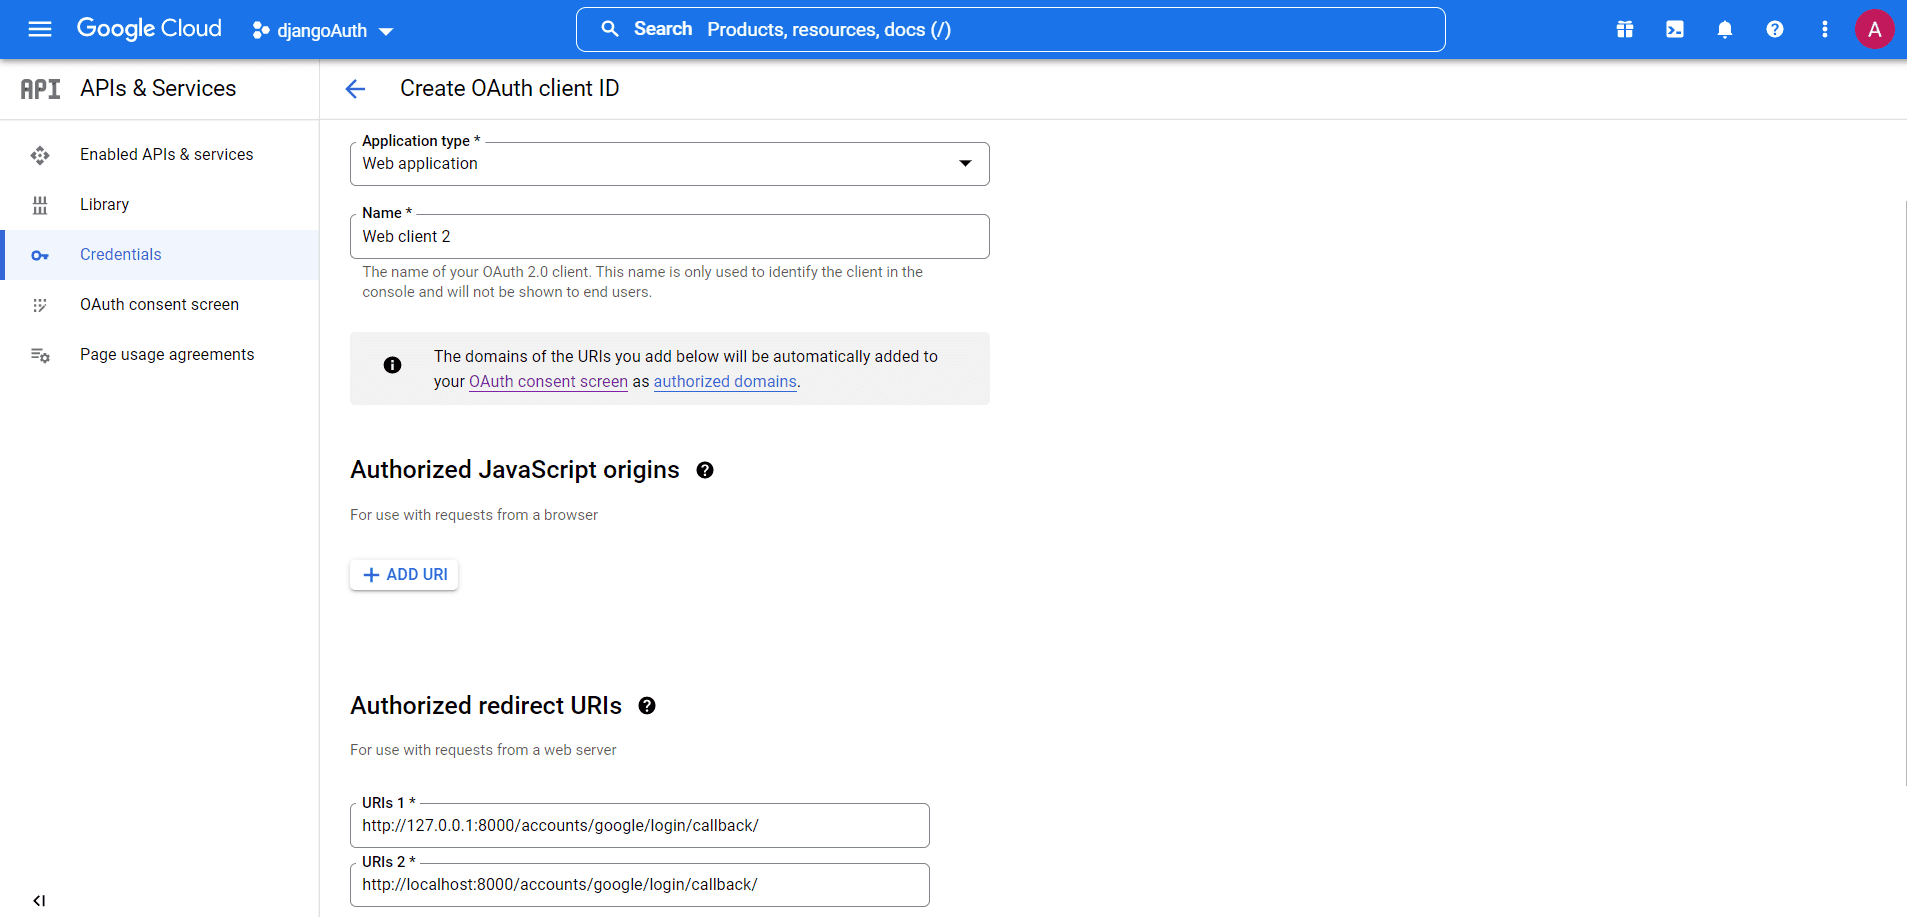
Image by Author
- Now, you will get your Client ID and Client Secret which we will use in our Django App.
Note: Please do not share these credentials with anyone.
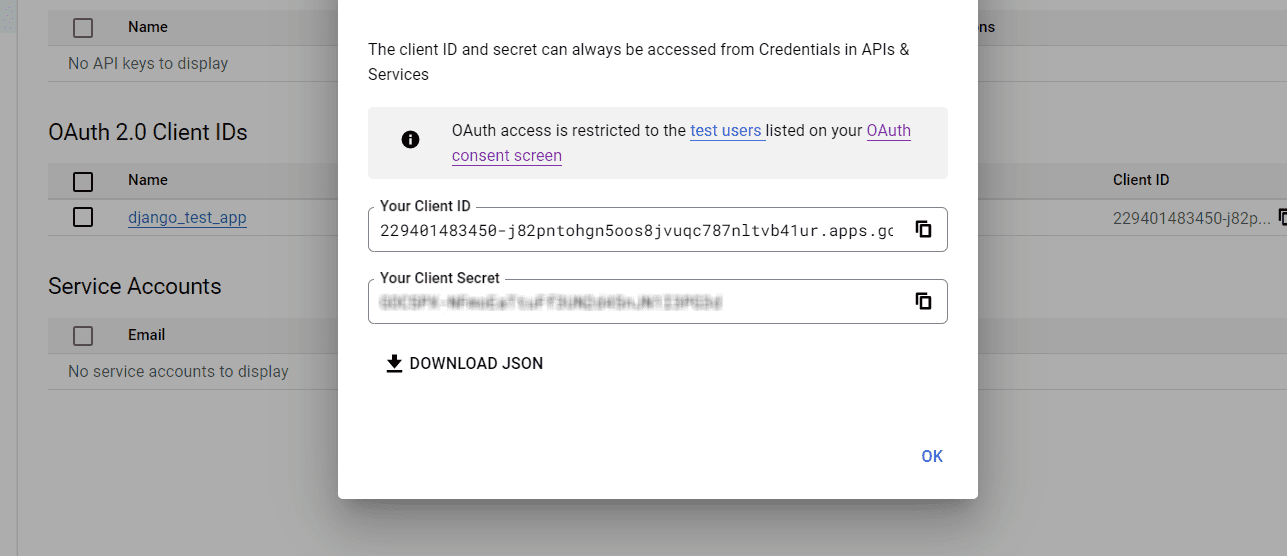
Image by Author
You will find your created credentials in the Credentials Section.
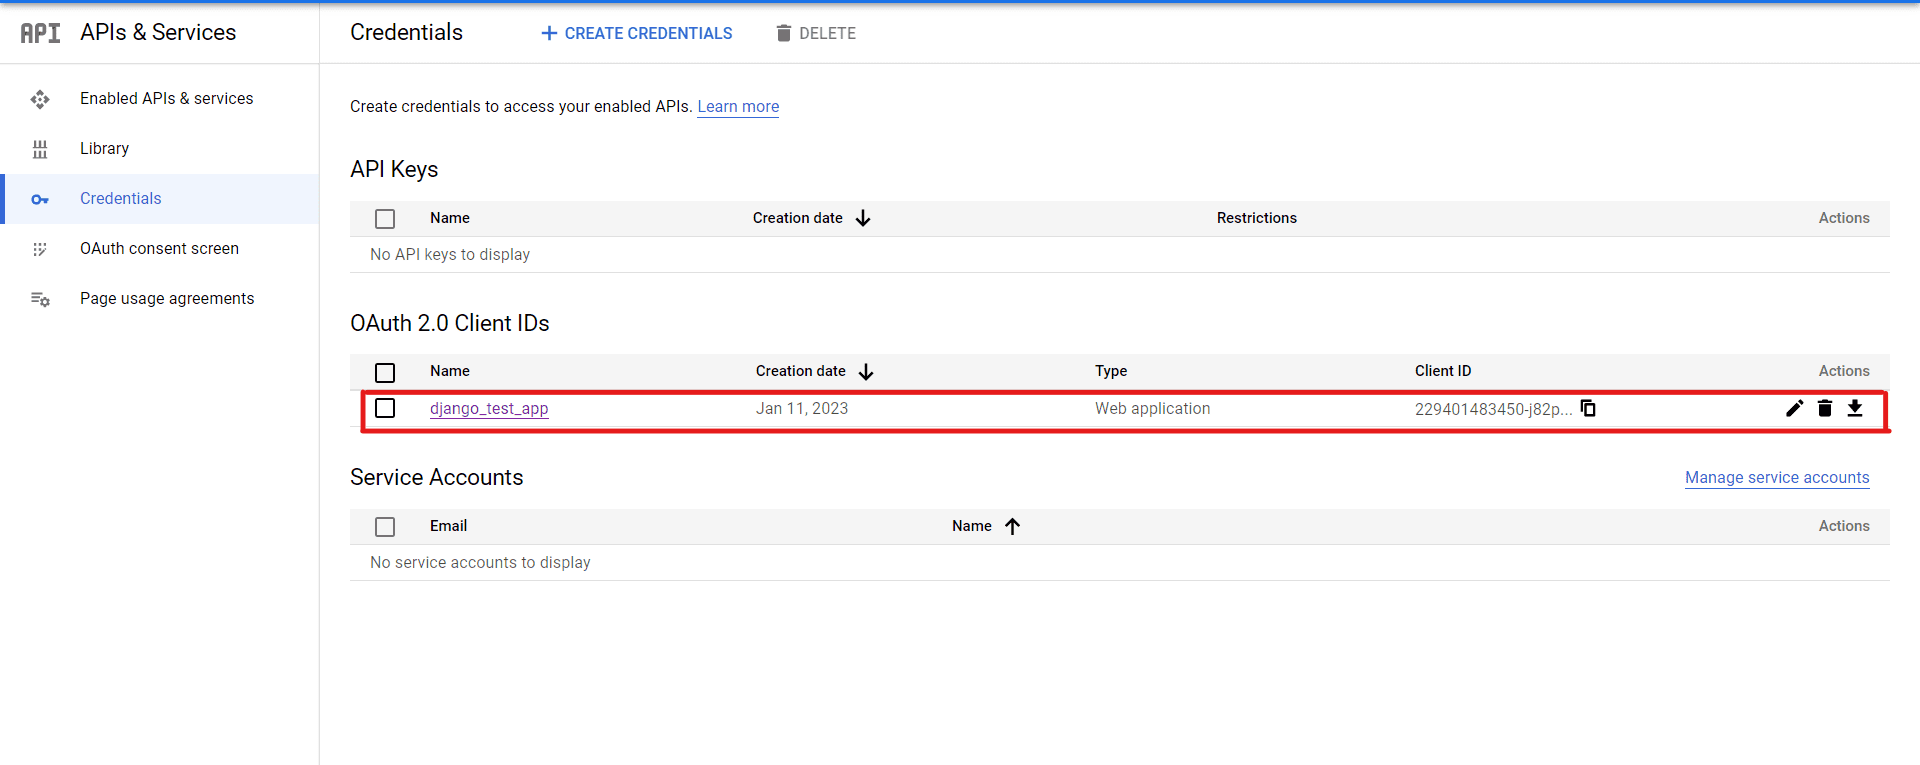
Image by Author
Creating Django App
In this section, we will discuss how to create a Django app and how to use Social User Authentication. If you are new to Django, that is also completely fine. I will explain every step in detail.
Note: We will use a Windows Machine in this tutorial.
- Create a virtual environment
$ py -m venv           // Command to create venv
$ \Scripts\activate   // Command to activate venv
Note: It is always recommended to create a virtual environment. It will help you to manage your libraries/dependencies well.
- Installing required libraries:
$ pip install django
$ pip install django-allauth
What is Django-allauth?
Django-allauth is a library for the Django web framework that provides a set of all-in-one authentication views and forms, a unified user registration and authentication process across various third-party (social) account providers like Google, Facebook, etc. It allows developers to quickly and easily add authentication and registration functionality to their Django projects. It also provides support for OAuth and OpenID Connect.
- Creating a Django Project
$ django-admin startproject //socialauthapp
- Move inside the project directory
$ cd //socialauthapp
- Add the apps inside the INSTALLED_APPS list in the
settings.pyfile.
INSTALLED_APPS = [
    "django.contrib.admin",
    "django.contrib.auth",
    "django.contrib.contenttypes",
    "django.contrib.sessions",
    "django.contrib.messages",
    "django.contrib.staticfiles",
    "allauth",
    "allauth.account",
    "allauth.socialaccount",
    "allauth.socialaccount.providers.google",
]
- In the same file
settings.py, add the following Authentication Backends.
AUTHENTICATION_BACKENDS = (
    "django.contrib.auth.backends.ModelBackend",
    "allauth.account.auth_backends.AuthenticationBackend",
)
- Now we have to add the allauth urls in the
urls.pyfile in the main project directory. After adding the urls yoururls.pyfile looks like this.
from django.contrib import admin
from django.urls import path
from django.urls import include, re_path

urlpatterns = [
    path("admin/", admin.site.urls),
    re_path("accounts/", include("allauth.urls")),
]
- Perform all the necessary migrations.
$ python manage.py makemigrations
$ python manage.py migrate
- Now, we will create a superuser (This is an admin user having all sort of access/permissions)
$ python manage.py createsuperuser
- Finally, we will run our server.
$ python manage.py runserver
- By hitting this url (http://localhost:8000/accounts/login/), you will be able to see the login form.
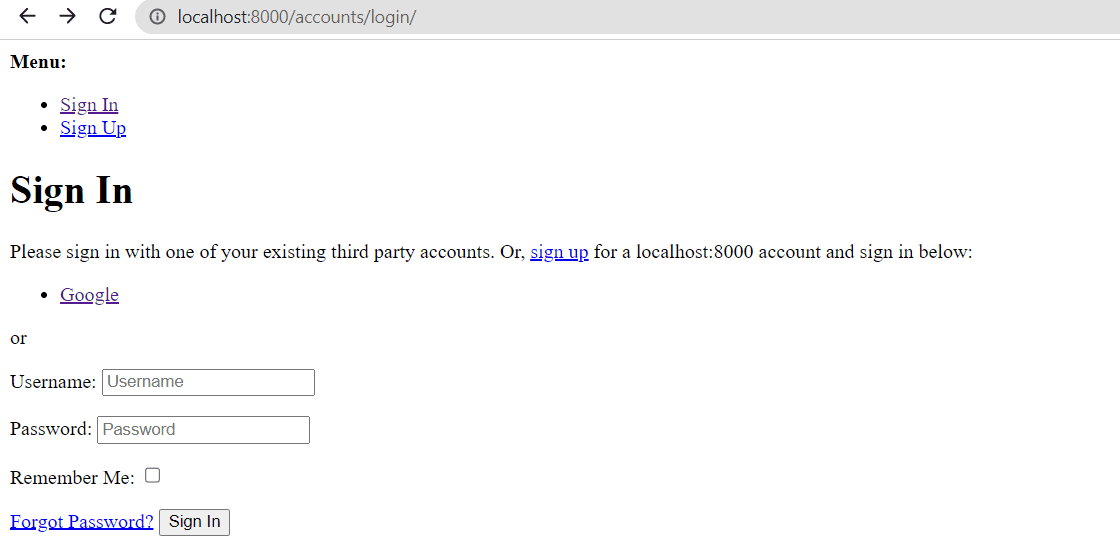
Image by Author
Our Django app is now created. If you face any error while running the server, please check all the steps again. If you can see the above login page, your app works perfectly??.
Adding Client ID and Client Secret in Django App
In this section, we will add the Client ID and the Client Secret in our app that we have created in the google console.
- Open the Django Admin Panel. (http://localhost:8000/admin/login/?next=/admin/)
- Enter the username and password you set while creating the superuser.

Image by Author
- Click on Social Applications and then click on Add Social Application.
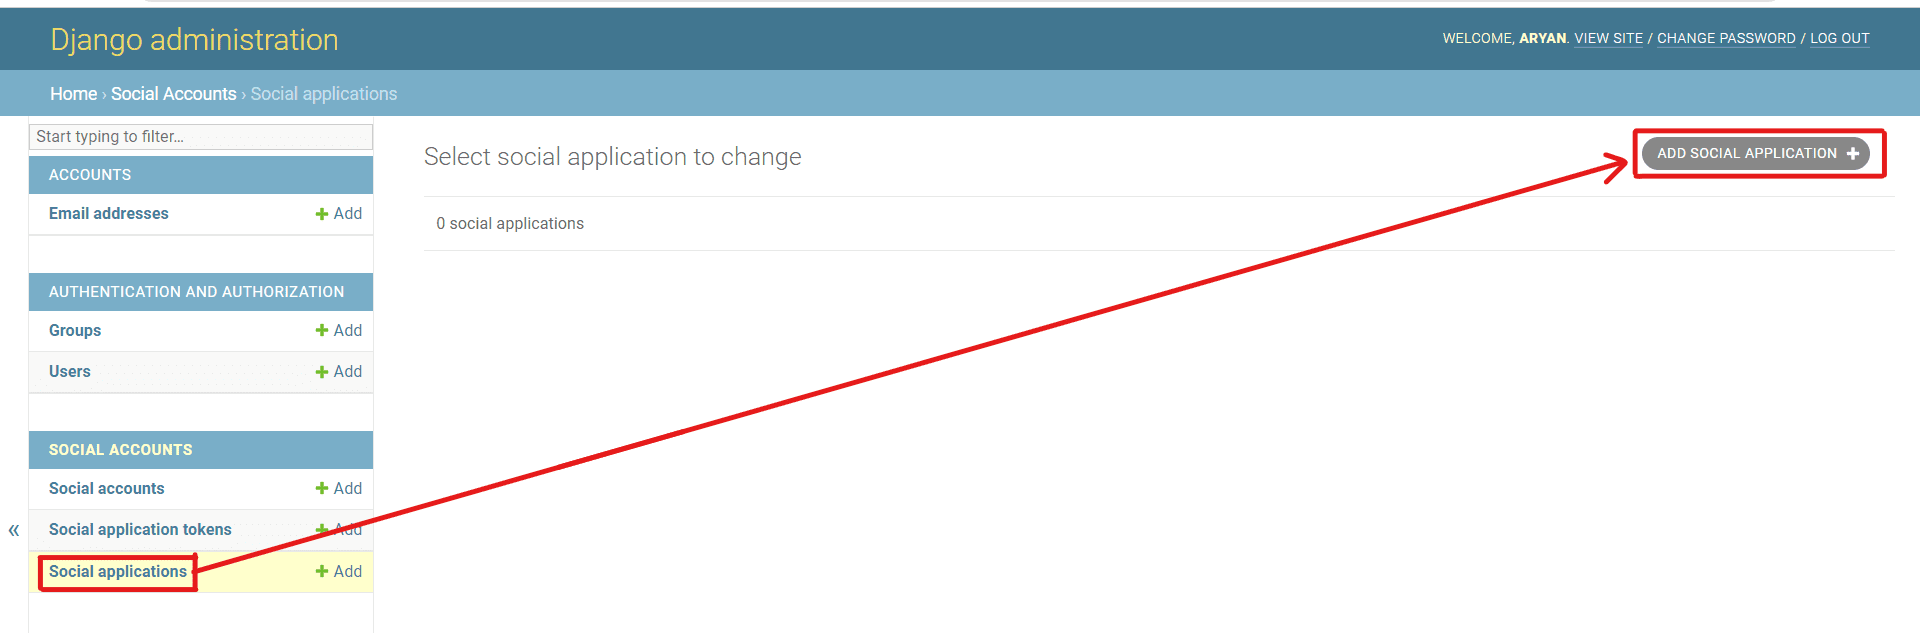
Image by Author
- Select the provider as Google and enter your Client ID and Client Secret. And then finally, click on the save button.
- Now log out from the Admin Panel, and you are all done.
Steps for Login
Hit this URL (http://localhost:8000/accounts/google/login/?process=login) to log in through your app using Google.
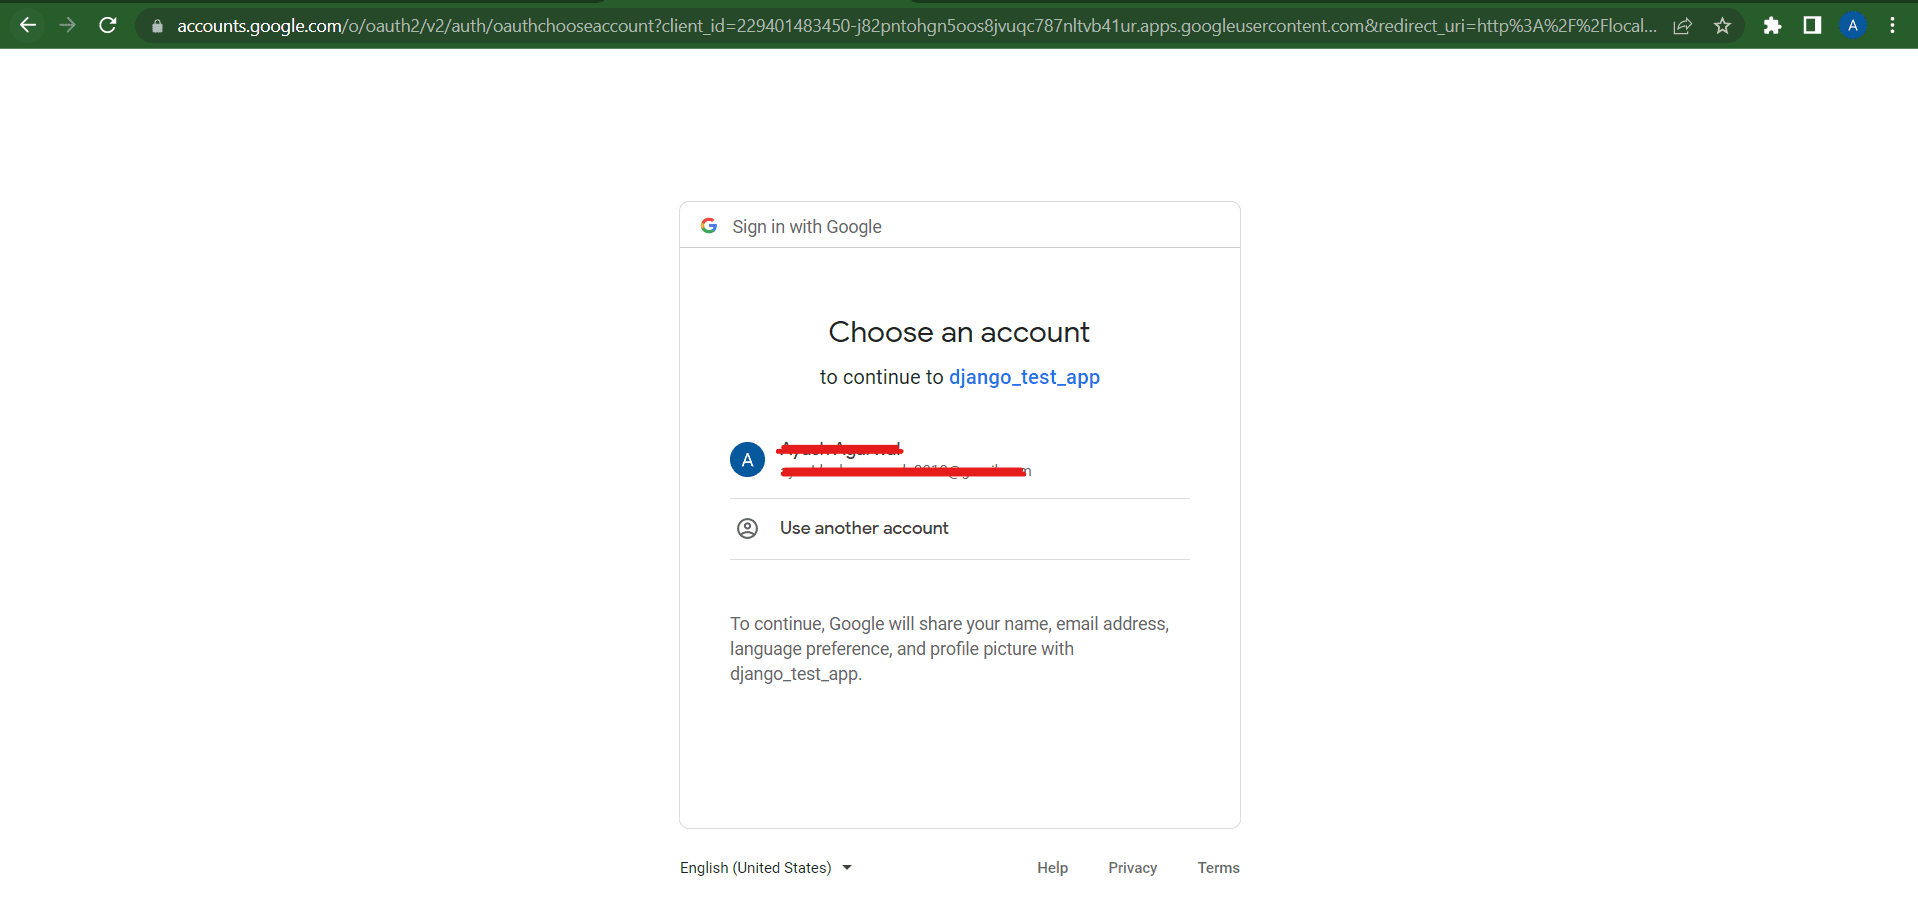
Image by Author
Note: After login, you will be automatically redirected to the profile page(i.e., http://localhost:8000/accounts/profile/).
Changing Redirect URLs
You can change the default redirect URLs by specifying your particular redirect URL in the settings.py file.
For example,
LOGIN_REDIRECT_URL = "/"  # This will redirect to your homepage
LOGOUT_REDIRECT_URL = "/"
Logout
You can logout from the app by hitting this URL (http://localhost:8000/accounts/logout/).
Conclusion
In this article, we have taken a step-by-step approach to show how to integrate Google Authentication into a Django web application. To begin, we created a service on the Google Console and obtained the necessary Client ID and Client Secret. Then after creating the app, we entered the secret keys in the Admin Portal and successfully logged in to the app using Google Authentication.
It's worth noting that we can apply the same process to authenticate users using Facebook or Github. By creating the secret keys from the respective admin portals and entering them into the Django App's admin portal, you can also enable authentication through these providers.
In conclusion, I hope you have enjoyed this article and found it informative. If you have any suggestions or feedback, please reach out to me via LinkedIn.
Have a nice day????.
Aryan Garg is a B.Tech. Electrical Engineering student, currently in the final year of his undergrad. His interest lies in the field of Web Development and Machine Learning. He have pursued this interest and am eager to work more in these directions.