Text Summarization Development: A Python Tutorial with GPT-3.5
Utilizing the power of GPT-3.5 to develop a simple summarize generator application.

Image by frimufilms on Freepik
This is an era where AI breakthrough is coming daily. We didn’t have many AI-generated in public a few years ago, but now the technology is accessible to everyone. It’s excellent for many individual creators or companies that want to significantly take advantage of the technology to develop something complex, which might take a long time.
One of the most incredible breakthroughs that change how we work is the release of the GPT-3.5 model by OpenAI. What is the GPT-3.5 model? If I let the model talk for themselves. In that case, the answer is “a highly advanced AI model in the field of natural language processing, with vast improvements in generating contextually accurate and relevant text”.
OpenAI provides an API for the GPT-3.5 model that we can use to develop a simple app, such as a text summarizer. To do that, we can use Python to integrate the model API into our intended application seamlessly. What does the process look like? Let’s get into it.
Prerequisite
There are a few prerequisites before following this tutorial, including:
- Knowledge of Python, including knowledge of using external libraries and IDE
- Understanding of APIs and handling the endpoint with Python
- Having access to the OpenAI APIs
To obtain OpenAI APIs access, we must register on the OpenAI Developer Platform and visit the View API keys within your profile. On the web, click the “Create new secret key” button to acquire API access (See image below). Remember to save the keys, as they will not be shown the keys after that.
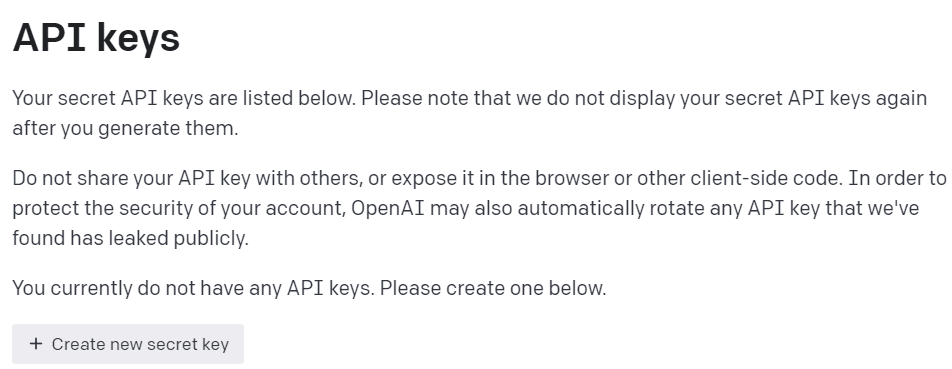
Image by Author
With all the preparation ready, let’s try to understand the basic of the OpenAI APIs model.
Understanding GPT-3.5 OpenAI API
The GPT-3.5 family model was specified for many language tasks, and each model in the family excels in some tasks. For this tutorial example, we would use the gpt-3.5-turbo as it was the recommended current model when this article was written for its capability and cost-efficiency.
We often use the text-davinci-003 in the OpenAI tutorial, but we would use the current model for this tutorial. We would rely on the ChatCompletion endpoint instead of Completion because the current recommended model is a chat model. Even if the name was a chat model, it works for any language task.
Let’s try to understand how the API works. First, we need to install the current OpenAI packages.
pip install openai
After we have finished installing the package, we will try to use the API by connecting via the ChatCompletion endpoint. However, we need to set the environment before we continue.
In your favorite IDE (for me, it’s VS Code), create two files called .env and summarizer_app.py, similar to the image below.
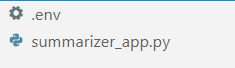
Image by Author
The summarizer_app.py is where we would build our simple summarizer application, and the .env file is where we would store our API Key. For security reasons, it is always advised to separate our API key in another file rather than hard-code them in the Python file.
In the .env file put the following syntax and save the file. Replace your_api_key_here with your actual API key. Don’t change the API key into a string object; let them as it is.
OPENAI_API_KEY=your_api_key_here
To understand the GPT-3.5 API better; we would use the following code to generate the word summarizer.
openai.ChatCompletion.create(
    model="gpt-3.5-turbo",
    max_tokens=100,
    temperature=0.7,
    top_p=0.5,
    frequency_penalty=0.5,
    messages=[
        {
          "role": "system",
          "content": "You are a helpful assistant for text summarization.",
        },
        {
          "role": "user",
          "content": f"Summarize this for a {person_type}: {prompt}",
        },
    ],
)
The above code is how we interact with the OpenAI APIs GPT-3.5 model. Using the ChatCompletion API, we create a conversation and will get the intended result after passing the prompt.
Let’s break down each part to understand them better. In the first line, we use the openai.ChatCompletion.create code to create the response from the prompt we would pass into the API.
In the next line, we have our hyperparameters that we use to improve our text tasks. Here is the summary of each hyperparameter function:
model: The model family we want to use. In this tutorial, we use the current recommended model (gpt-3.5-turbo).max_tokens: The upper limit of the generated words by the model. It helps to limit the length of the generated text.temperature: The randomness of the model output, with a higher temperature, means a more diverse and creative result. The value range is between 0 to infinity, although values more than 2 are not common.top_p: Top P or top-k sampling or nucleus sampling is a parameter to control the sampling pool from the output distribution. For example, value 0.1 means the model only samples the output from the top 10% of the distribution. The value range was between 0 and 1; higher values mean a more diverse result.frequency_penalty: The penalty for the repetition token from the output. The value range between -2 to 2, where positive values would suppress the model from repeating token while negative values encourage the model to use more repetitive words. 0 means no penalty.messages: The parameter where we pass our text prompt to be processed with the model. We pass a list of dictionaries where the key is the role object (either "system", "user", or "assistant") that helps the model to understand the context and structure while the values are the context.- The role “system” is the set guidelines for the model “assistant” behavior,
- The role “user” represents the prompt from the person interacting with the model,
- The role “assistant” is the response to the “user” prompt
Having explained the parameter above, we can see that the messages parameter above has two dictionary object. The first dictionary is how we set the model as a text summarizer. The second is where we would pass our text and get the summarization output.
In the second dictionary, you will also see the variable person_type and prompt. The person_type is a variable I used to control the summarized style, which I will show in the tutorial. While the prompt is where we would pass our text to be summarized.
Continuing with the tutorial, place the below code in the summarizer_app.py file and we will try to run through how the function below works.
import openai
import os
from dotenv import load_dotenv

load_dotenv()
openai.api_key = os.getenv("OPENAI_API_KEY")


def generate_summarizer(
    max_tokens,
    temperature,
    top_p,
    frequency_penalty,
    prompt,
    person_type,
):
    res = openai.ChatCompletion.create(
        model="gpt-3.5-turbo",
        max_tokens=100,
        temperature=0.7,
        top_p=0.5,
        frequency_penalty=0.5,
        messages=
       [
         {
          "role": "system",
          "content": "You are a helpful assistant for text summarization.",
         },
         {
          "role": "user",
          "content": f"Summarize this for a {person_type}: {prompt}",
         },
        ],
    )
    return res["choices"][0]["message"]["content"]
The code above is where we create a Python function that would accept various parameters that we have discussed previously and return the text summary output.
Try the function above with your parameter and see the output. Then let’s continue the tutorial to create a simple application with the streamlit package.
Text Summarization Application with Streamlit
Streamlit is an open-source Python package designed for creating machine learning and data science web apps. It’s easy to use and intuitive, so it is recommended for many beginners.
Let’s install the streamlit package before we continue with the tutorial.
pip install streamlit
After the installation is finished, put the following code into the summarizer_app.py.
import streamlit as st

#Set the application title
st.title("GPT-3.5 Text Summarizer")

#Provide the input area for text to be summarized
input_text = st.text_area("Enter the text you want to summarize:", height=200)

#Initiate three columns for section to be side-by-side
col1, col2, col3 = st.columns(3)

#Slider to control the model hyperparameter
with col1:
    token = st.slider("Token", min_value=0.0, max_value=200.0, value=50.0, step=1.0)
    temp = st.slider("Temperature", min_value=0.0, max_value=1.0, value=0.0, step=0.01)
    top_p = st.slider("Nucleus Sampling", min_value=0.0, max_value=1.0, value=0.5, step=0.01)
    f_pen = st.slider("Frequency Penalty", min_value=-1.0, max_value=1.0, value=0.0, step=0.01)

#Selection box to select the summarization style
with col2:
    option = st.selectbox(
        "How do you like to be explained?",
        (
            "Second-Grader",
            "Professional Data Scientist",
            "Housewives",
            "Retired",
            "University Student",
        ),
    )

#Showing the current parameter used for the model
with col3:
    with st.expander("Current Parameter"):
        st.write("Current Token :", token)
        st.write("Current Temperature :", temp)
        st.write("Current Nucleus Sampling :", top_p)
        st.write("Current Frequency Penalty :", f_pen)

#Creating button for execute the text summarization
if st.button("Summarize"):
    st.write(generate_summarizer(token, temp, top_p, f_pen, input_text, option))
Try to run the following code in your command prompt to initiate the application.
streamlit run summarizer_app.py
If everything works well, you will see the following application in your default browser.
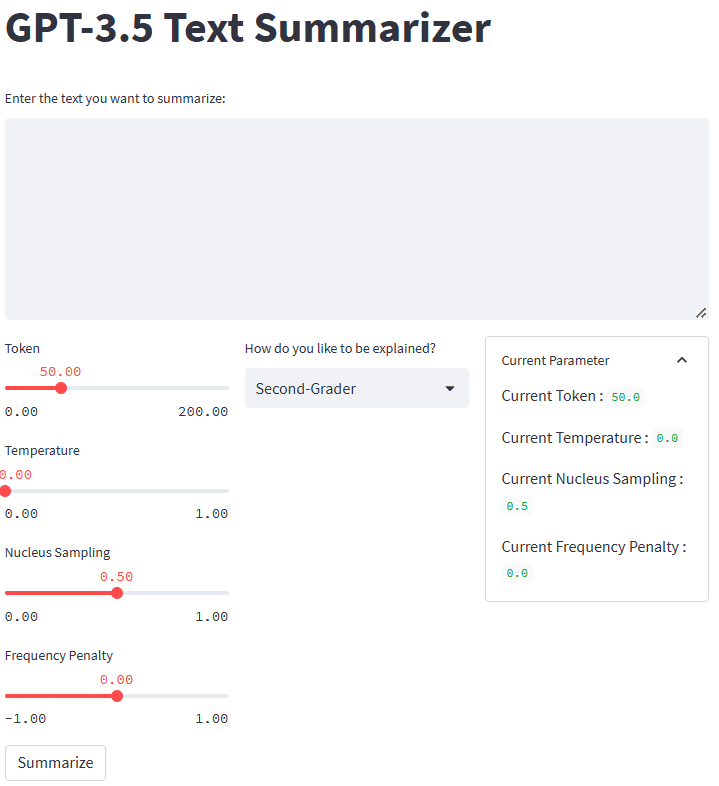
Image by Author
So, what happened in the code above? Let me briefly explain each function we used:
.st.title: Provide the title text of the web application..st.write: Writes the argument into the application; it could be anything but mainly a string text..st.text_area: Provide an area for text input that can be stored in the variable and used for the prompt for our text summarizer.st.columns: Object containers to provide side-by-side interaction..st.slider: Provide a slider widget with set values that the user can interact with. The value is stored on a variable used as the model parameter..st.selectbox: Provide a selection widget for users to select the summarization style they want. In the example above, we use five different styles..st.expander: Provide a container that users can expand and hold multiple objects..st.button: Provide a button that runs the intended function when the user presses it.
As streamlit would automatically design the UI following the given code from top to bottom, we could focus more on the interaction.
With all the pieces in place, let’s try our summarization application with a text example. For our example, I would use the Theory of Relativity Wikipedia page text to be summarized. With a default parameter and second-grader style, we obtain the following result.
Albert Einstein was a very smart scientist who came up with two important ideas about how the world works. The first one, called special relativity, talks about how things move when there is no gravity. The second one, called general relativity, explains how gravity works and how it affects things in space like stars and planets. These ideas helped us understand many things in science, like how particles interact with each other and even helped us discover black holes!
You might obtain a different result than the above one. Let’s try the Housewives style and tweak the parameter a bit (Token 100, Temperature 0.5, Nucleus Sampling 0.5, Frequency Penalty 0.3).
The theory of relativity is a set of physics theories proposed by Albert Einstein in 1905 and 1915. It includes special relativity, which applies to physical phenomena without gravity, and general relativity, which explains the law of gravitation and its relation to the forces of nature. The theory transformed theoretical physics and astronomy in the 20th century, introducing concepts like 4-dimensional spacetime and predicting astronomical phenomena like black holes and gravitational waves.
As we can see, there is a difference in style for the same text we provide. With a change prompt and parameter, our application can be more functional.
The overall look of our text summarizer application can be seen in the image below.
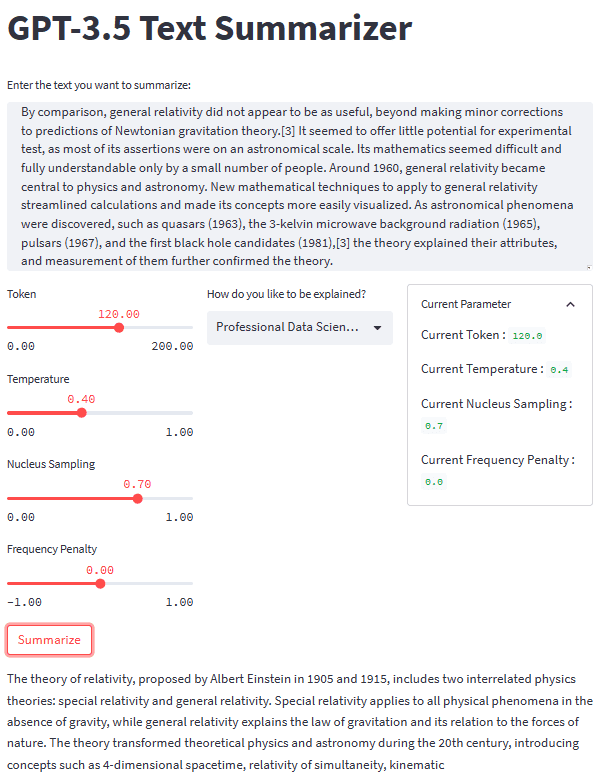
Image by Author
That is the tutorial on creating text summarizer application development with GPT-3.5. You could tweak the application even further and deploy the application.
Conclusion
Generative AI is rising, and we should utilize the opportunity by creating a fantastic application. In this tutorial, we will learn how the GPT-3.5 OpenAI APIs work and how to use them to create a text summarizer application with the help of Python and streamlit package.
Cornellius Yudha Wijaya is a data science assistant manager and data writer. While working full-time at Allianz Indonesia, he loves to share Python and Data tips via social media and writing media.