GitHub is the Best AutoML You Will Ever Need
This article uses PyCaret 2.0, an open source, low-code machine learning library in Python to develop a simple AutoML solution and deploy it as a Docker container using GitHub actions.
By Moez Ali, Founder & Author of PyCaret
You may be wondering since when did GitHub get into the business of Automated Machine Learning. Well, it didn’t but you can use it for testing your personalized AutoML software. In this tutorial, we will show you how to build and containerize your own Automated Machine Learning software and test it on GitHub using Docker container.
We will use PyCaret 2.0, an open source, low-code machine learning library in Python to develop a simple AutoML solution and deploy it as a Docker container using GitHub actions. If you haven’t heard about PyCaret before, you can read official announcement for PyCaret 2.0 here or check the detailed release notes here.
???? Learning Goals of this Tutorial
- Understanding what Automated Machine Learning is and how to build a simple AutoML software using PyCaret 2.0.
- Understand what is a container and how to deploy your AutoML solution as a Docker container.
- What are GitHub actions and how can you use them to test your AutoML.
What is Automated Machine Learning?
Automated machine learning (AutoML) is a process of automating the time consuming, iterative tasks of machine learning. It allows data scientists and analysts to build machine learning models with efficiency while sustaining the model quality. The final goal of any AutoML software is to finalize the best model based on some performance criteria.
Traditional machine learning model development process is resource-intensive, requiring significant domain knowledge and time to produce and compare dozens of models. With automated machine learning, you’ll accelerate the time it takes to develop production-ready ML models with great ease and efficiency.
There are many AutoML software out there, paid as well as open source. Almost all of them use the same collection of transformations and base algorithms. Hence the quality and performances of the models trained under such software are approximately the same.
Paid AutoML software as a service are very expensive and financially infeasible if you does not have dozens of use-cases in your back pocket. Managed machine learning as a service platforms are relatively less expensive, but they are often hard to use and require knowledge of the specific platform.
Among many other open source AutoML libraries, PyCaret is relatively a new library and has a unique low-code approach to machine learning. The design and functionality of PyCaret is simple, human friendly, and intuitive. In short amount of time, PyCaret was adopted by over 100,000 data scientists globally and we are a growing community of developers.
How Does PyCaret works?
PyCaret is a workflow automation tool for supervised and unsupervised machine learning. It is organized into six modules and each module has a set of functions available to perform some specific action. Each function takes an input and returns an output, which in most cases is a trained machine learning model. Modules available as of the second release are:
- Classification
- Regression
- Clustering
- Anomaly Detection
- Natural Language Processing
- Association Rule Mining
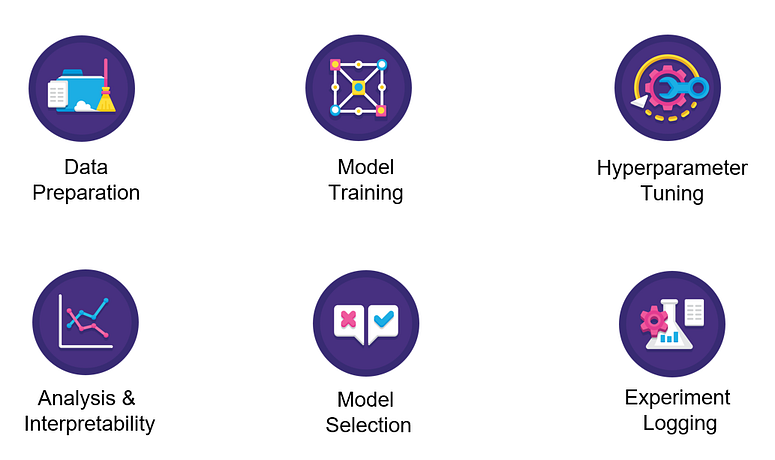
All modules in PyCaret supports data preparation (over 25+ essential preprocessing techniques, comes with a huge collection of untrained models & support for custom models, automatic hyperparameter tuning, model analysis and interpretability, automatic model selection, experiment logging and easy cloud deployment options.
To learn more about PyCaret, click here to read our official release announcement.
If you want to get started in Python, click here to see a gallery of example notebooks to get started.
???? Before we start
Let’s understand the following terminologies before starting to build an AutoML software. At this point all you need is some basic theoretical knowledge of these tools / terms that we are using in this tutorial. If you would like to go in more details, there are links at the end of this tutorial for you to explore later.
Container
Containers provide a portable and consistent environment that can be deployed rapidly in different environments to maximize the accuracy, performance, and efficiency of machine learning applications. Environment contains run-time language (for e.g. Python), all the libraries, and the dependencies of your application.
Docker
Docker is a company that provides software (also called Docker) that allows users to build, run, and manage containers. While Docker’s container are the most common, there are other less famous alternatives such as LXD and LXC that also provide container solution.
GitHub
GitHub is a cloud-based service that is used to host, manage and control code. Imagine you are working in a large team where multiple people (sometime in hundreds) are making changes on the same code base. PyCaret is itself an example of an open-source project where hundreds of community developers are continuously contributing to source code. If you haven’t used GitHub before, you can sign up for a free account.
GitHub Actions
GitHub Actions help you automate your software development workflows in the same place you store code and collaborate on pull requests and issues. You can write individual tasks, called actions, and combine them to create a custom workflow. Workflows are custom automated processes that you can set up in your repository to build, test, package, release, or deploy any code project on GitHub.
???? Let’s get started
Objective
To train and select the best performing regression model that predicts patient charges based on the other variables in the dataset i.e. age, sex, bmi, children, smoker, and region.
???? Step 1 — Develop app.py
This is the main file for AutoML, which is also an entry point for Dockerfile (see below in step 2). If you have used PyCaret before then this code must be self-explanatory to you.
First five lines are about importing libraries and variables from the environment. Next three lines are for reading data as pandas dataframe. Line 12 to Line 15 is to import the relevant module based on environment variable and Line 17 onwards is about PyCaret’s functions to initialize the environment, compare base models and to save the best performing model on your device. The last line downloads the experiment logs as a csv file.
???? Step 2— Create Dockerfile
Dockerfile is just a file with a few lines of instructions that are saved in your project folder with name “Dockerfile” (case-sensitive and no extension).
Another way to think about a Docker file is that it is like a recipe you have invented in your own kitchen. When you share such recipe with others and if they follow the exact same instructions in the recipe, they will able to reproduce the same dish with same quality. Similarly, you can share your docker file with others, who can then create images and run containers based on that docker file.
This Docker file for this project is simple and consist of 6 lines only. See below:
The first line in the Dockerfile imports the python:3.7-slim image. Next four lines create an app folder, update libgomp1 library, and install all the requirements from the requirements.txt file which in this case only requires pycaret. Finally, the last two lines define the entry point of your application; this means that when the container starts, it will execute the app.py file that we earlier saw above in step 1.
???? Step 3 — Create action.yml
Docker actions require a metadata file. The metadata filename must be either action.yml or action.yaml. The data in the metadata file defines the inputs, outputs and main entrypoint for your action. Action file uses YAML syntax.
Environment variable dataset, target, and usecase are all declared in line 6, 9, and 14 respectively. See line 4–6 of app.py to understand how we have used these environment variables in our app.py file.
???? Step 4 — Publish action on GitHub
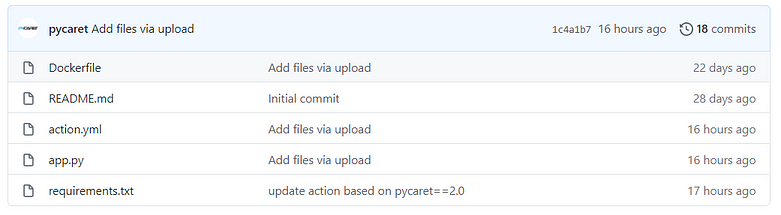
At this point your project folder should look like this:
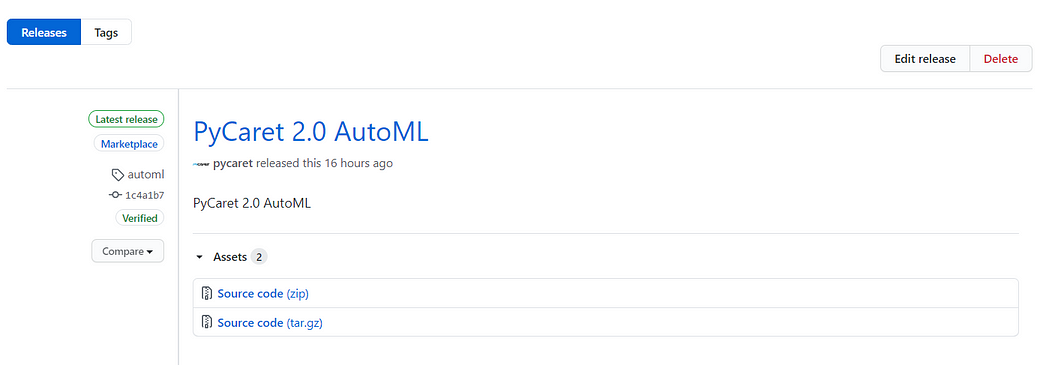
Click on ‘Releases’:

Draft a new release:

Fill in the details (tag, release title and description) and click on ‘Publish release’:

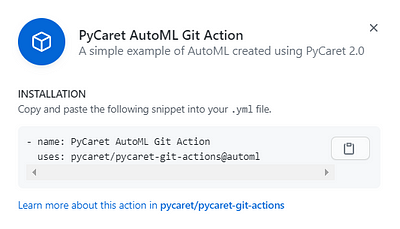
Once published click on release and then click on ‘Marketplace’:
Click on ‘Use latest version’:
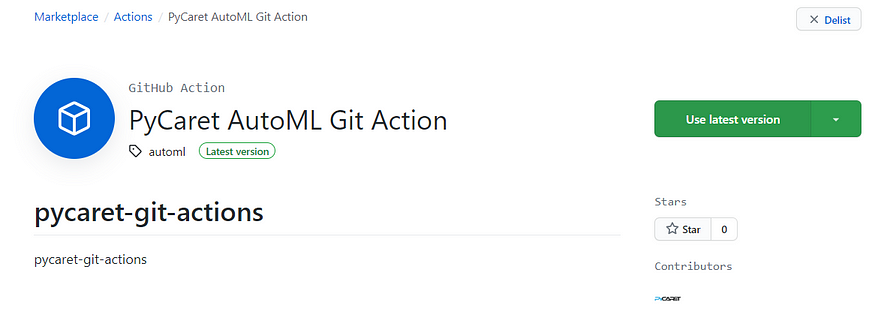
Save this information, this is the installation details of your software. This is what you will need to install this software on any public GitHub repository:
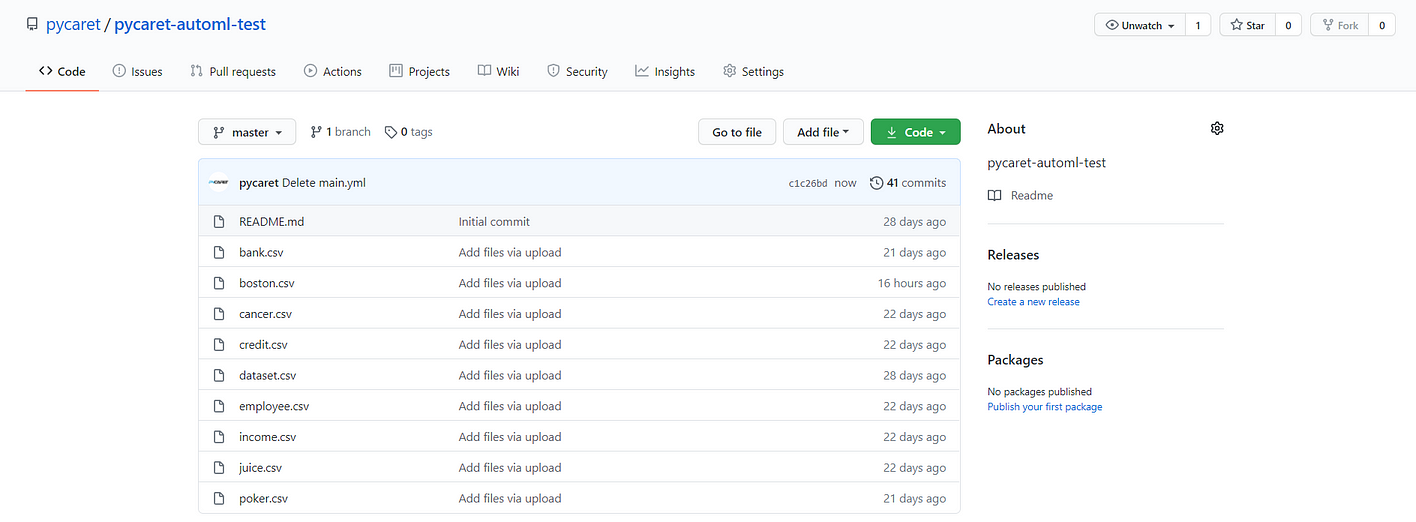
???? Step 5— Install software on GitHub repository
To install and test the software we just created, we have created a new repository pycaret-automl-test and uploaded a few sample datasets for classification and regression.
To install the software that we published in the previous step, click on ‘Actions’:

Click on ‘set up a workflow yourself’ and copy this script into the editor and click on ‘Start commit’.
This is an instruction file for GitHub to execute. First action starts from line 9. Line 9 to 15 is an action to install and execute the software we previously developed. Line 11 is where we have referenced the name of the software (see the last part of step 4 above). Line 13 to 15 is action to define environment variables such as the name of the dataset (csv file must be uploaded on the repository), name of the target variable, and usecase type. Line 16 onwards is another action from this repository to upload three files model.pkl, experiment logs as csv file, and system logs as a .log file.
Once you start commit, click on ‘actions’:
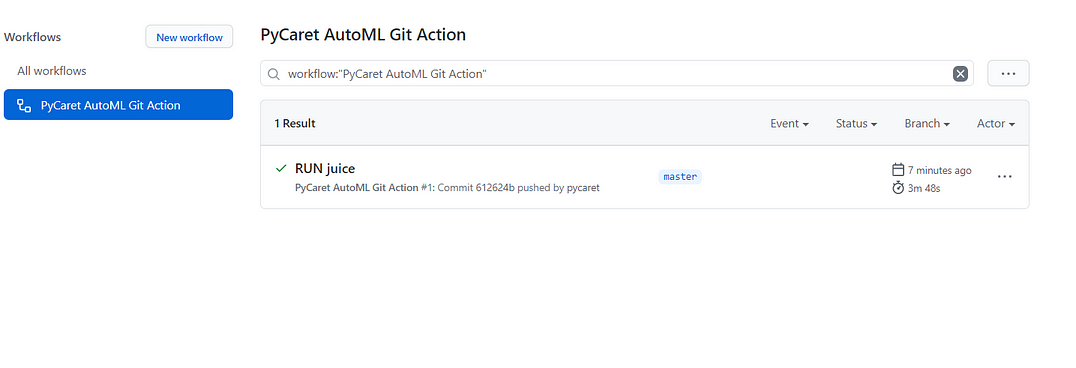
This is where you can monitor the logs of your build as its building and once the workflow is completed, you can collect your files from this location as well.

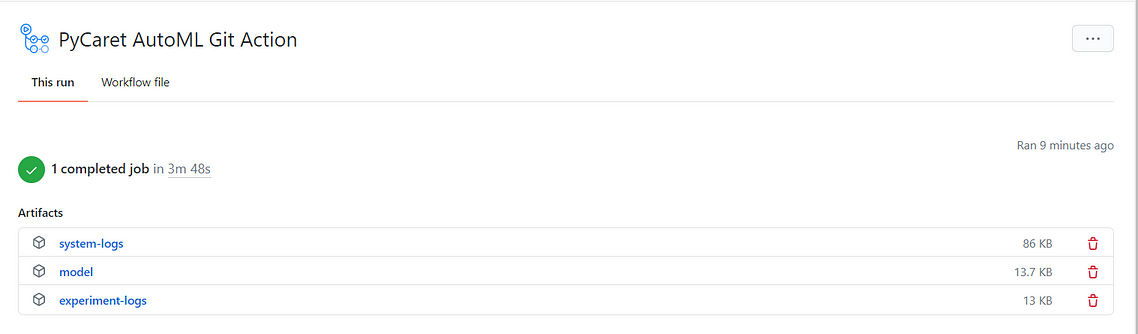
You can download the files and unzip it on your device.
File: model
This is a .pkl file for the final model along with the entire transformation pipeline. You can use this file to generate predictions on new dataset using predict_model function. To learn more about it, click here.
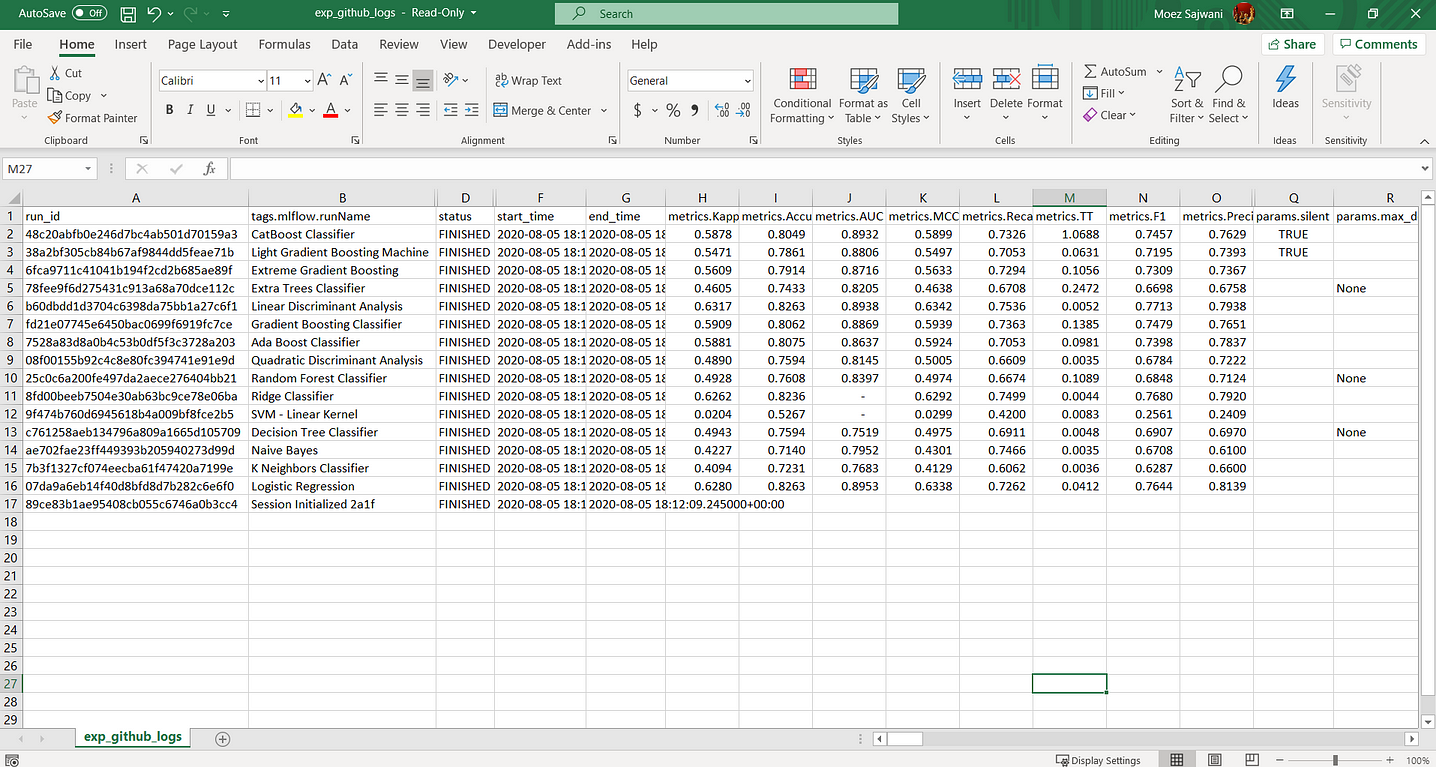
File: experiment-logs
This is a .csv file that has all the details you will ever need for your model. It contains all the models that were trained in app.py script, their performance metrics, hyperparameters and other important meta data.
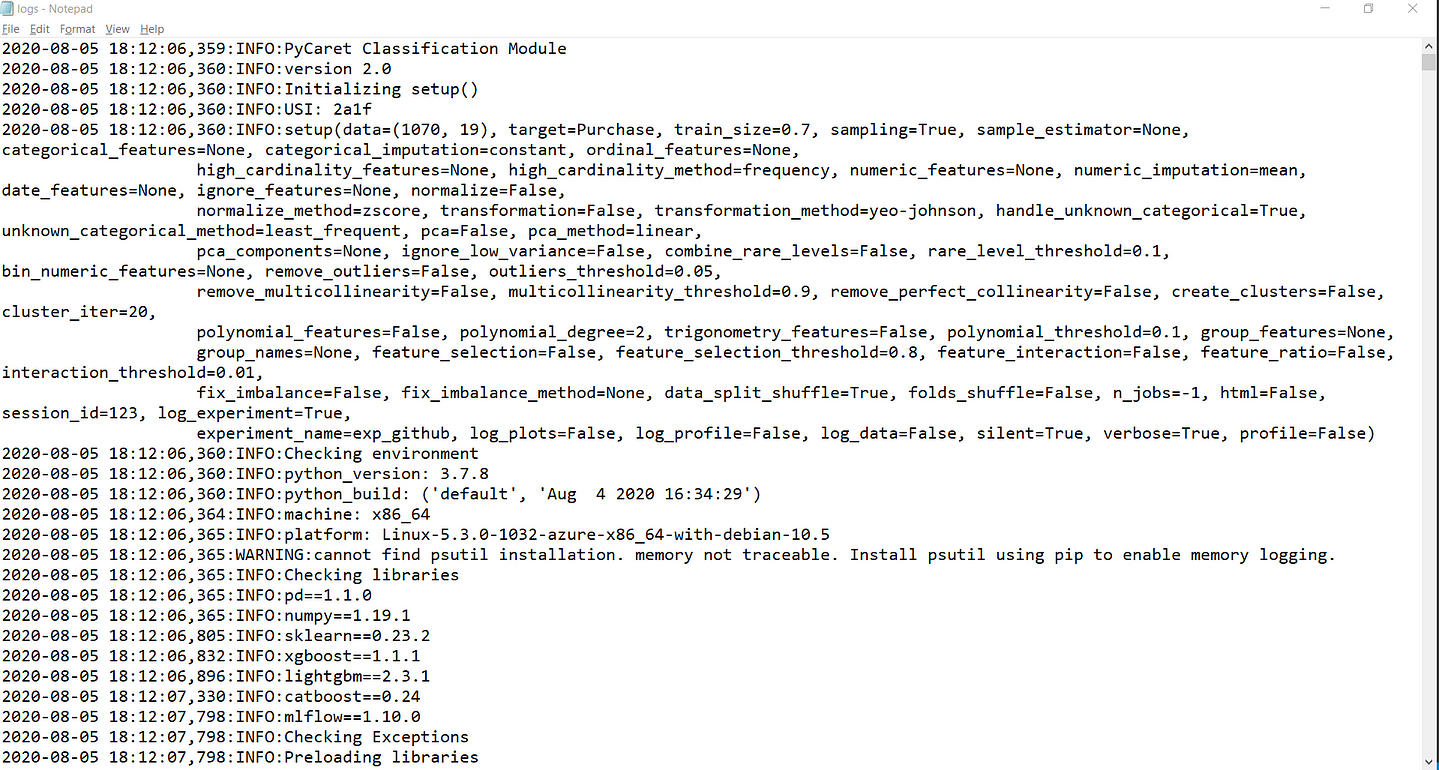
File: system-logs
This is a system logs file that PyCaret has generated. This can be used for auditing the process. It contains important meta deta information and is very useful for troubleshooting errors in your software.
Disclosure
GitHub Actions enables you to create custom software development lifecycle workflows directly in your GitHub repository. Each Account comes with included compute and storage quantities for use with Actions, depending on your Account plan, which can be found in the Actions documentation.
Actions and any elements of the Action service may not be used in violation of the Agreement, the Acceptable Use Policy, or the GitHub Actions service limitations. Additionally, Actions should not be used for:
- cryptomining;
- serverless computing;
- using our servers to disrupt, or to gain or to attempt to gain unauthorized access to, any service, device, data, account or network (other than those authorized by the GitHub Bug Bounty program)
- the provision of a stand-alone or integrated application or service offering Actions or any elements of Actions for commercial purposes; or,
- any other activity unrelated to the production, testing, deployment, or publication of the software project associated with the repository where GitHub Actions are used.
In order to prevent violations of these limitations and abuse of GitHub Actions, GitHub may monitor your use of GitHub Actions. Misuse of GitHub Actions may result in termination of jobs, or restrictions in your ability to use GitHub Actions.
Repositories used in this tutorial:
There is no limit to what you can achieve using this light-weight workflow automation library in Python. If you find this useful, please do not forget to give us ⭐️ on our github repo.
To hear more about PyCaret follow us on LinkedIn and Youtube.
If you would like to learn more about PyCaret 2.0, read this announcement. If you have used PyCaret before, you might be interested in release notes for current release.
You may also be interested it:
Build your own AutoML in Power BI using PyCaret 2.0
Deploy Machine Learning Pipeline on Azure using Docker
Deploy Machine Learning Pipeline on Google Kubernetes Engine
Deploy Machine Learning Pipeline on AWS Fargate
Build and deploy your first machine learning web app
Deploy PyCaret and Streamlit app using AWS Fargate serverless
Build and deploy machine learning web app using PyCaret and Streamlit
Deploy Machine Learning App built using Streamlit and PyCaret on GKE
Important Links
Blog
Release Notes for PyCaret 2.0
User Guide / Documentation
Github
Stackoverflow
Install PyCaret
Notebook Tutorials
Contribute in PyCaret
Want to learn about a specific module?
Click on the links below to see the documentation and working examples.
Classification
Regression
Clustering
Anomaly Detection
Natural Language Processing
Association Rule Mining
Bio: Moez Ali is a Data Scientist, and is Founder & Author of PyCaret.
Original. Reposted with permission.
Related:
- Announcing PyCaret 2.0
- 5 Things You Don’t Know About PyCaret
- Deploy a Machine Learning Pipeline to the Cloud Using a Docker Container