 Learning SQL the Hard Way
 Learning SQL the Hard Way
Simply put: This post is about installing SQL, explaining SQL and running SQL.

A Data Scientist who doesn’t know SQL is not worth his salt.
And that seems correct to me in every sense of the world. While we feel much more accomplished creating models and coming up with the different hypotheses, the role of data munging can’t be understated.
And with the ubiquitousness of SQL when it comes to ETL and data preparation tasks, everyone should know a little bit of it to at least be useful.
I still remember the first time I got my hands on SQL. It was the first language (if you can call it that) I learned. And it made an impact on me. I was able to automate things, and that was something I hadn’t thought of before.
Before SQL, I used to work with Excel — VLOOKUPs and pivots. I was creating reporting systems, doing the same work again and again. SQL made it all go away. Now I could write a big script, and everything would be automated — all the crosstabs and analysis generated on the fly.
That is the power of SQL. And though you could do anything that you do with SQL using Pandas, you still need to learn SQL to deal with systems like HIVE, Teradata and sometimes Spark too.
This post is about installing SQL, explaining SQL and running SQL.
Setting up the SQL Environment
Now the best way to learn SQL is to get your hands dirty with it(Same I can say for any other thing you want to learn)
I will advise against using the web-based recipes like w3schools/tutorialspoint for SQL since you cannot use your data with those.
Also, I will advise you to go with learning the MySQL flavour of SQL as it is Open Source, easy to set up in your laptop and has a great client named MySQL Workbench to make your life easier.
As we have gotten these points out of the way, here is a step by step to get set up with MySQL:
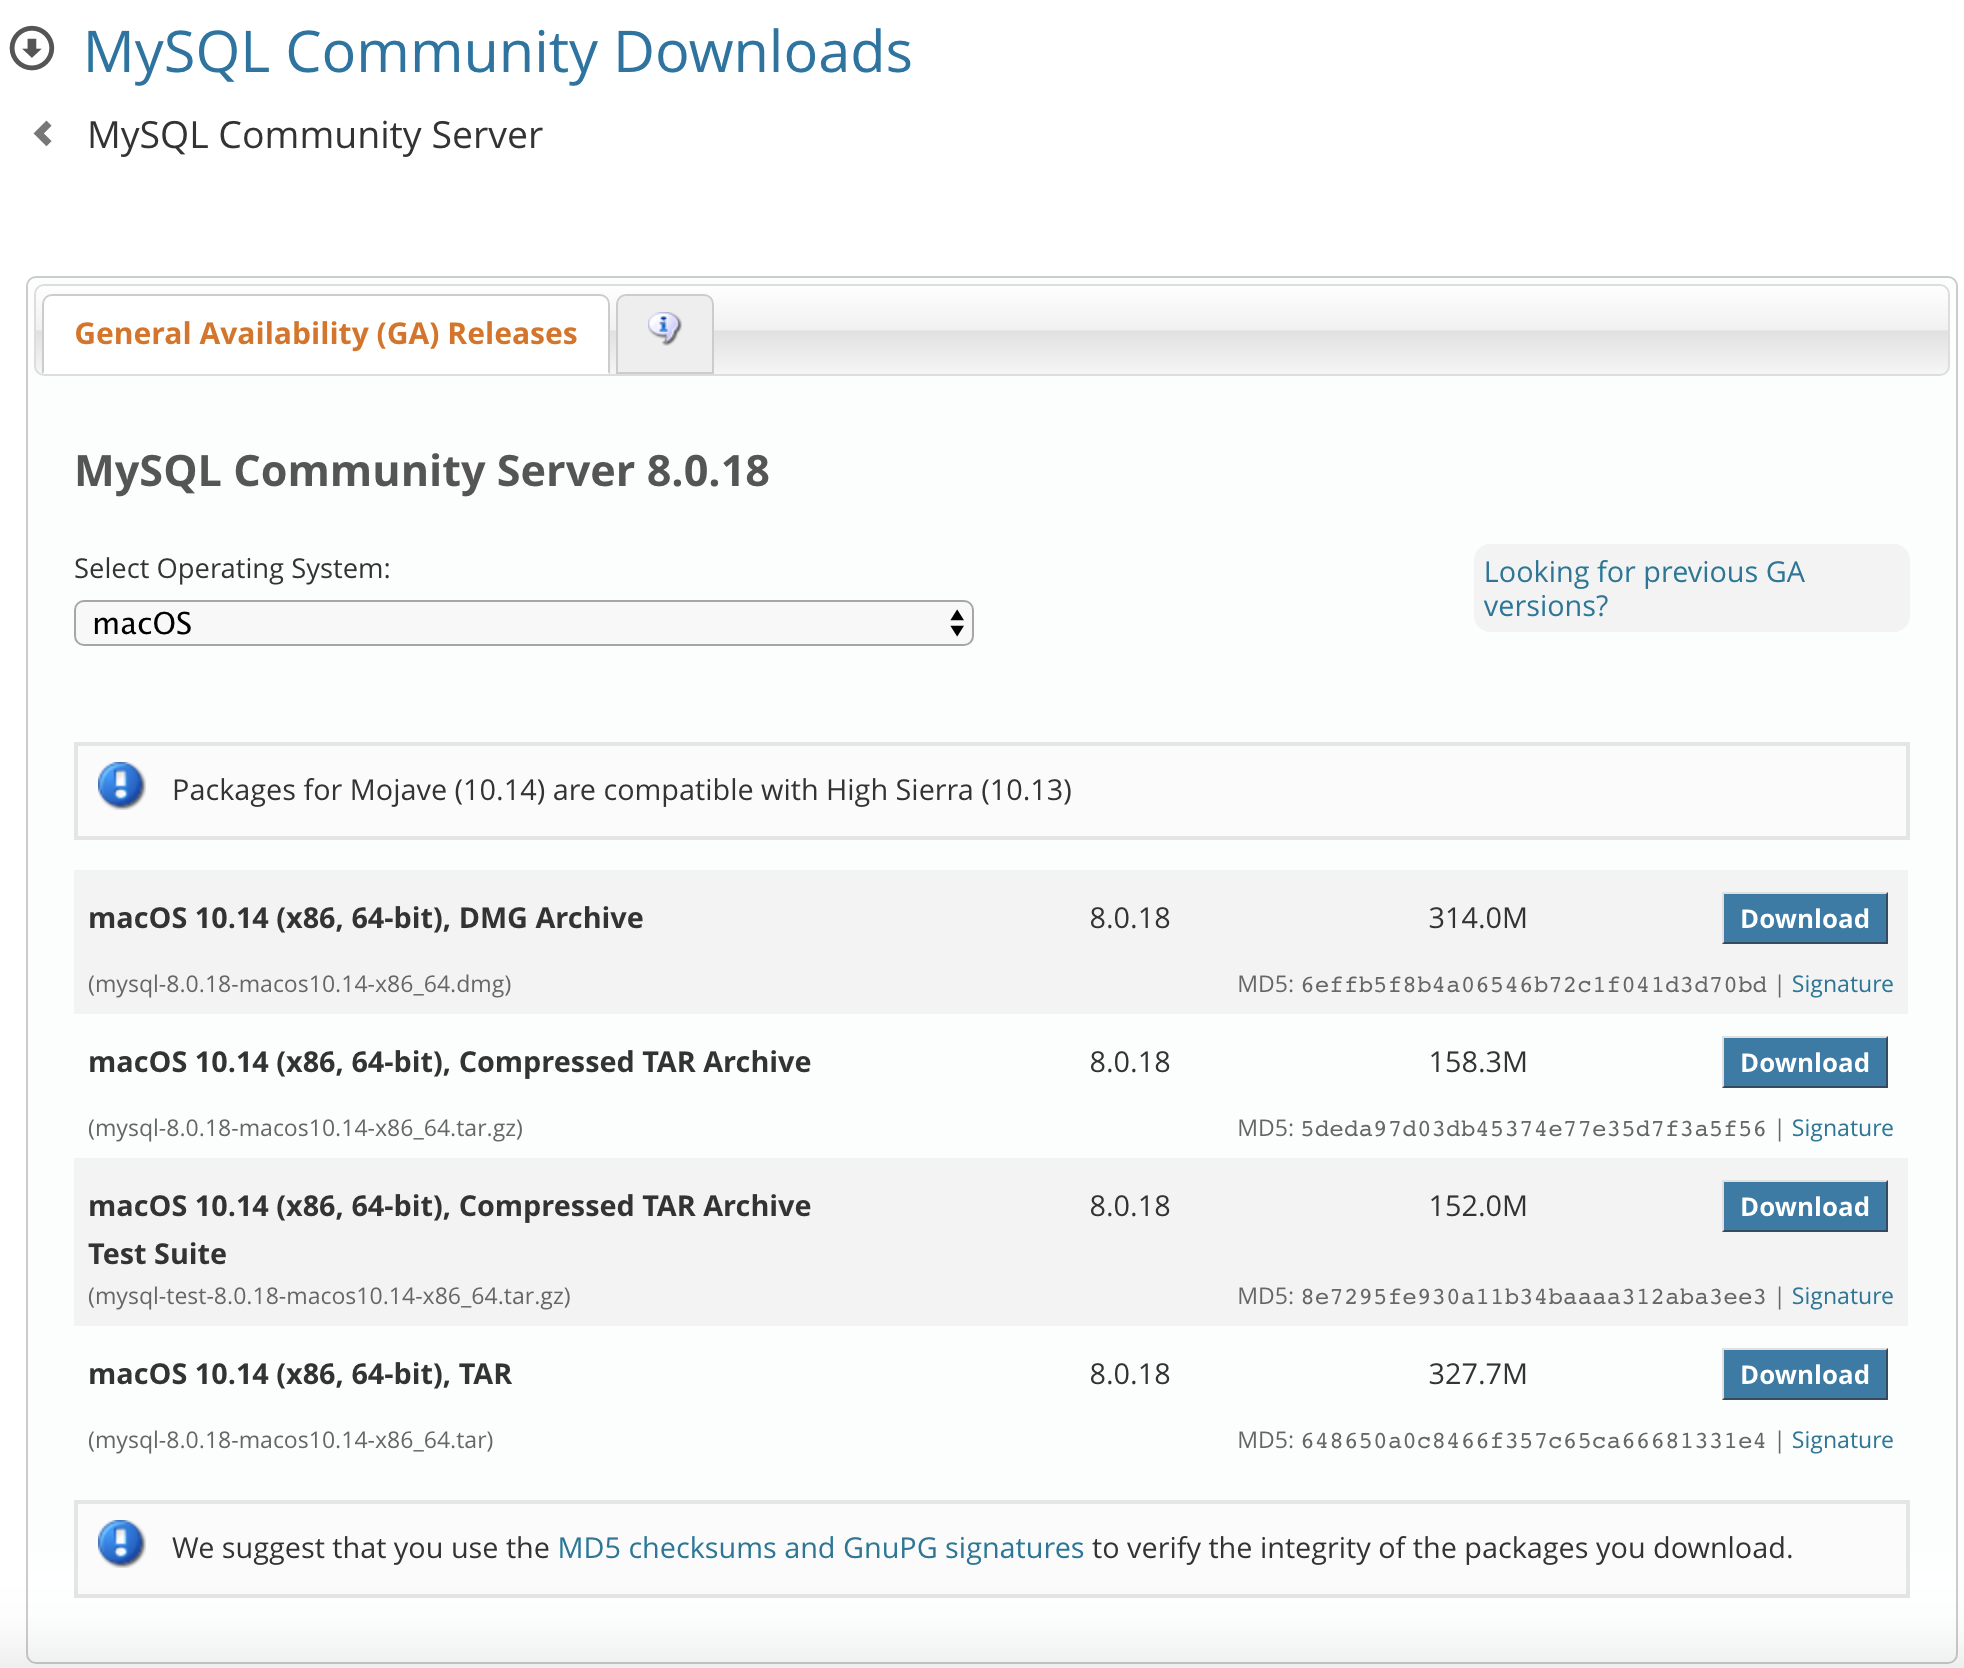
- You can download MySQL for your particular system (MACOSX, Linux, Windows) from Download MySQL Community Server. In my case, I downloaded the DMG Archive. After that, double click and install the file. You might need to set up a password. Remember this password as it would be required to connect to the MySQL instance later.
- Create a file named
my.cnfand put the following in it. This is needed to give Local file read permissions to your SQL database.
[client]
port= 3306
[mysqld]
port= 3306
secure_file_priv=''
local-infile=1
- Open up
System Preferences>MySQL. Go toConfigurationand browse to themy.cnffile using the select button.
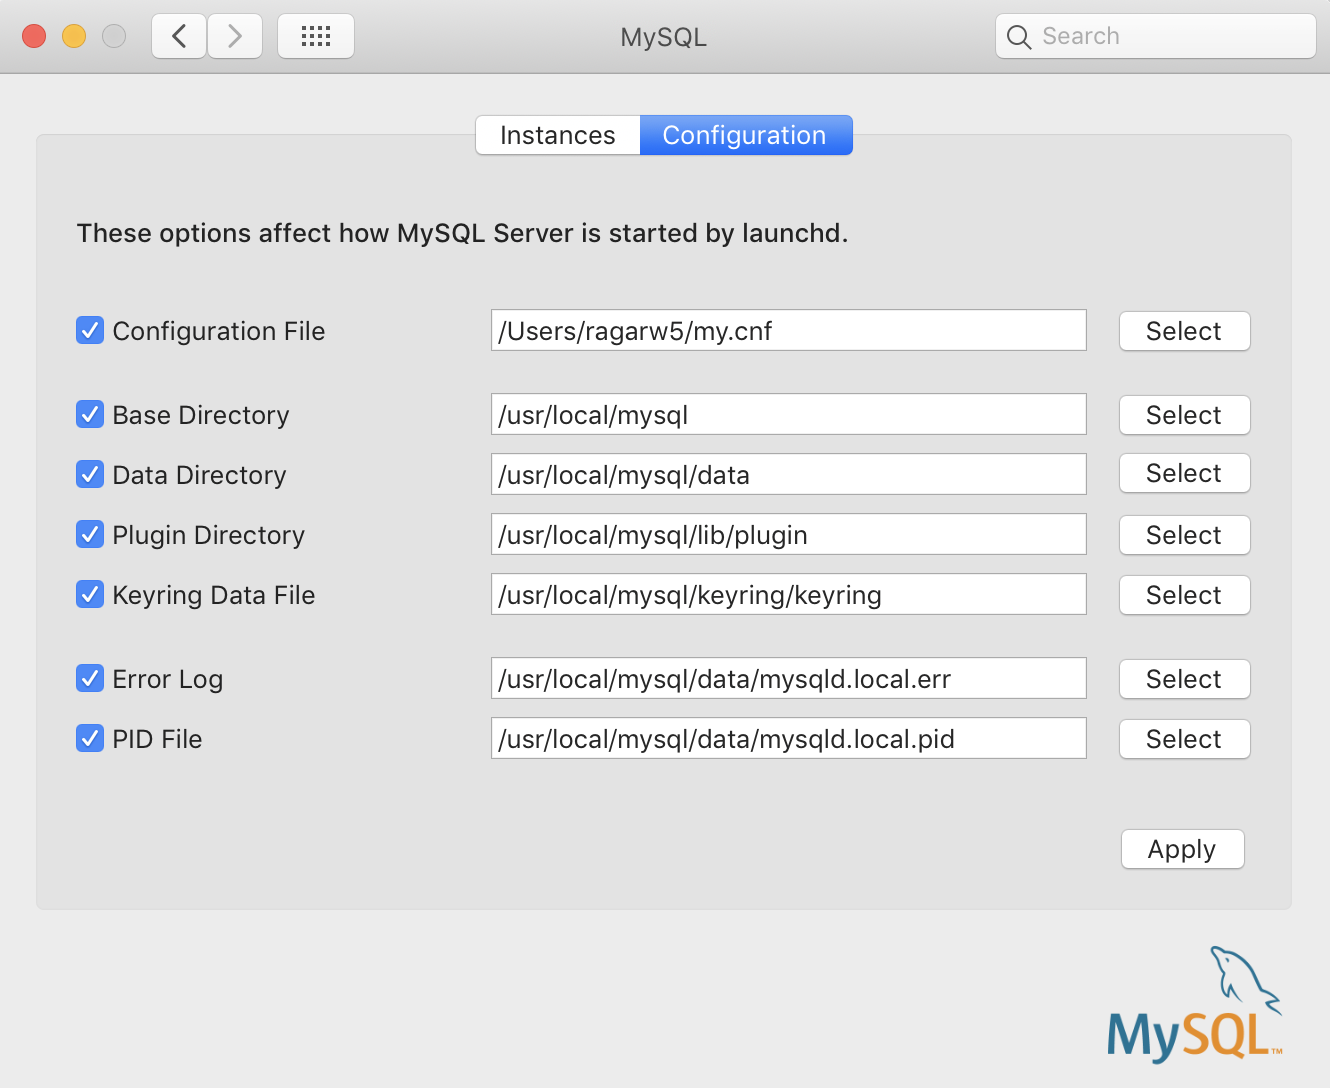
- Restart the server from
Instancestab by clicking stop and start.

- Once you get that server running, download and install the MySQL Workbench: Download MySQL Workbench. The workbench gives you an editor to write your SQL Queries and get the results in a structured way.

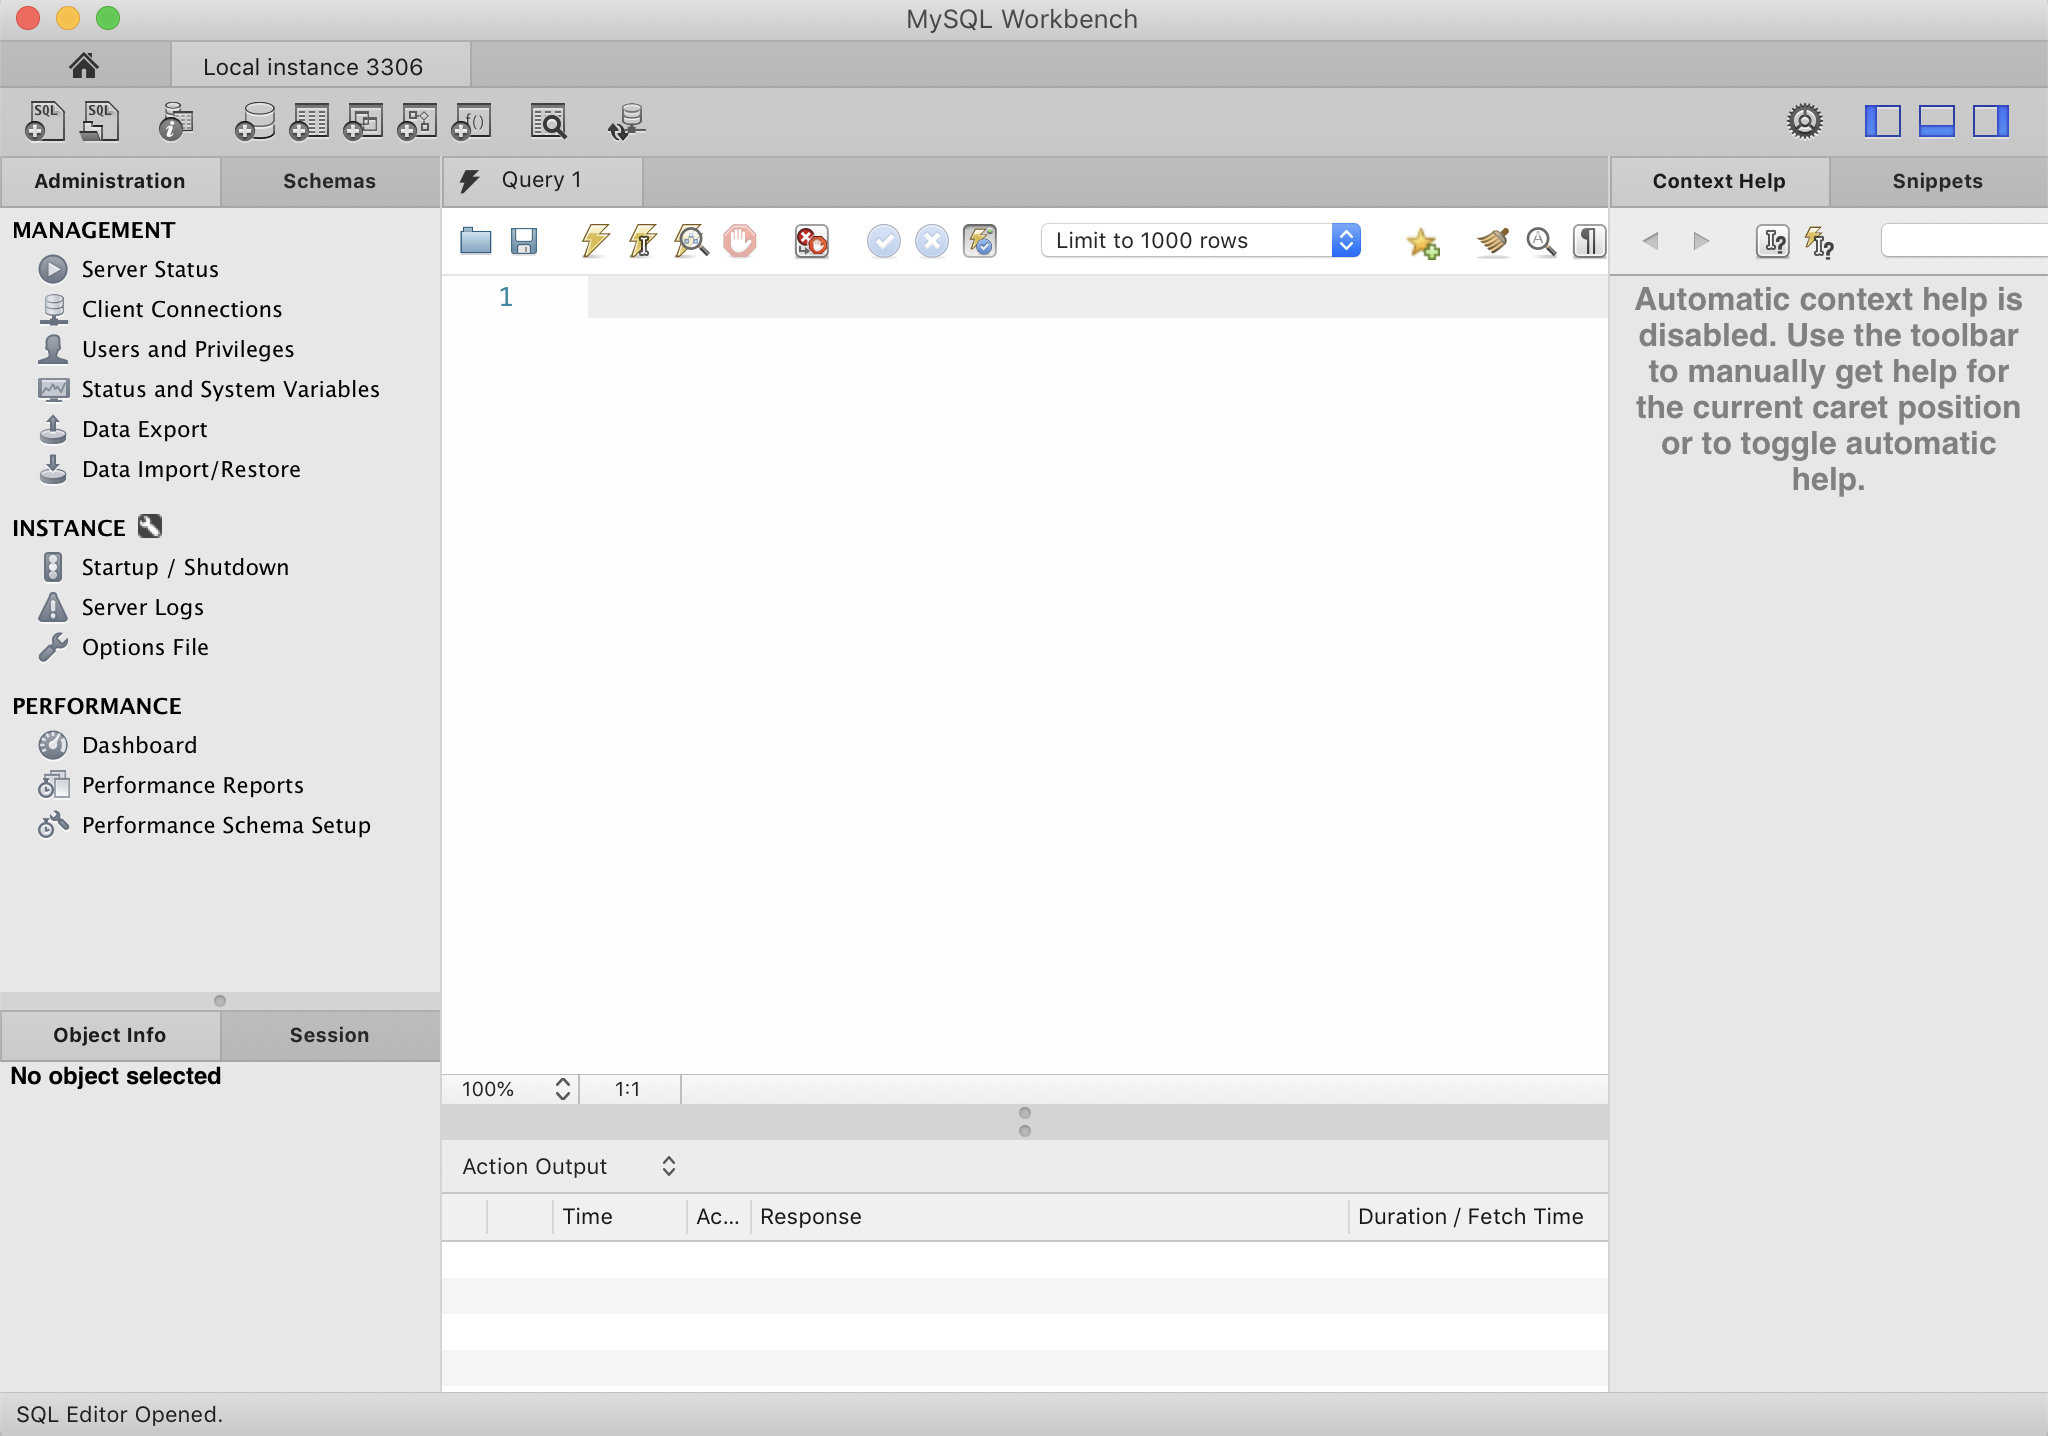
- Open up the MySQL workbench now and connect to SQL through it. You will see something like below.
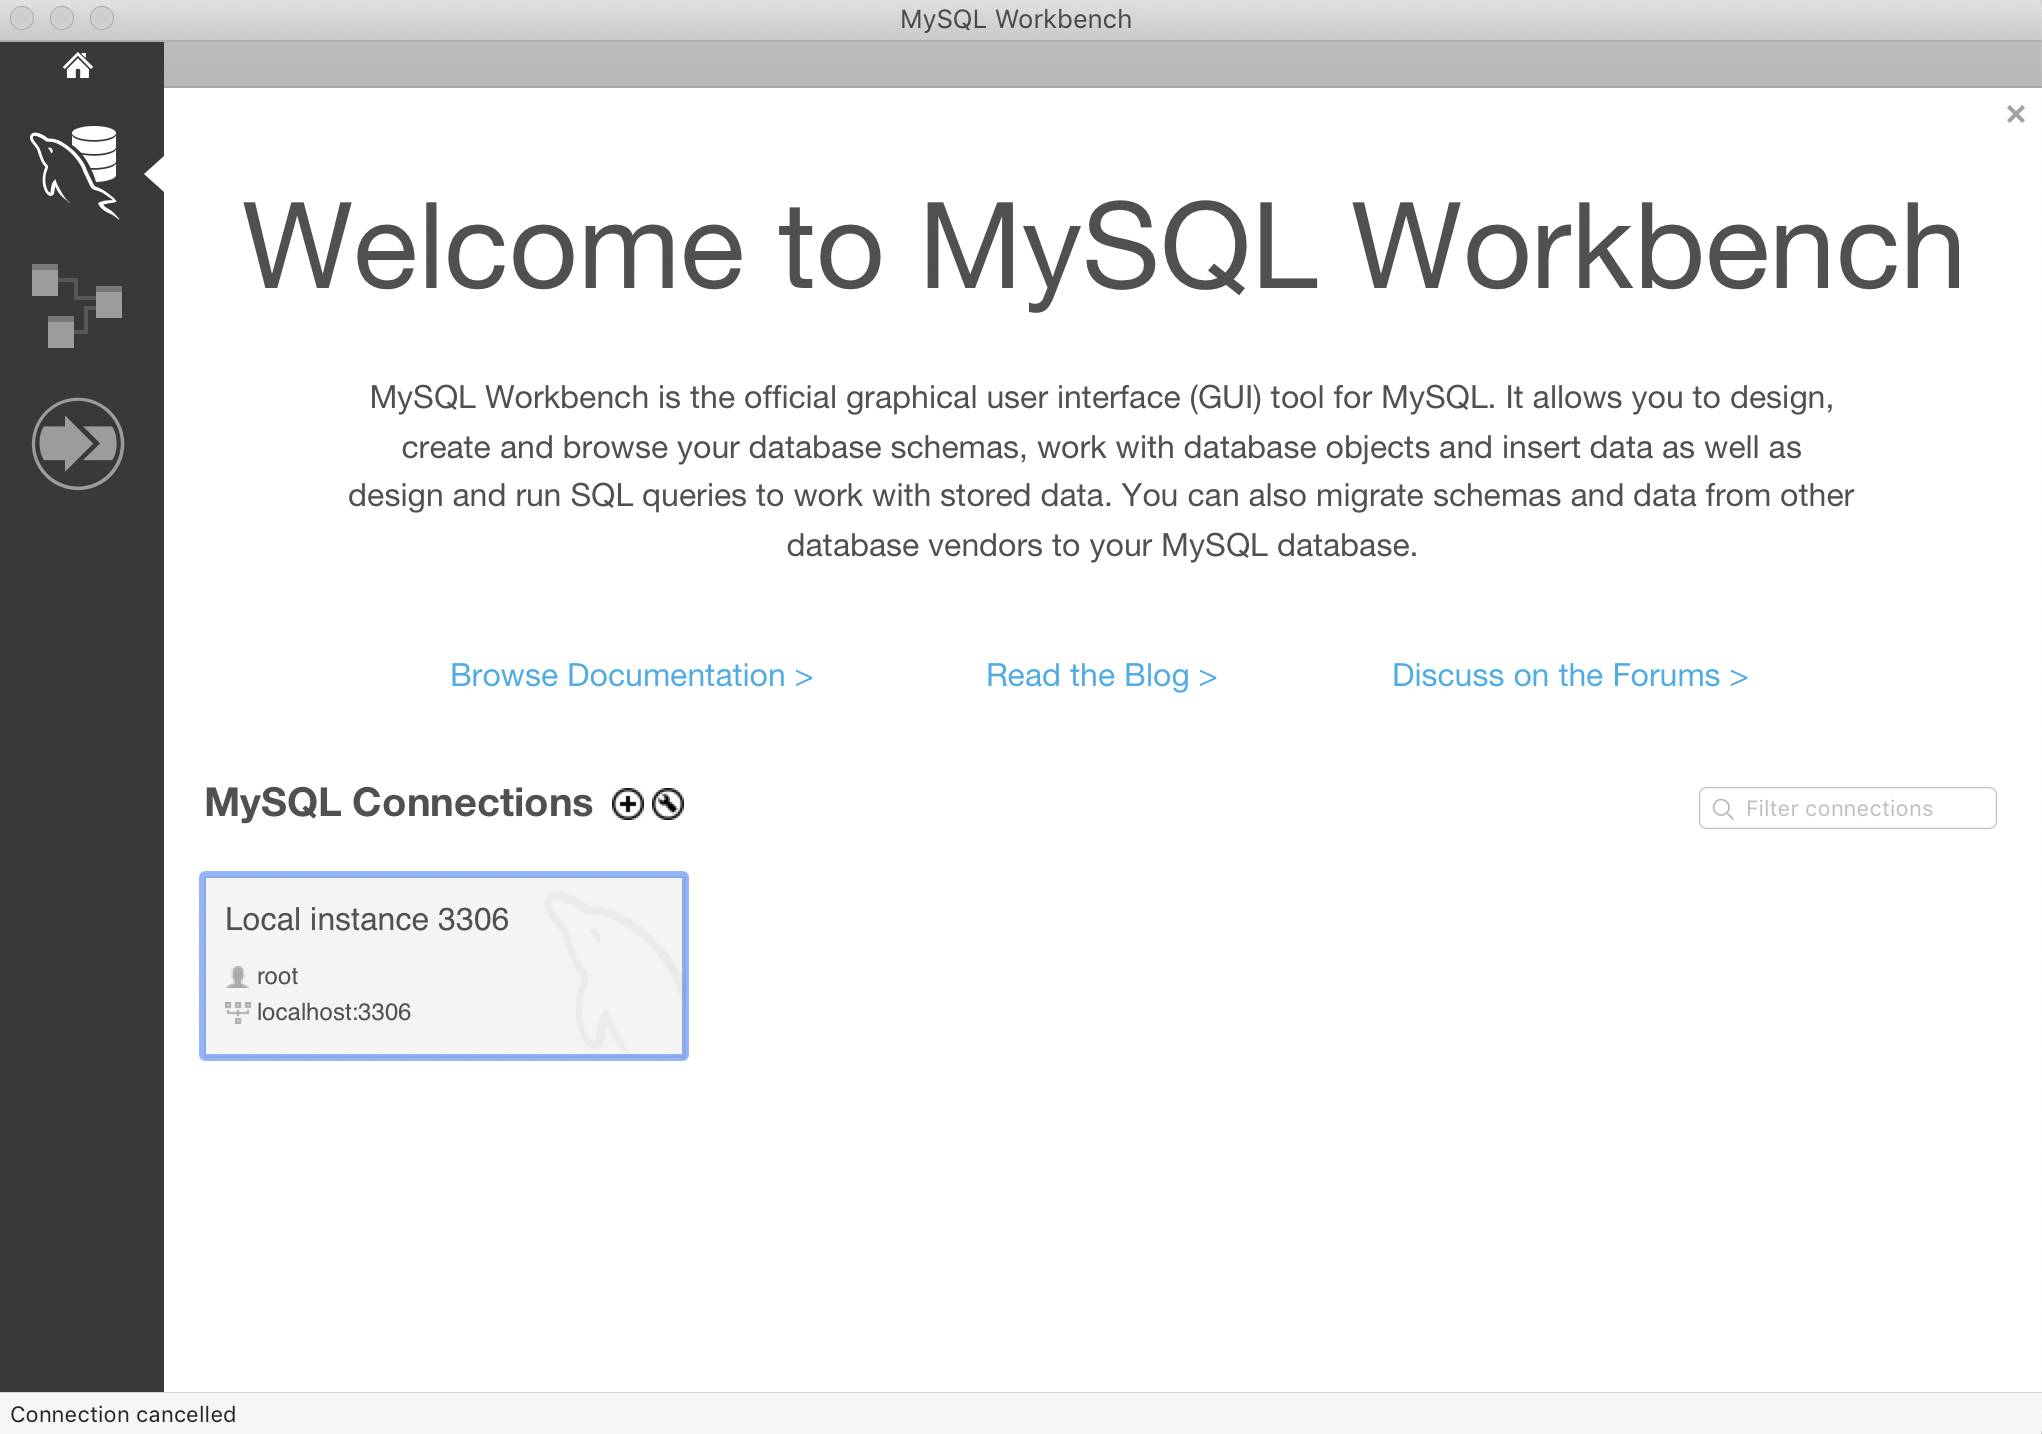
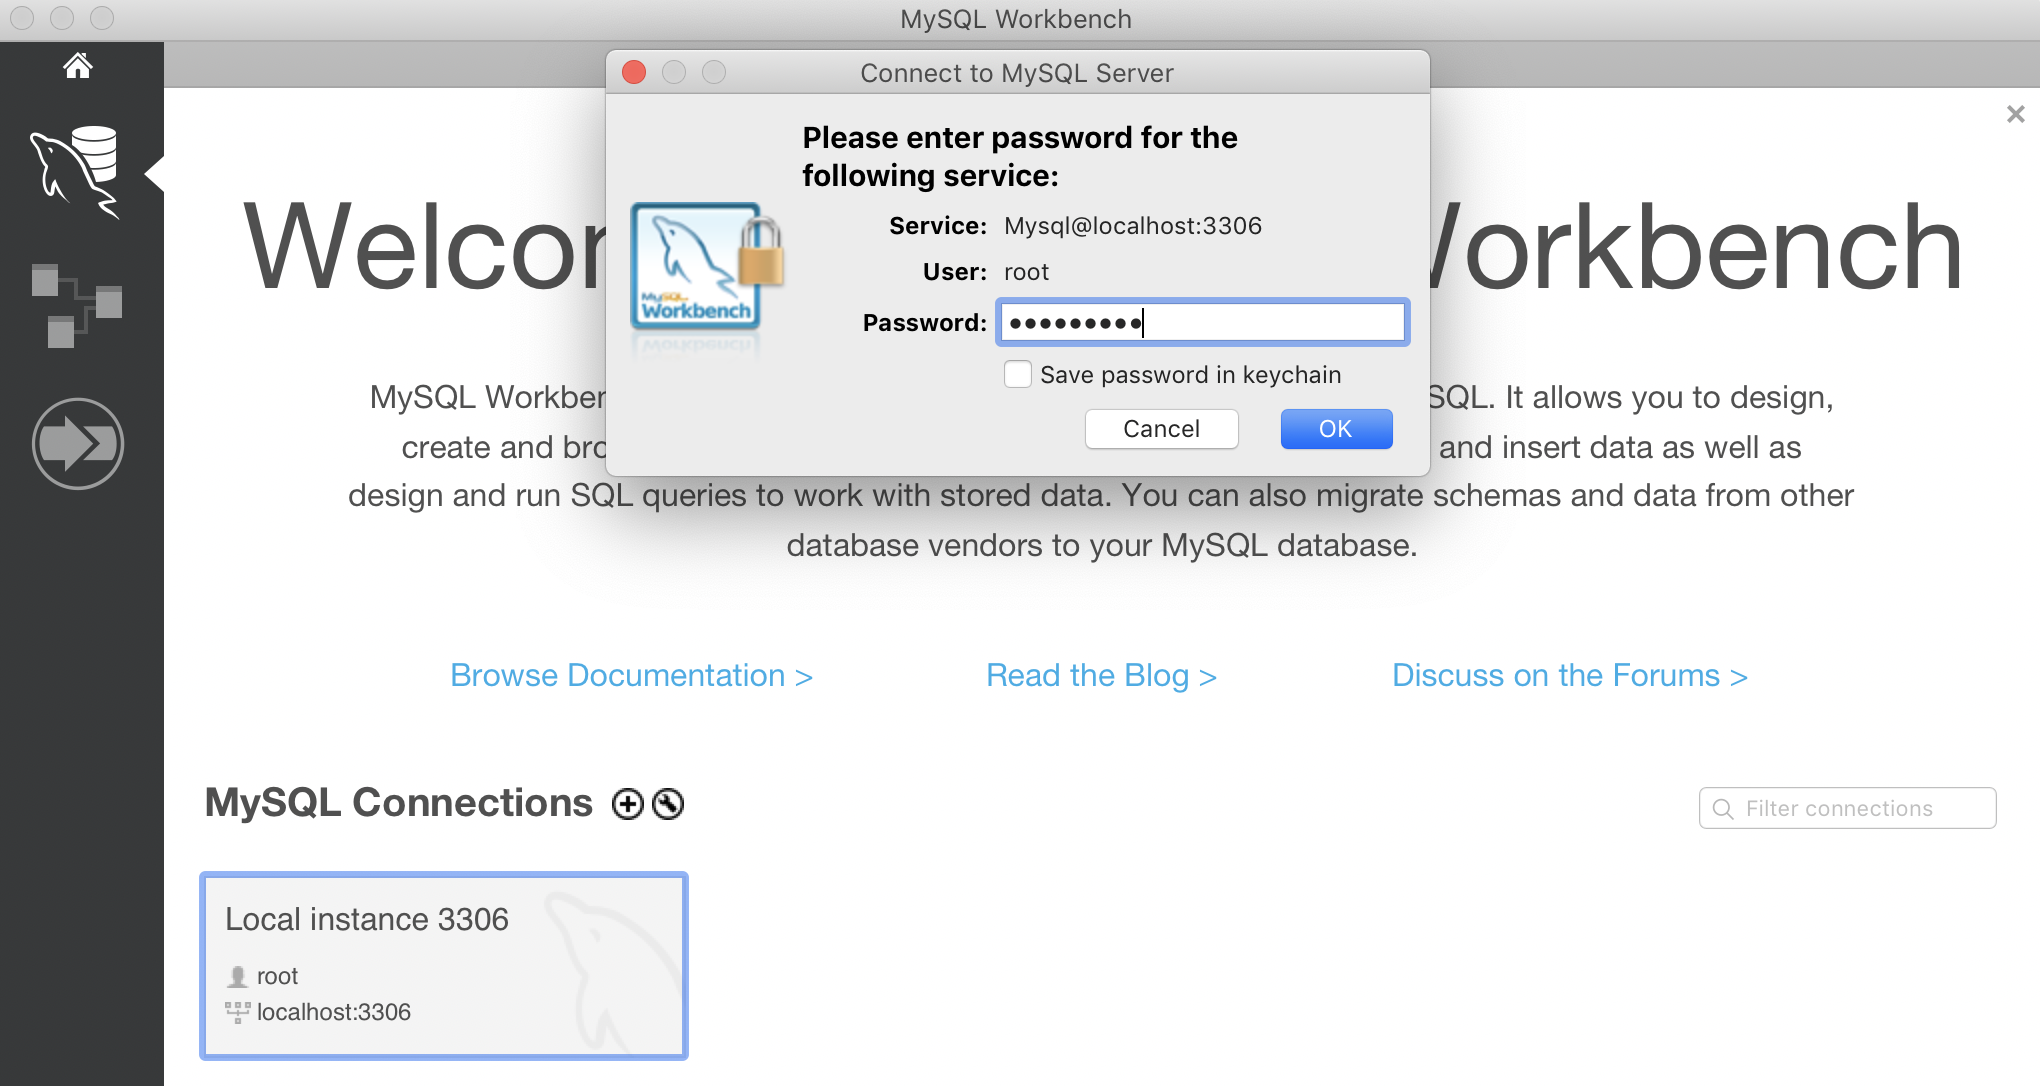
- You can see that the Local Instance connection has been set up for you beforehand. Now, you just need to click on that connection and get started using the password that we set up before for the MySQL server(You can also create a connection to an existing SQL server that might not be on your machine if you have the address, port number, username and password).
- And you get an editor to write your queries on the particular database.
- Check the
Schemastab on the top left to see the tables that are present. There is just asysschema present with the tablesys_config. Not an interesting data source to learn SQL. So let’s install some data to practice. - If you have your own data to work. Then good and fine. You can create a new schema(database) and upload it into tables using these following commands. (You can run the commands by using
Cmd+Enteror by clicking the ⚡️lightning button)
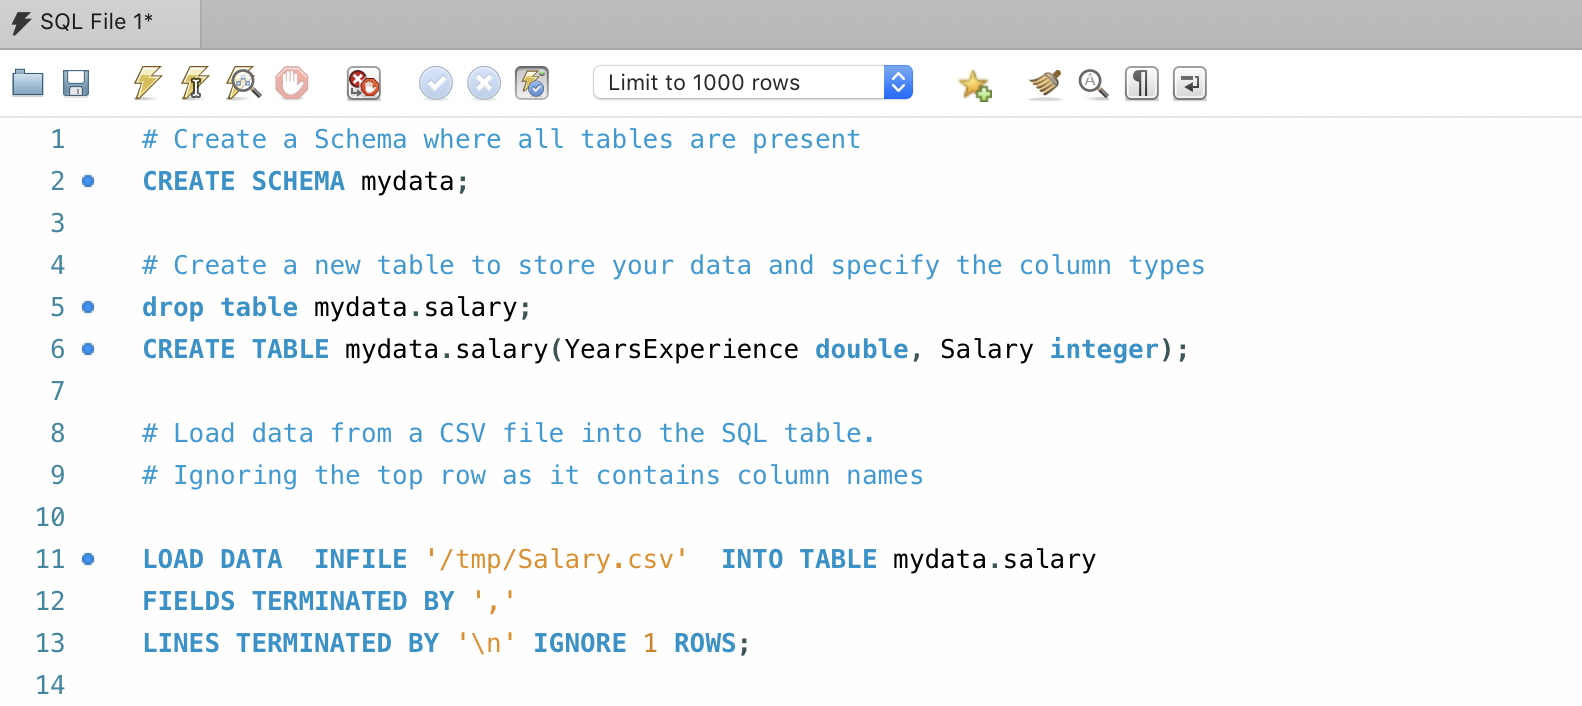
In this tutorial, however, I am going to use the Sakila Movie database which you can install using the following steps:
- Go to MySQL Documentation and download the Sakila ZIP file.
- Unzip the file.
- Now go to MySQL Workbench and select File>Run SQL Script>select location
sakila-db/sakila-schema.sql - Go to MySQL Workbench and select File >Run SQL Script >select location
sakila-db/sakila-data.sql
Once you do that, you will see a new database added in the SCHEMA list.

Playing with Data
Now we have some data with us. Finally.
Let’s start with writing some queries.
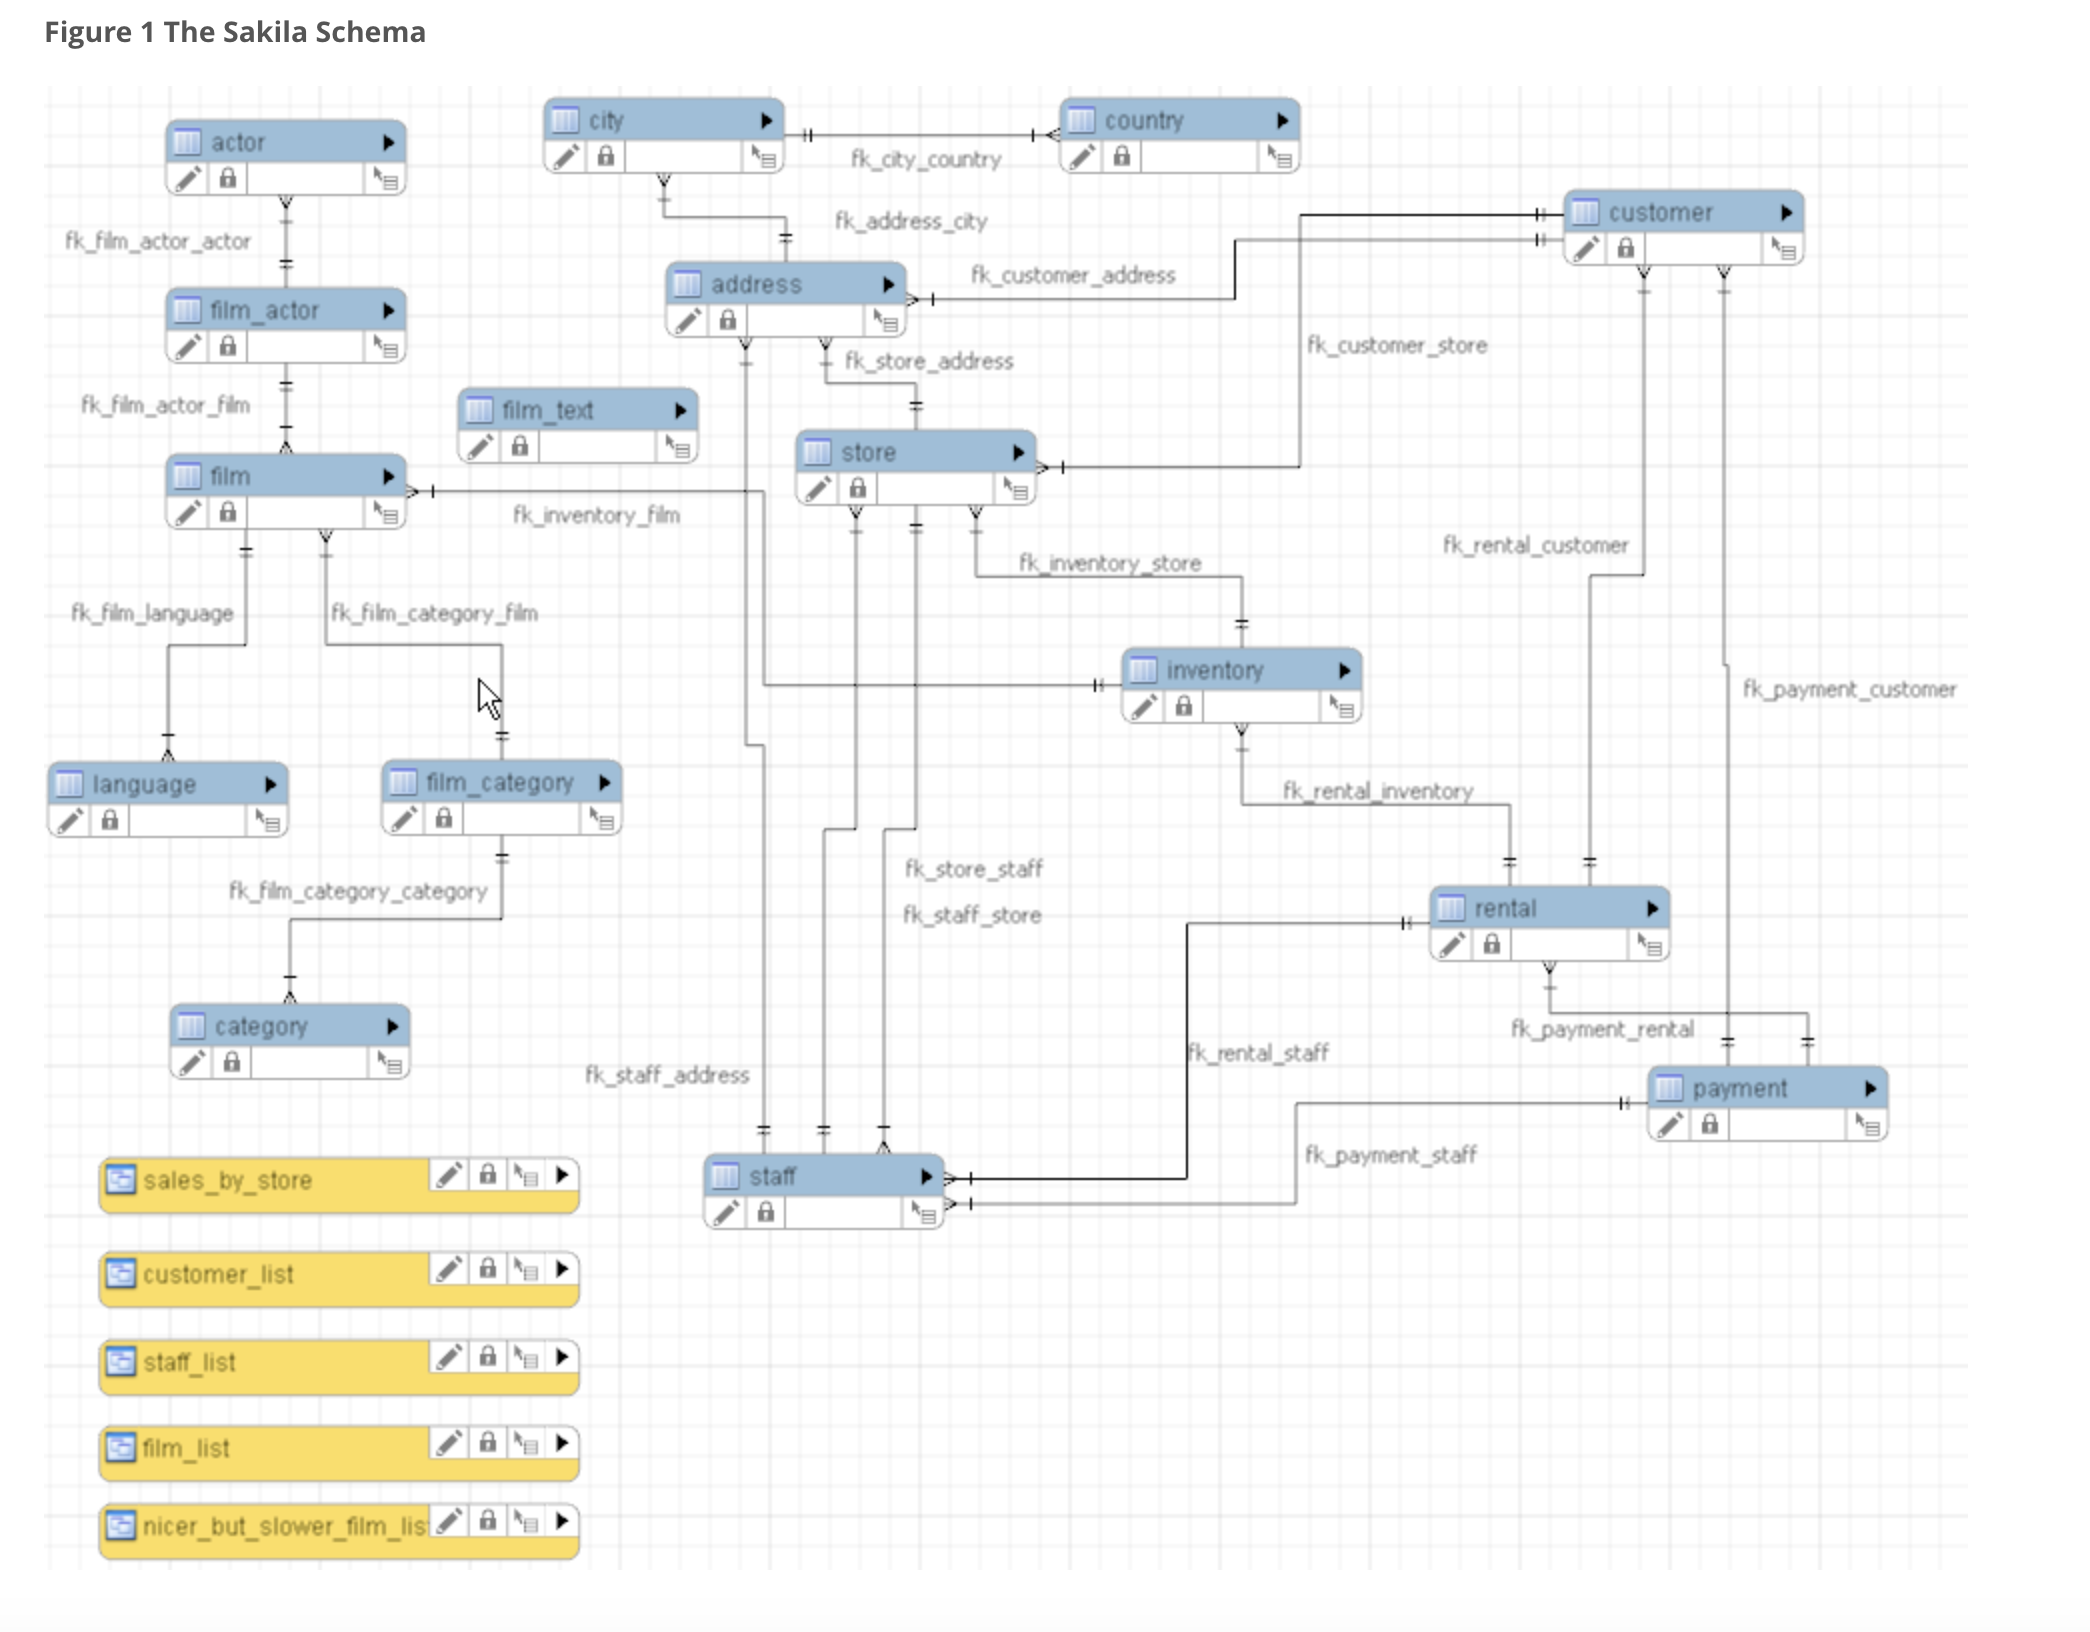
You can try to understand the Schema of the Sakila Database in detail using the Sakila Sample Database document.
Now the basic syntax of any SQL query is:
SELECT col1, SUM(col2) as col2sum, AVG(col3) as col3avg FROM table_name WHERE col4 = 'some_value' GROUP BY col1 ORDER BY col2sum DESC;
There are four elements in this query:
- SELECT: Which Columns to select? Here we choose
col1and do SUM aggregation oncol2and AVG aggregation oncol3. We also give a new name toSUM(col2)by using theaskeyword. This is known as aliasing. - FROM: From which table should we SELECT?
- WHERE: We can filter data using WHERE statements.
- GROUP BY: All selected columns that are not in aggregation should be in GROUP BY.
- ORDER BY: Sort on
col2sum
The above query will help you with most of the simple things you want to find in a database.
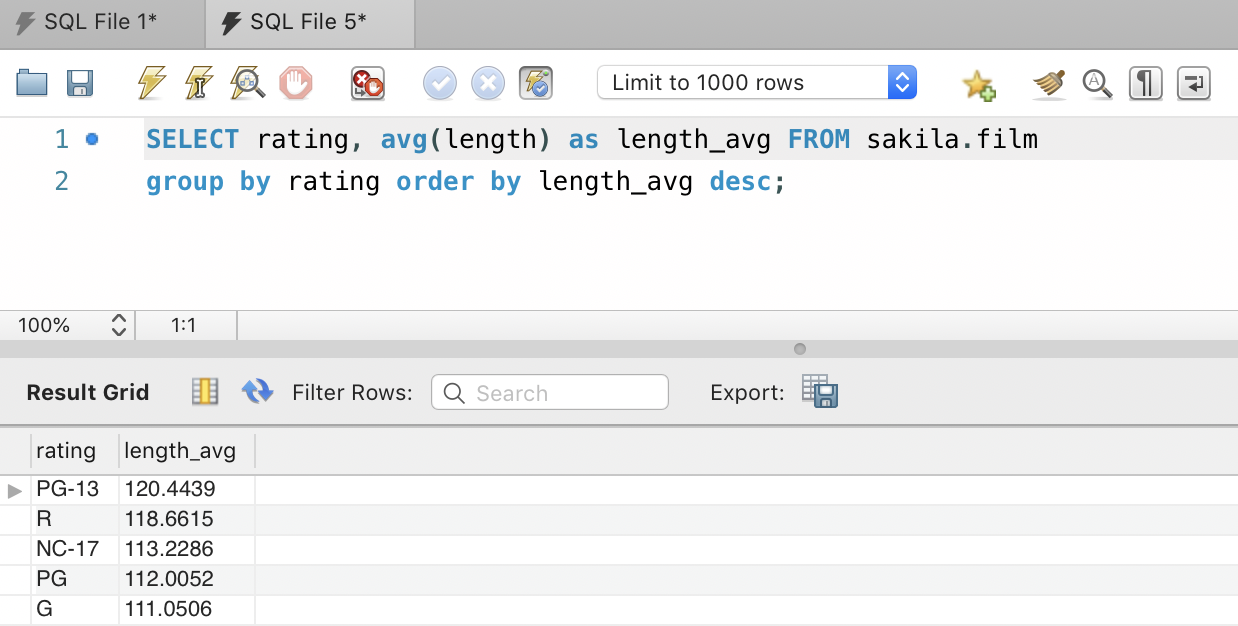
For example, we can find out how differently censored rated movies are timed differently using:
SELECT rating, avg(length) as length_avg FROM sakila.film group by rating order by length_avg desc;
Exercise: Frame a Question
You should now come up with some questions of your own.
For Example, you can try to find out all the movies released in the year 2006. Or try to find all of the movies which have a rating of PG and length greater than 50 minutes.
You can do this by running the following on MySQL Workbench:
select * from sakila.film where release_year = 2006;
select * from sakila.film where length>50 and rating="PG";
Joins in SQL
Till now, we have learned how we can work with single tables. But in reality, we need to work with multiple tables.
So, the next thing we would want to learn is how to do joins.
Now joins are an integral and an essential part of a MySQL Database and understanding them is necessary. The below visual talks about most of the joins that exist in SQL. I usually end up using just the LEFT JOIN, and INNER JOIN, so I will start with LEFT JOIN.
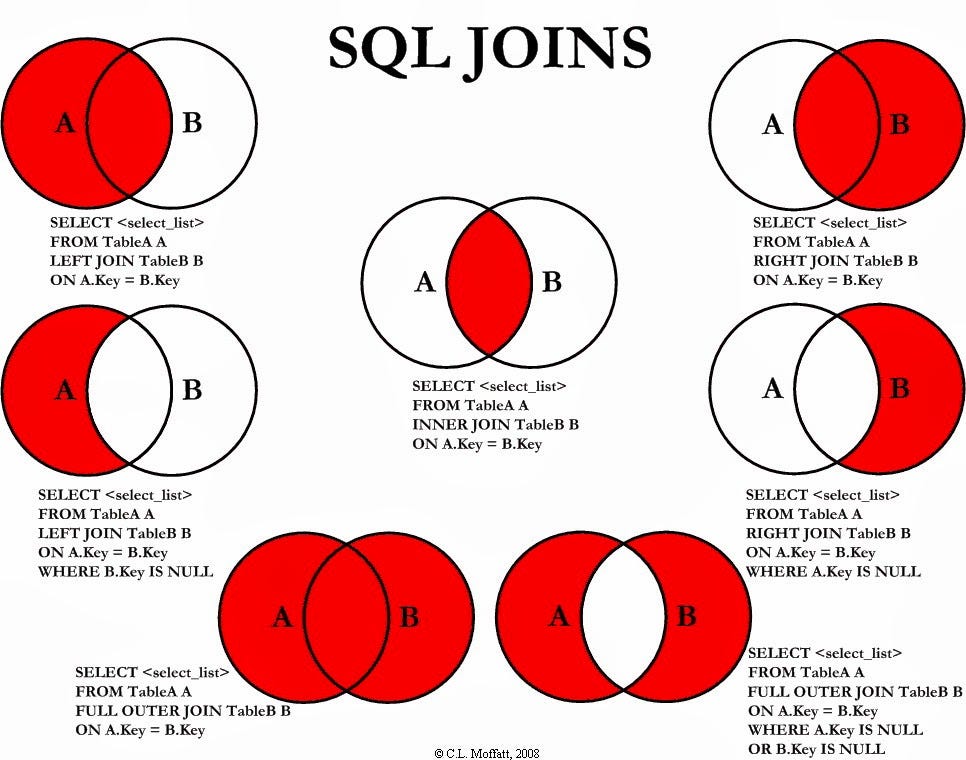
The LEFT JOIN is used when you want to keep all the records in the left table(A) and merge B on the matching records. The records of A where B is not merged are kept as NULL in the resulting table. The MySQL Syntax is:
SELECT A.col1, A.col2, B.col3, B.col4 from A LEFT JOIN B on A.col2=B.col3
Here we select col1 and col2 from table A and col3 and col4 from table B. We also specify which common columns to join on using the ON statement.
The INNER JOIN is used when you want to merge A and B and only to keep the common records in A and B.
Example:
To give you a use case lets go back to our Sakila database. Suppose we wanted to find out how many copies of each movie we do have in our inventory. You can get that by using:
SELECT film_id,count(film_id) as num_copies FROM sakila.inventory group by film_id order by num_copies desc;
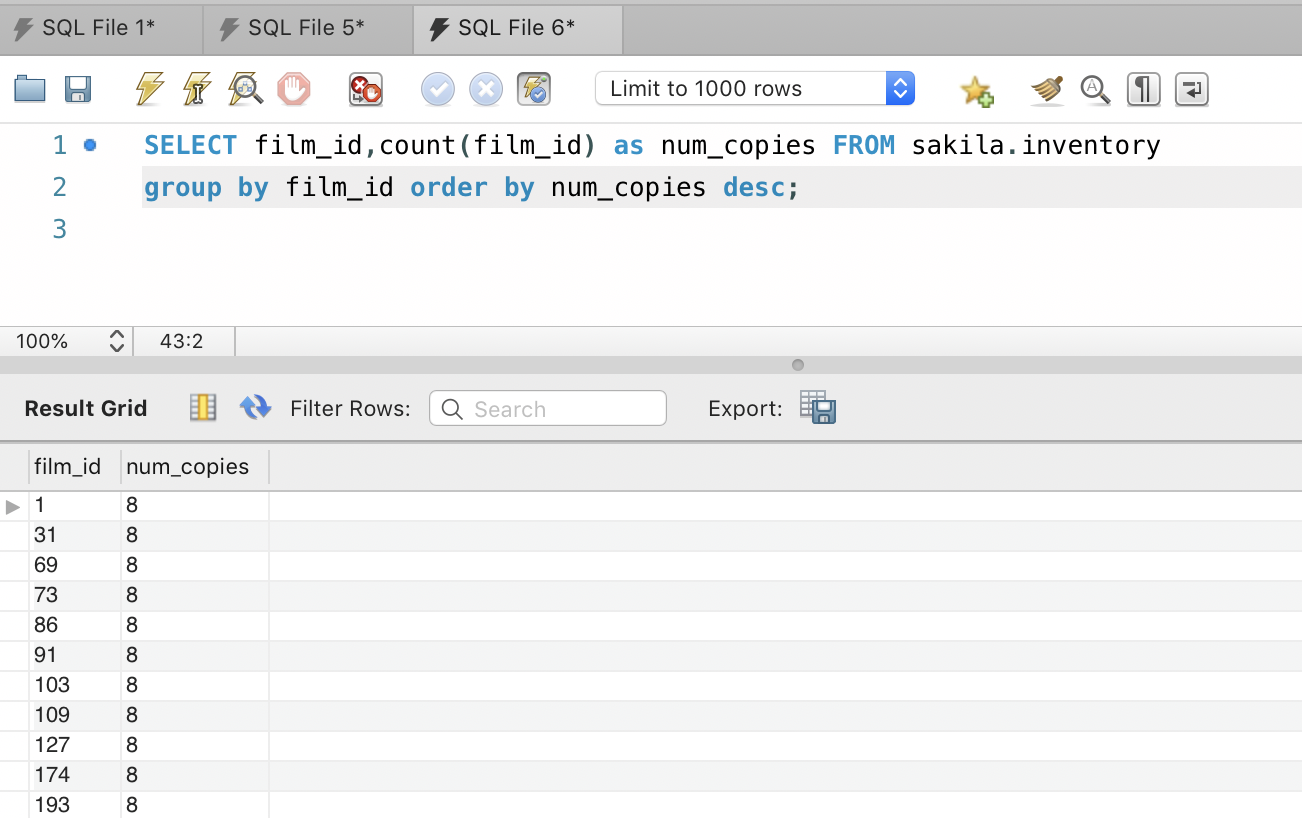
Does this result look interesting? Not really. IDs don’t make sense to us humans, and if we can get the names of the movies, we would be able to process the information better. So we snoop around and see that the table film has got film_id as well as the title of the film.
So we have all the data, but how do we get it in a single view?
Come Joins to the rescue. We need to add the title to our inventory table information. We can do this using —
SELECT A.*, B.title from sakila.inventory A left join sakila.film B on A.film_id = B.film_id

This will add another column to your inventory table information. As you might notice some films are in the film table that we don’t have in the inventory. We used a left join since we wanted to keep whatever is in the inventory table and join it with its corresponding counterpart in the film table and not everything in the film table.
So now we have got the title as another field in the data. This is just what we wanted, but we haven’t solved the whole puzzle yet. We want title and num_copies of the title in the inventory.
But before we can go any further, we should understand the concept of inner queries first.
Inner Query:
Now you have a query that can give you the above result. One thing you can do is create a new table using
create table sakila.temp_table as SELECT A.*, B.title from sakila.inventory A left join sakila.film B on A.film_id = B.film_id;
And then use a simple group by operation using:
select title, count(title) as num_copies from sakila.temp_table group by title order by num_copies desc;

But this is one step too many. And we have to create a temporary table that ends up taking space on the system.
SQL provides us with the concept of the inner query just for these sort of issues. You can instead write all this in a single query using:
select temp.title, count(temp.title) as num_copies from (SELECT A.*, B.title from sakila.inventory A left join sakila.film B on A.film_id = B.film_id) temp group by title order by num_copies desc;
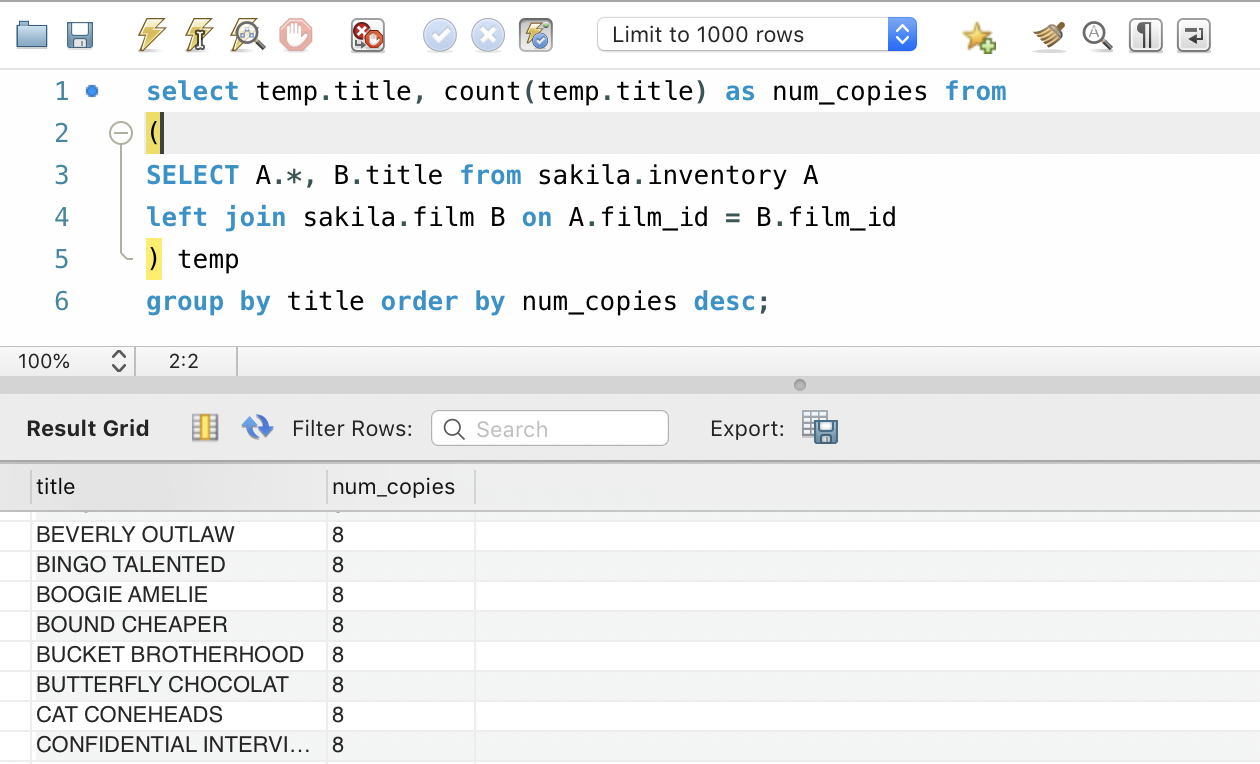
What we did here was sandwich our first query in parenthesis and gave that table an alias temp. We then did the group by operations considering temp just as we would consider any table. It is because of the inner query concept that we can write SQL queries that span multiple pages at some times.
The HAVING Clause
HAVING is yet another SQL construct that is useful to understand. So we have got the results, and now we want to get the films whose number of copies are less than or equal to 2.
We can do this by using the inner query concept and the WHERE clause. Here we nest one inner query inside another. Pretty neat.

Or, we can use the HAVING Clause.

The HAVING clause is used to filter on the final aggregated result. It is different from WHERE as where is used to filter the table that is used in the FROM statement. HAVING filters the final result after the GROUP BY happens.
There are a lot of ways to do the same thing with SQL as you have already seen in the above example. We need to try to come up with the least verbose and thus HAVING makes sense in many cases.
If you can follow this far, you already know more SQL than most people.
Next thing to do: Practice.
Try to come up with your questions on your dataset and try to find out the answers you have using SQL.
Some questions I could provide for a start:
- Which Actor has the most distinct films in our inventory?
- Which Genre films are the most rented in our inventory?
Continue Learning
This was just a simple tutorial on how to use SQL. If you want to learn more about SQL, I would like to call out an excellent course on SQL for Data Science from the University of California. Do check it out as it talks about other SQL concepts like UNION, String Manipulation, functions, Date Handling, etc.
I am going to be writing more beginner-friendly posts in the future too. Follow me up at Medium or Subscribe to my blog to be informed about them. As always, I welcome feedback and constructive criticism and can be reached on Twitter @mlwhiz.
Also, a small disclaimer — There might be some affiliate links in this post to relevant resources, as sharing knowledge is never a bad idea.
Bio: Rahul Agarwal is Senior Statistical Analyst at WalmartLabs. Follow him on Twitter @mlwhiz.
Original. Reposted with permission.
Related:
- 7 Steps to Mastering SQL for Data Science — 2019 Edition
- The Last SQL Guide for Data Analysis You’ll Ever Need
- 6 bits of advice for Data Scientists