By Axel Furlan, Data Engineer

Photo by Chris Ried on Unsplash
Why a DAG Factory?
Let’s look at a pretty simple DAG with 2 tasks…
Isn’t it weird the amount of boilerplate code necessary in order to execute 2 simple python scripts on Airflow? No matter how many DAGs you write, most certainly you will find yourself writing almost all the same variables with the slightest of changes in a lot of different DAGs.
Remember that, in coding, it’s generally better to write a piece of code that you can later call, instead of writing the same piece of code every time you need that procedure. This is called being DRY.
If many of your DAGs share similar values, e.g the email address, the start date, the schedule interval, the number of retries, and so-on, it’s probably better to have a piece of code that fulfills those values for you. This is what we try to achieve with a Factory class.
Using a DAG Factory on Airflow, we can reduce the number of lines necessary to create a DAG by half.
Let’s look at the following examples
Here, we want a simple DAG that prints today’s date and then prints “hi”.
This is how it looks on Airflow:
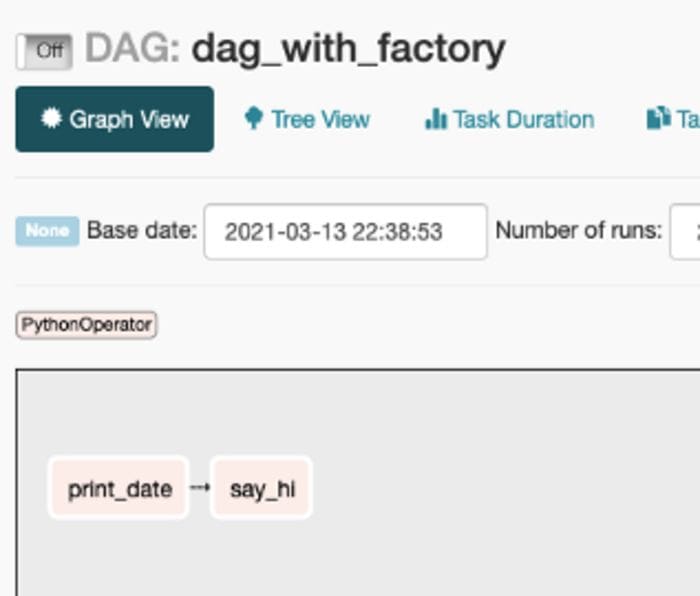
Notice how much we reduced clutter. We haven’t specified what operator we use, what are the tasks’ ids, the schedule interval, who created the DAG nor when was it created.
We can also see that we specified tasks and dependencies using a dictionary and that ultimately translates into the correct tasks dependencies ????
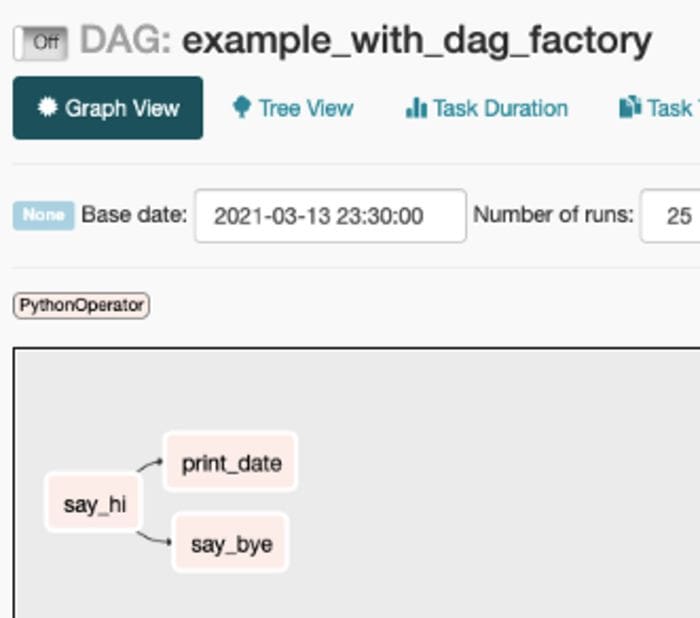
Let’s look at a slightly more complex example:
In this DAG, I specified 2 arguments that I wanted to override from the defaults. Those are the DAG’s owner and its number of retries. I also specified in the get_airflow_dag() method that I wanted for the schedule to be daily.
This DAG has 3 tasks. Both say_bye() and print_date() depend on say_hi(). Let’s see how this looks like on Airflow.
Now, let’s look at how we can build the DAG Factory ????
How to code it?
To be honest, it is pretty simple. We first create a class that will have all methods that we need to run in order to create a DAG with its tasks.
Below is the full code for the DAG Factory.
The main method that we’re going to call in order to get a fully usable DAG is get_airflow_dag().
This method will receive 2 mandatory parameters: the DAG’s name and the tasks that it should run. The rest of the parameters are optional since we can set a default in the function’s implementation. When implementing, feel free to make any of those optional parameters mandatory, depending on your use case, it may be useful to make the cron (schedule_interval) a mandatory parameter or even the DAG’s owner, for instance.
The default_args parameter is going to be a dictionary that will hold any keys and values that you may want to override. If not specified, the default default_args are going to be used.
In our case, the defaults are:
DEFAULT_ARGS = {
'owner': 'Data Engineer',
'depends_on_past': False,
'start_date': datetime(2021, 1, 1),
'email': ['data_engineers@company.com'],
'email_on_failure': True,
'email_on_retry': False,
'retries': 1,
'retry_delay': timedelta(minutes=5),
}
The other 3 parameters are the main ones used to describe a DAG. There are more options so feel free to specify more.
get_airflow_dag() will run create_dag() in order to create the DAG object and return it. add_tasks_to_dag() is a little bit more complicated since we want to make it easy for the user to specify a way to create dependencies on tasks without having to write the Operators.
In our case, we always use the PythonOperator for our tasks, so it made sense for us to assume that as the norm.
The implementation aims to facilitate the data engineer’s job, so we avoid setting extra things like the task’s name, we just assume it’s the same as the function’s name — so we use a little bit of reflection to figure it out.
for func in tasks:
    task_id = func.__name__
    task = PythonOperator(
        task_id=task_id,
        python_callable=func,
        dag=dag
    )
    aux_dict[task_id] = taskfor func, dependencies in tasks.items():
    task_id = func.__name__
    for dep in dependencies:
        aux_dict[dep.__name__] >> aux_dict[task_id]
The function first creates an auxiliary dictionary to hold a key value pair of task name: task object. This is done to only have one set of tasks objects and to use that later to set dependencies. Then for each key in the tasks dictionary provided originally, the dependencies get set making use of the auxiliary dictionary.
After this is done, the DAG object is ready to be returned and used by the team ????.
Gotcha!
There’s a little trick in the file in order for Airflow to recognize it’s a proper DAG that we’re returning.
When Airflow starts, the so-called DagBag process will parse all the files looking for DAGs. The way the current implementation works is something like this:
- The DagBag spawns different processes that look through the files of the dag folder.
- The function called
process_filehere runs for each file to figure out if there’s a DAG there. - The code runs
might_contain_dagwhich returns a True depending if the file contains both “dag” and “airflow” in their code. Implementation here.
That’s why the function get_airflow_dag is called like that, in order to have both keywords in the file that will result in the file being correctly parsed.
This was a hard thing to find, I spent many hours trying to figure out why my DAG factory was not working. There’s not much documentation about what to take into account in order to create DAGs in a non-traditional way, so this is one of the big gotchas that you will have to take into account when doing something like this.
Conclusion
This simple article aimed to explain how to make a Data Engineer’s life easier by utilizing the Factory pattern on Airflow.
Hope you liked it! Feel free to click on my profile to see other useful Airflow and Data Engineering articles! ????
Bio: Axel Furlan is a Data Engineer from Argentina ???????? and a software engineering student. Axel started as a Data Scientist and then combined both software eng and data and fell in love with how versatile the role can be. He is writing to make other DEs lives easier.
Original. Reposted with permission.
Related:
- Data Science Learning Roadmap for 2021
- 9 Skills You Need to Become a Data Engineer
- Faster machine learning on larger graphs with NumPy and Pandas