An Overview of Mercury: Creating Data Science Portfolio and Notebook Based WebApps
Turn your dull Jupyter notebooks into interactive web apps by adding a YAML header and sharing it with your friends and colleagues. You can also use Mercury to create your data science portfolio, which consists of a resume and projects.
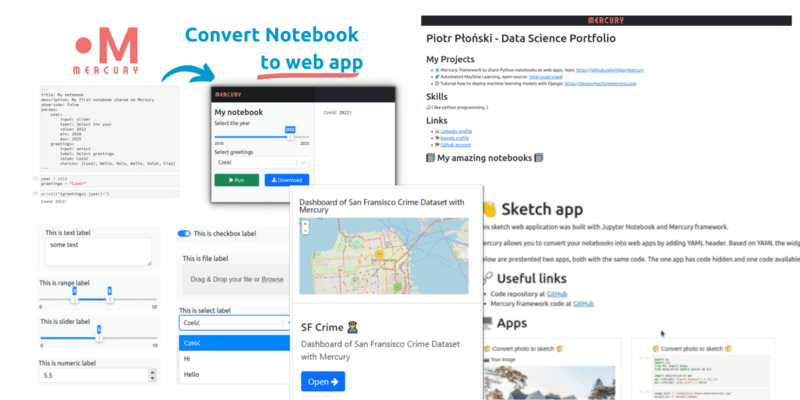
Image by author
Mercury is a tool that converts your Python Jupyter notebooks into interactive web apps and deploys them to the cloud. It is for data analysts and machine learning engineers who are looking to create an amazing dashboard and create machine learning demos using a few lines of YAML script.
Mercury key features:
- Add Interactive widgets using the YAML header.
- Change values, execute the notebook, and save the results.
- Option to show or hide the code in Jupyter cells.
- Easy to deploy on a cloud server.
- Create and add multiple notebooks to the server.
- Portfolio front page.
- Admin control and authentication.
- Embed interactive web application using iframe.
- Open Source under AGPLv3
The open-source version of Mercury consists of core features such as multiple web apps, welcome page edits, and interactive widgets. The Mercury Pro version has additional features to support team, private sharing, administrator control, and authentication. It also comes with dedicated support.
Install Mercury using `pip install mljar-mercury` or use `mercury run demo` in the terminal. To validate installation run a demo `mercury run demo` and then enter the `http://127.0.0.1` address to your browser. You can also take a mini-tutorial on Mercury docs to understand how things work at a basic level.
In this overview, we will learn about the key features of Mercury and how you can use it to your advantage.
YAML Parameters
The most important thing is to add a header to the Jupyter notebook. You need to create a new cell on top and change it to Raw `NBConvert`. After that, add YAML code for modifying parameters.

Gif from Mercury
The list of parameters used in YAML header:
- title: is the name of a webapp. It is shown on the side bar and on the main page.
- author: creator of web app.
- description: add detailed description of webapp.
- show-code: hide or show python code.
- show-prompt: hide or show prompt information of a jupyter cell.
- share: share the webapp with public, private, or certain groups.
- params: add, remove, modify widgets. This is the most important parameter which controls the inputs and outputs of an application.
Widgets
Widgets are interactive inputs for your application. You can add text, integer, slider, checkbox, range, add multiple options, and even upload files for your machine learning demo.
The sample code below shows how we can add a widget (slider) to a Python variable (my_variable).
params:
    my_variable:
        input: slider
        label: This is slider label
        value: 5
        min: 0
        max: 10
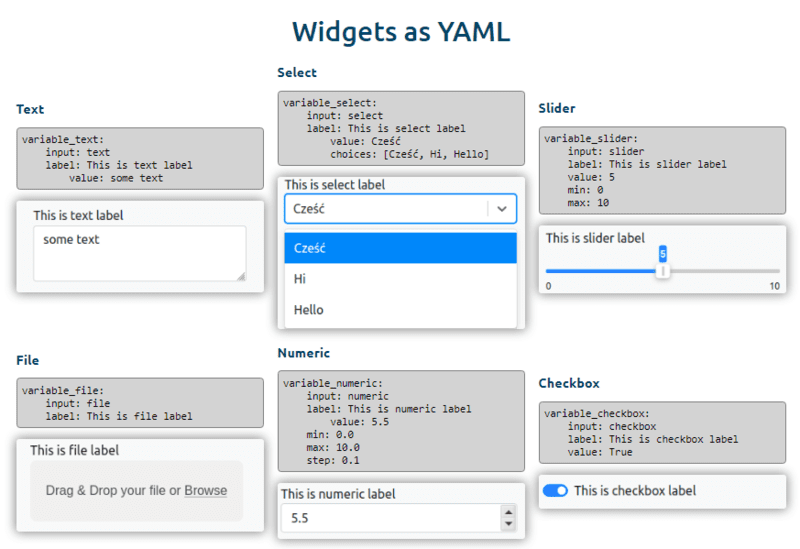
Image by Mercury
Welcome Page
You can create a custom front page using Markdown. If you ask me, this is the easiest way to create your data science portfolio, which includes your biography, achievements, and projects informed by web apps. To create the front page add the welcome.md file and add information using markdown.
To get inspiration, check out the Data Science Portfolio created by the author (Piotr Płoński).
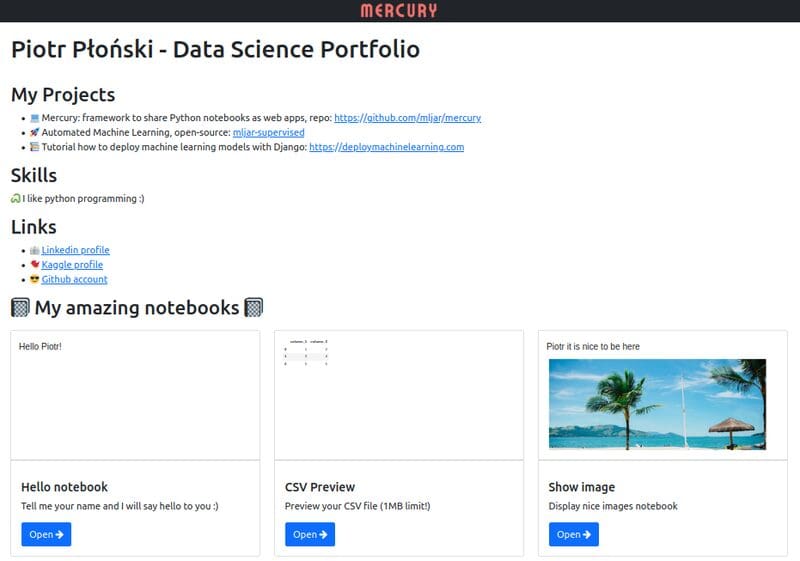
Image from Mercury Docs
Embedding
You can also add your web app to your blog or WordPress website using an iframe. Just copy the link of your web app and add “/embed” within the iframe script as shown below.
<iframe src="https://mercury.mljar.com/app/5/embed" height="700px" width="1200px"/>
This feature is special as no other web app offers embed features.
Admin and Authentication
If you want to limit who can see your notebooks, then make your application private. To access the Mercury web app, you need to provide a username and password. You can put a list of users or groups to `share` parameters in the YAML header. You can use the Admin Panel to manage notebooks, tasks, users, and groups. Adding, deleting, and updating users or groups come with a Pro version.
Gif by Mercury
Deployment on Heroku
It was quite easy for me to fork one of the repositories and deploy it to the Heroku server. You can check my project on how I deploy the GitHub repository without using a single line of code. To access my deployed web app click here. Similarly, you can easily deploy your application on AWS or Google Cloud. Make sure you have added Environment variables:
- NOTEBOOKS= *.ipynb
- PORT= 8080
- SERVE_STATIC= True
- ALLOWED_HOST= <your-wep-app-url>
Conclusion
Mercury brings a different flavor to the work of the Python web app. Instead of creating one, you can add multiple notebooks at once and even create your portfolio page. In this blog, we have learned how you can create a dashboard or machine learning demo using the YAML header. Mercury is so simple that you can deploy your app using GitHub integration. Furthermore, you can add authentication, manage users, create a welcome page, add multiple widgets, and save the output as an HTML file.
- Website: Build web app from Python Notebook
- GitHub: mljar/mercury
- Doc: Mercury Docs
Abid Ali Awan (@1abidaliawan) is a certified data scientist professional who loves building machine learning models. Currently, he is focusing on content creation and writing technical blogs on machine learning and data science technologies. Abid holds a Master's degree in Technology Management and a bachelor's degree in Telecommunication Engineering. His vision is to build an AI product using a graph neural network for students struggling with mental illness.