 A Complete guide to Google Colab for Deep Learning
 A Complete guide to Google Colab for Deep Learning
Google Colab is a widely popular cloud service for machine learning that features free access to GPU and TPU computing. Follow this detailed guide to help you get up and running fast to develop your next deep learning algorithms with Colab.

Image Credit: Medium.
Google Colab is one of the most famous cloud services for seasoned data scientists, researchers, and software engineers. While Google Colab seems easy to start, some things are difficult to use. In this guide, you will learn:
- Why Colab
- Creating a new notebook
- Import Notebooks from GitHub/local machine
- Google Drive with Colab
- Keyboard shortcuts for Colab
- Change Language (Python 3 -> Python 2)
- Select GPU or TPU
- Load Data from Drive
- Load Data from Github Repository
- Importing External Datasets such as from Kaggle
- Download Packages
- Bash commands in Colab
Why Colab
There are several benefits of using Colab over using your own local machines. Some of the benefits of Colab are
- You do not require to do an environment setup. It comes with important packages pre-installed and ready to use.
- Provides browser-based Jupyter Notebooks.
- Free GPU
- Store Notebooks on Google Drive
- Importing Notebooks from Github
- Document code with Markdown
- Load Data from Drive
- and much more
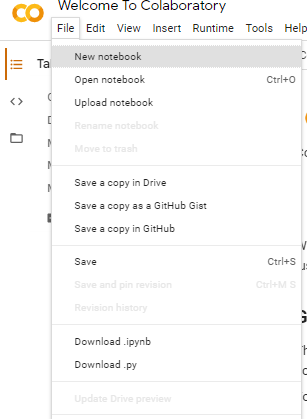
Creating a new notebook
To create a new Notebook on Colab, open https://colab.research.google.com/, and it will automatically show your previous notebooks and give an option to create a new notebook.

Here you can click on NEW NOTEBOOK to start a new notebook and start running your code in it. By default, it is a Python 3 notebook. I will show you later how to make a new Python 2 notebook.
Alternatively, if for some reason you do not see this prompt, or you canceled it, You can make a new notebook from “File > New Notebook”.
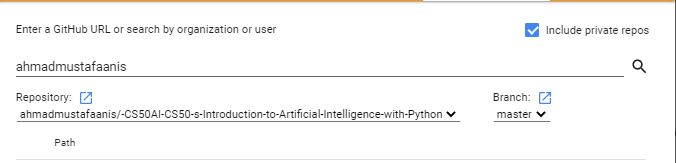
Import Notebooks from GitHub/local machine

Here you can see these 2 boxes which show GitHub and Upload option.
For Github, at first, you need to authorize with Colab with your GitHub, and then it will show you all available repositories from which you can create a new notebook.
GitHub with Colab.
For uploading from your local machine, you will be prompted to upload a file from your local machine to run it in Colab.
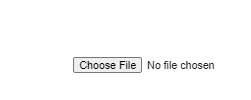
Upload from your local machine.
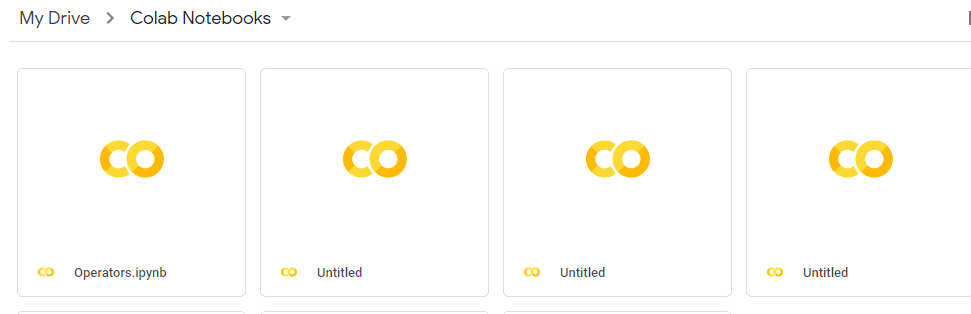
Google Drive with Colab
All the notebooks you create in Google Colab, are by default stored in your Google Drive. There is a folder in your drive named “Colab Notebooks” where you can find all your notebooks created from Google Colab.
To open a notebook from Drive in Colab, right-click on the desired notebook and “Open With > Google Colaboratory”.

Similarly, if you are in a notebook in Colab, and want to see it in the drive, you can do it using “File > Locate to Drive”, which will redirect you to the notebook position in your Drive.
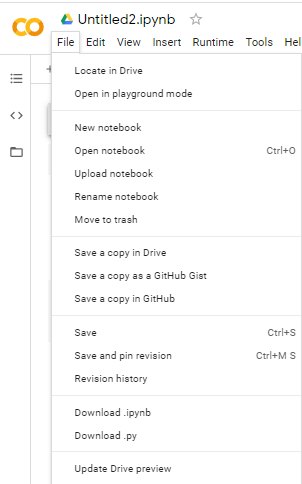
Locate Notebook in Google Drive from Colab.
Keyboard Shortcuts for Colab
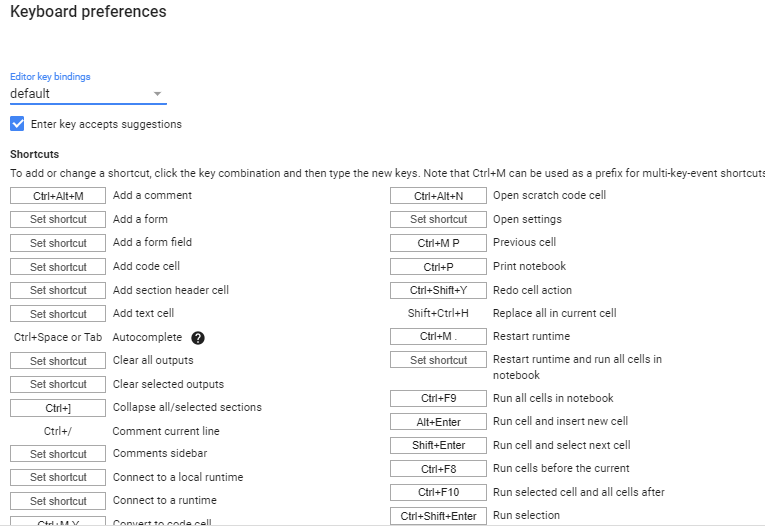
Most of the keyboard shortcuts of Colab are similar to those of the Jupyter Notebook. Let's look at some important ones.
- Shortcut to show all the shortcut keys.
- You can see all the shortcut keys with ctrl + M + H the key. When looking for any specific shortcut, you can search here.
Shortcut key menu.
- New Code Block
- You can add a new code block by Ctrl + M + B.
- Convert Cell to Markdown
- You can convert a cell to Markdown by using Ctrl + M + M shortcut key.
- Convert from Markdown to Code
- To convert from Markdown to Code, you can use Ctrl + M then quickly press Y. I can say it as Ctrl + M followed by Y. Remember not to press them altogether but follow the order.
There are many other great shortcut keys that you can search using Ctrl + M + H key.
Change Language from Python 3 to Python 2
Now with the official end of support of Python 2, Python 2 is no longer available at Colab. Now for some reason, someone sends you a python 2 code, or you have to check something in Python 2 quickly, all you can do is to go to these links
which will eventually redirect you to this https://colab.research.google.com/notebook#create=true&language=python2 link from where you can test your Python 2 code.
Hardware Selection (GPU or TPU)
Colab’s biggest advantage is that it provides free support to GPU and TPU. You can easily select GPU or TPU for your program by Runtime > Change runtime type.
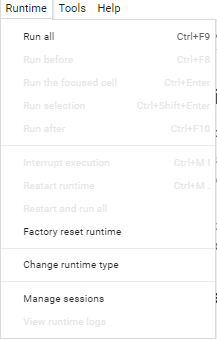
Change runtime type.
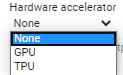
After clicking on the Change runtime type, you will be prompted to select GPU or TPU.
You can also use your local GPU with Colab Interface. In order to do that, do the following steps.
- Start a Jupyter notebook instance at your local machine.
- Copy its URL with Token
- Click on the arrow here(It may be written ‘connect’ in some cases)
![]()
- Click on connect to local runtime
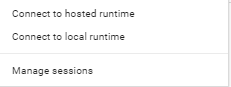
- After clicking, you will see this prompt

- Paste the link here, and connect it.
Load Data from Drive
You can easily load data from Google Drive by mounting it to the notebook. To do this, type the following code in your notebook.
from google.colab import drive
drive.mount('gdrive')
It will give you a link to open,

- Go to the link
- Login to your Google Account
- Copy the code
- Paste it in notebook
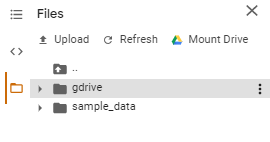
Now if you see in your “Files” section, you will find your ‘gdrive’.
Let's say you have uploaded is under the Untitled folder.
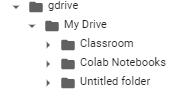
You can get it by
myfile = open('gdrive/My Drive/Untitled folder/dataset1.csv)
And you get your file.
Load data from Github
Let’s say your data set is in Github, and you want to load it. You can do it simply by downloading it as you download it normally in your machine
!git clone REPOLINK
%cd REPONAME
If it is in zip format, you can unzip it by
!unzip GPR_radargrams.zip
%cd GPR_radargrams
And now you have access to data. Later in this tutorial, I will show you how to use bash commands, after that this part will make more sense and easy to use for you.
Import Dataset from Kaggle
- Step 1 is to get a Kaggle API Token. Go to My account > API > Create New API Token.

- Go to API and click on Create New API token. You will receive a JSON file which you can save it.
- Install Kaggle Library and Import Google Colab Files in your notebook.
from google.colab import files
!pip install -q kaggle
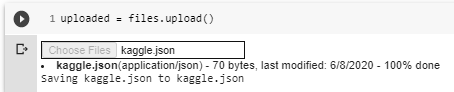
- Upload your Kaggle API JSON file to Colab.
uploaded = files.upload()
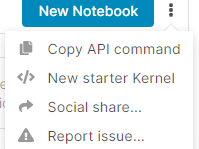
- Go to Dataset you want to download, and click on copy API command, under 3 dots.
- Copy the command and put a ‘!’ before it and run it on Colab, i.e.,
!kaggle datasets download -d ruchi798/malnutrition-across-the-globe
and it will download the dataset for you.
Download Packages
Although all important packages such as Tensorflow, PyTorch, Numpy, Pandas, etc are installed, you can install further packages or upgrade current ones.
To download the packages, you can simply use the command through which you download datasets in your local machine with ‘!’ in the start.
Let's say you want to download the pillow package in your Colab (though it will be downloaded by default), just type the following code and run the cell.
!pip install pillow
If it is already downloaded, it will show

otherwise, it will download it for you.
To update a package, let's say TensorFlow, use following
!pip install tensorflow --upgrade
which will upgrade your package, and you might need to restart runtime.
Bash Commands on Colab
To run any bash command on Colab, you can add ‘!’ before the command, and it will run. For example, to see items in your directory, you can use
!dir
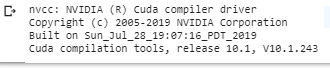
or to check your CUDA and CUDNN, you can use
!nvcc --version
which will output
This brings us to the end of this article. I hope you have learned how to set up your Google Colab for deep learning and its important usage.
Related: