Building a Convolutional Neural Network with PyTorch
This blog post provides a tutorial on constructing a convolutional neural network for image classification in PyTorch, leveraging convolutional and pooling layers for feature extraction as well as fully-connected layers for prediction.

Image by Author
Introduction
A Convolutional Neural Network (CNN or ConvNet) is a deep learning algorithm specifically designed for tasks where object recognition is crucial - like image classification, detection, and segmentation. CNNs are able to achieve state-of-the-art accuracy on complex vision tasks, powering many real-life applications such as surveillance systems, warehouse management, and more.
As humans, we can easily recognize objects in images by analyzing patterns, shapes, and colors. CNNs can be trained to perform this recognition too, by learning which patterns are important for differentiation. For example, when trying to distinguish between a photo of a Cat versus a Dog, our brain focuses on unique shape, textures, and facial features. A CNN learns to pick up on these same types of distinguishing characteristics. Even for very fine-grained categorization tasks, CNNs are able to learn complex feature representations directly from pixels.
In this blog post, we will learn about Convolutional Neural Networks and how to use them to build an image classifier with PyTorch.
How Convolutional Neural Networks Work?
Convolutional neural networks (CNNs) are commonly used for image classification tasks. At a high level, CNNs contain three main types of layers:
- Convolutional layers. Apply convolutional filters to the input to extract features. The neurons in these layers are called filters and capture spatial patterns in the input.
- Pooling layers. Downsample the feature maps from the convolutional layers to consolidate information. Max pooling and average pooling are commonly used strategies.
- Fully-connected layers. Take the high-level features from the convolutional and pooling layers as input for classification. Multiple fully-connected layers can be stacked.
The convolutional filters act as feature detectors, learning to activate when they see specific types of patterns or shapes in the input image. As these filters are applied across the image, they produce feature maps that highlight where certain features are present.
For example, one filter might activate when it sees vertical lines, producing a feature map showing the vertical lines in the image. Multiple filters applied to the same input produce a stack of feature maps, capturing different aspects of the image.
Gif by IceCream Labs
By stacking multiple convolutional layers, a CNN can learn hierarchies of features - building up from simple edges and patterns to more complex shapes and objects. The pooling layers help consolidate the feature representations and provide translational invariance.
The final fully-connected layers take these learned feature representations and use them for classification. For an image classification task, the output layer typically uses a softmax activation to produce a probability distribution over classes.
In PyTorch, we can define the convolutional, pooling, and fully-connected layers to build up a CNN architecture. Here is some sample code:
# Conv layers
self.conv1 = nn.Conv2d(in_channels, out_channels, kernel_size)
self.conv2 = nn.Conv2d(in_channels, out_channels, kernel_size)

# Pooling layer
self.pool = nn.MaxPool2d(kernel_size)

# Fully-connected layers
self.fc1 = nn.Linear(in_features, out_features)
self.fc2 = nn.Linear(in_features, out_features)
We can then train the CNN on image data, using backpropagation and optimization. The convolutional and pooling layers will automatically learn effective feature representations, allowing the network to achieve strong performance on vision tasks.
Getting Started with CNNs
In this section, we will load CIFAR10 and build and train a CNN-based classification model using PyTorch. The CIFAR10 dataset provides 32x32 RGB images across ten classes, which is useful for testing image classification models. There are ten classes labeled in integers 0 to 9.
Note: The example code is the modified version from MachineLearningMastery.com blog.
First, we will use torchvision to download and load the CIFAR10 dataset. We will also use torchvision to transform both the testing and training sets to tensors.
import torch
import torch.nn as nn
import torch.optim as optim
import torchvision

transform = torchvision.transforms.Compose(
    [torchvision.transforms.ToTensor()]
)

train = torchvision.datasets.CIFAR10(
    root="data", train=True, download=True, transform=transform
)

test = torchvision.datasets.CIFAR10(
    root="data", train=False, download=True, transform=transform
)
Downloading https://www.cs.toronto.edu/~kriz/cifar-10-python.tar.gz to data/cifar-10-python.tar.gz

100%|██████████| 170498071/170498071 [00:10<00:00, 15853600.54it/s]

Extracting data/cifar-10-python.tar.gz to data
Files already downloaded and verified
After that, we will use a data loader and split the images into the batches.
batch_size = 32
trainloader = torch.utils.data.DataLoader(
    train, batch_size=batch_size, shuffle=True
)
testloader = torch.utils.data.DataLoader(
    test, batch_size=batch_size, shuffle=True
)
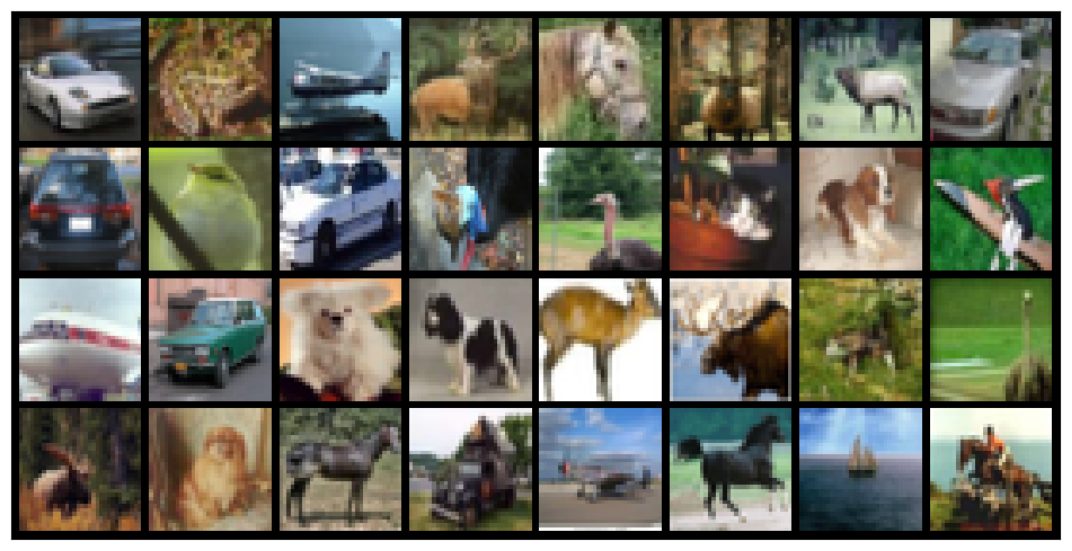
To visualize the image in a single batch of the images, we will use matplotlib and torchvision utility function.
from torchvision.utils import make_grid
import matplotlib.pyplot as plt

def show_batch(dl):
    for images, labels in dl:
        fig, ax = plt.subplots(figsize=(12, 12))
        ax.set_xticks([]); ax.set_yticks([])
        ax.imshow(make_grid(images[:64], nrow=8).permute(1, 2, 0))
        break
show_batch(trainloader)
As we can see, we have images of cars, animals, planes, and boats.
Next, we will build our CNN model. For that, we have to create a Python class and initialize the convolutions, maxpool, and fully connected layers. Our architecture has 2 convolutional layers with pooling and linear layers.
After initializing, we will not connect all the layers sequentially in the forward function. If you are new to PyTorch, you should read Interpretable Neural Networks with PyTorch to understand each component in detail.
class CNNModel(nn.Module):
    def __init__(self):
        super().__init__()
        self.conv1 = nn.Conv2d(3, 32, kernel_size=(3,3), stride=1, padding=1)
        self.act1 = nn.ReLU()
        self.drop1 = nn.Dropout(0.3)

        self.conv2 = nn.Conv2d(32, 32, kernel_size=(3,3), stride=1, padding=1)
        self.act2 = nn.ReLU()
        self.pool2 = nn.MaxPool2d(kernel_size=(2, 2))

        self.flat = nn.Flatten()

        self.fc3 = nn.Linear(8192, 512)
        self.act3 = nn.ReLU()
        self.drop3 = nn.Dropout(0.5)

        self.fc4 = nn.Linear(512, 10)

    def forward(self, x):
        # input 3x32x32, output 32x32x32
        x = self.act1(self.conv1(x))
        x = self.drop1(x)
        # input 32x32x32, output 32x32x32
        x = self.act2(self.conv2(x))
        # input 32x32x32, output 32x16x16
        x = self.pool2(x)
        # input 32x16x16, output 8192
        x = self.flat(x)
        # input 8192, output 512
        x = self.act3(self.fc3(x))
        x = self.drop3(x)
        # input 512, output 10
        x = self.fc4(x)
        return x
We will now initialize our model, set loss function, and optimizer.
model = CNNModel()
loss_fn = nn.CrossEntropyLoss()
optimizer = optim.SGD(model.parameters(), lr=0.001, momentum=0.9)
In the training phase, we will train our model for 10 epochs.
- We are using the forward function of the model for a forward pass, then a backward pass using the loss function, and finally updating the weights. This step is almost similar in all kinds of neural network models.
- After that, we are using a test data loader to evaluate model performance at the end of each epoch.
- Calculating the accuracy of the model and printing the results.
n_epochs = 10
for epoch in range(n_epochs):
    for i, (images, labels) in enumerate(trainloader):
        # Forward pass
        outputs = model(images)
        loss = loss_fn(outputs, labels)

        # Backward pass and optimize
        optimizer.zero_grad()
        loss.backward()
        optimizer.step()
    correct = 0
    total = 0
    with torch.no_grad():
        for images, labels in testloader:
            outputs = model(images)
            _, predicted = torch.max(outputs.data, 1)
            total += labels.size(0)
            correct += (predicted == labels).sum().item()

    print('Epoch %d: Accuracy: %d %%' % (epoch,(100 * correct / total)))
Our simple model has achieved 57% accuracy, which is bad. But, you can improve the model performance by adding more layers, running it for more epochs, and hyperparameter optimization.
Epoch 0: Accuracy: 41 %
Epoch 1: Accuracy: 46 %
Epoch 2: Accuracy: 48 %
Epoch 3: Accuracy: 50 %
Epoch 4: Accuracy: 52 %
Epoch 5: Accuracy: 53 %
Epoch 6: Accuracy: 53 %
Epoch 7: Accuracy: 56 %
Epoch 8: Accuracy: 56 %
Epoch 9: Accuracy: 57 %
With PyTorch, you don't have to create all the components of convolutional neural networks from scratch as they are already available. It becomes even simpler if you use `torch.nn.Sequential`. PyTorch is designed to be modular and offers greater flexibility in building, training, and assessing neural networks.
Conclusion
In this post, we explored how to build and train a convolutional neural network for image classification using PyTorch. We covered the core components of CNN architectures - convolutional layers for feature extraction, pooling layers for downsampling, and fully-connected layers for prediction.
I hope this post provided a helpful overview of implementing convolutional neural networks with PyTorch. CNNs are fundamental architecture in deep learning for computer vision, and PyTorch gives us the flexibility to quickly build, train, and evaluate these models.
Abid Ali Awan (@1abidaliawan) is a certified data scientist professional who loves building machine learning models. Currently, he is focusing on content creation and writing technical blogs on machine learning and data science technologies. Abid holds a Master's degree in Technology Management and a bachelor's degree in Telecommunication Engineering. His vision is to build an AI product using a graph neural network for students struggling with mental illness.