Better data apps with Streamlit’s new layout options
Introducing new layout primitives - including columns, containers and expanders!
By Austin Chen, Senior Software Engineer at Streamlit
Streamlit is all about simplicity. It’s pure Python. Your script runs from top to bottom. Your app renders from top to bottom too. Perfect, right? Well...not quite. Users noted that our thinking was a bit too vertical. The group griped about grids. The community clamored for columns. Fervent friends favored flexibility. You get the idea.
So move aside, vertical layout. Make a little space for... horizontal layout! And a bunch more layout primitives. And some syntactic goodies too. In fact, today, we're introducing four new layout features giving you much more control over your app’s presentation.
st.beta_columns: Side-by-side columns where you can insert Streamlit elementsst.beta_expander: An expand/collapse widget to selectively show stuffst.beta_container: The fundamental building block of layoutwith column1: st.write("hi!"): Syntax sugar to specify which container to use
Go horizontal with columns
st.beta_columns acts similarly to our beloved st.sidebar, except now you can put the columns anywhere in your app. Just declare each column as a new variable, and then you can add in ANY element or component available from the Streamlit library.
Use columns to compare things side-by-side:
col1, col2 = st.beta_columns(2)

original = Image.open(image)
col1.header("Original")
col1.image(original, use_column_width=True)

grayscale = original.convert('LA')
col2.header("Grayscale")
col2.image(grayscale, use_column_width=True)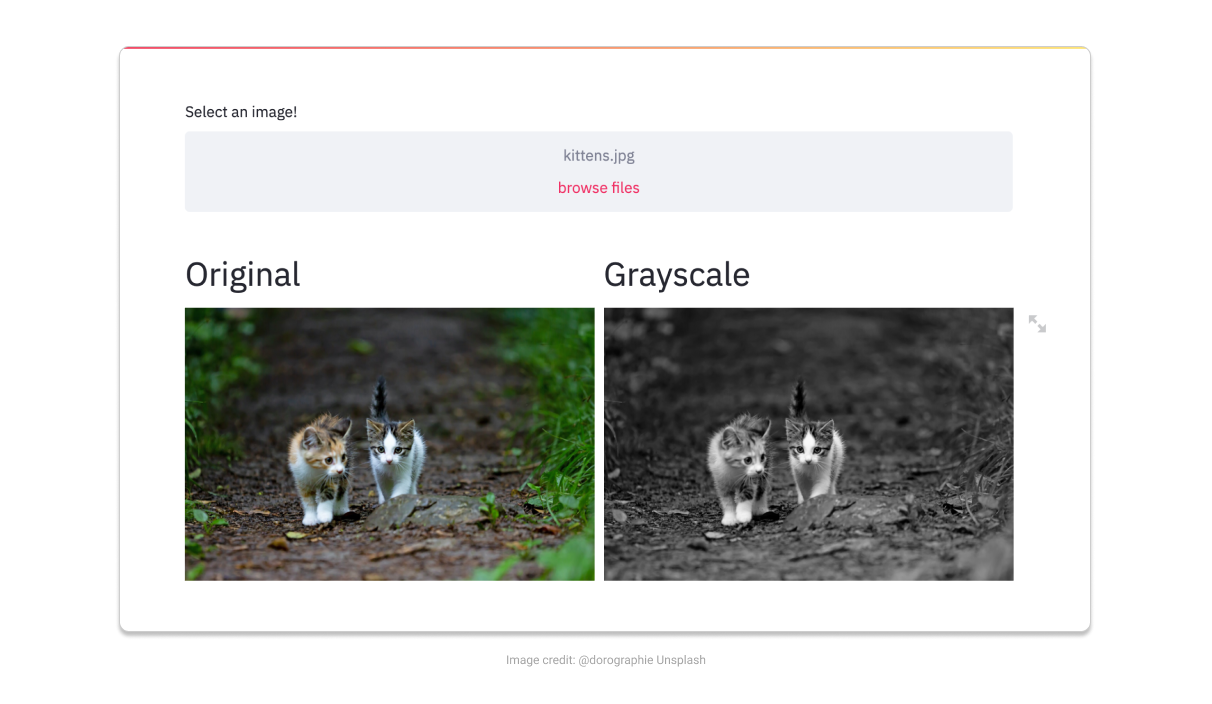
In fact, by calling st.beta_columns inside a loop, you get a grid layout!
st.title("Let's create a table!")
for i in range(1, 10):
    cols = st.beta_columns(4)
    cols[0].write(f'{i}')
    cols[1].write(f'{i * i}')
    cols[2].write(f'{i * i * i}')
    cols[3].write('x' * i)
You can even get quite complex (which can be great for wide monitors!) Here's an example that uses variable-width columns in conjunction with the wide-mode layout:
# Use the full page instead of a narrow central column
st.beta_set_page_config(layout="wide")

# Space out the maps so the first one is 2x the size of the other three
c1, c2, c3, c4 = st.beta_columns((2, 1, 1, 1))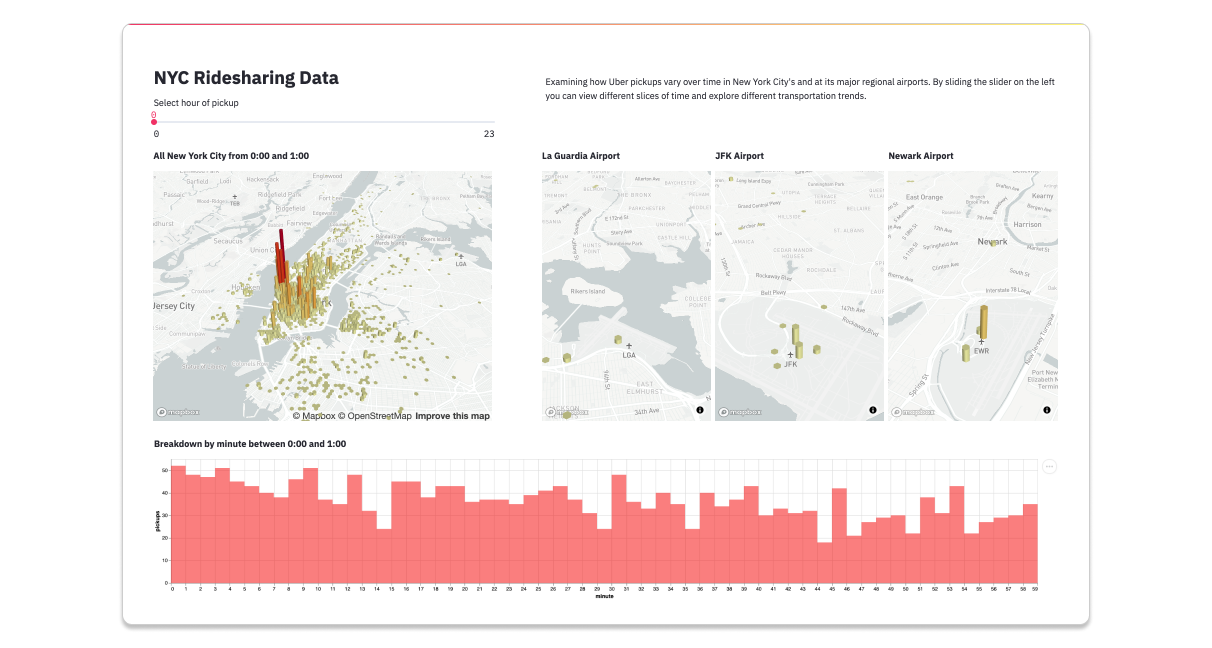
And just in case you were wondering: yes, columns are beautiful across devices and automatically resize for mobile and different browser widths.
Clean things up with expanders
Now that we've maximized horizontal space, try st.beta_expander, to maximize your vertical space! Some of you may have been using st.checkbox for this before, and expander is a prettier, more performant replacement ????
It's a great way to hide your secondary controls, or provide longer explanations that users can toggle!
Adding a new concept: containers!
If you squint a bit, st.beta_columns, st.beta_expander, and st.sidebar look kind of similar. They all return Python objects, which allow you to call all the Streamlit functions. We've given these objects a new name: containers. And since it would be nice to create containers directly, you can!
st.beta_container is a building block that helps you organize your app. Just like st.empty, st.beta_container lets you set aside some space, and then later write things to it out of order. But while subsequent calls to the same st.empty replace the item inside it, subsequent calls to the same st.beta_container append to it. Once again, this works just like the st.sidebar you've come to know and love.
Organize your code with... with
Finally, we're introducing a new syntax to help you manage all these new containers: with container. How does it work? Well, instead of making function calls directly on the container...
my_expander = st.beta_expander()
my_expander.write('Hello there!')
clicked = my_expander.button('Click me!')
Use the container as a Context Manager and call functions from the st. namespace!
my_expander = st.beta_expander()
with my_expander:
    'Hello there!'
    clicked = st.button('Click me!')
Why? This way, you can compose your own widgets in pure Python, and reuse them in different containers!
def my_widget(key):
    st.subheader('Hello there!')
    clicked = st.button("Click me " + key)

# This works in the main area
clicked = my_widget("first")

# And within an expander
my_expander = st.beta_expander("Expand", expanded=True)
with my_expander:
    clicked = my_widget("second")

# AND in st.sidebar!
with st.sidebar:
    clicked = my_widget("third")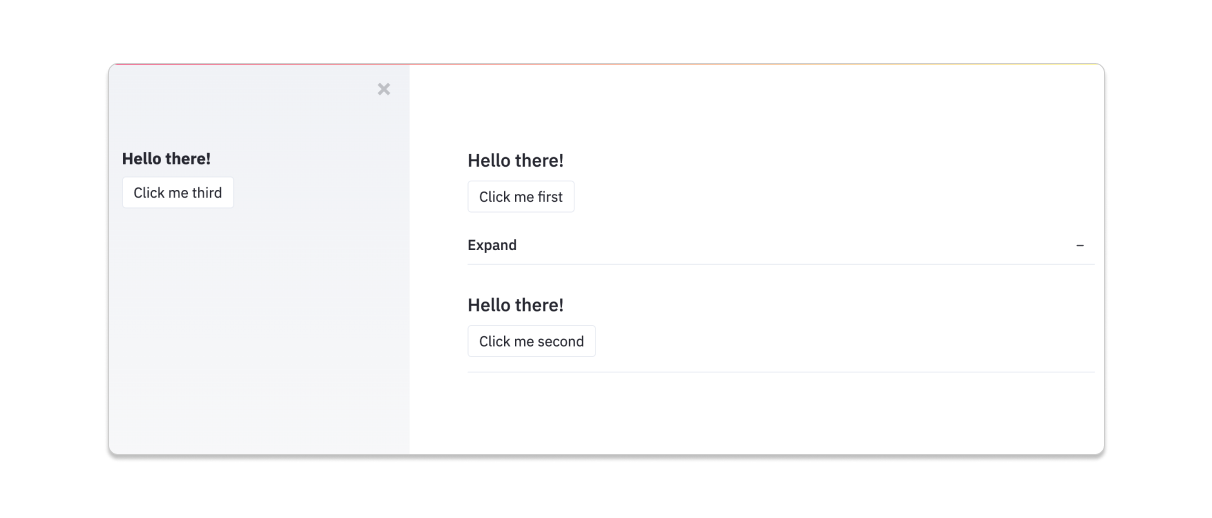
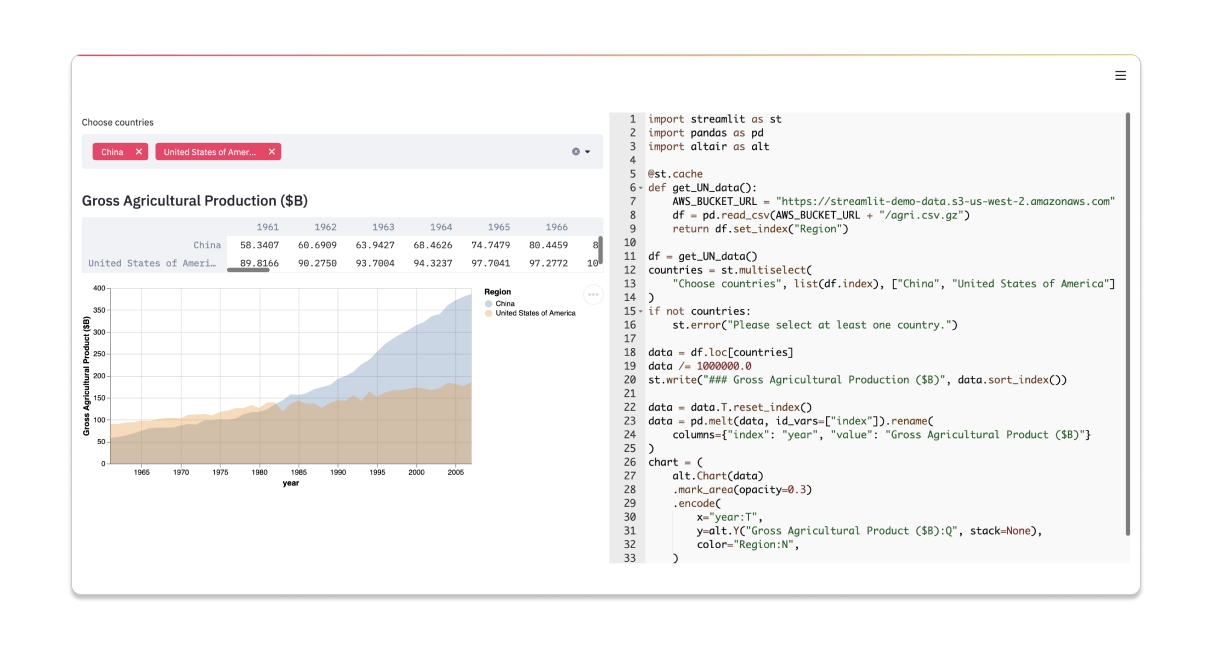
One last thing: the with syntax lets you put your Custom Components inside any container you like. Check out this app by community member Sam Dobson, which embeds the Streamlit Ace editor in a column right next to the app itself — so a user can edit the code and see the changes LIVE!
That's all, folks!
To start playing with layout today, simply upgrade to the latest version of Streamlit (v0.68).
$ pip install streamlit --upgradeComing up are updates with padding, alignment, responsive design, and UI customization. Stay tuned for that, but most importantly, let us know what YOU want from layout. Questions? Suggestions? Or just have a neat app you want to show off? Join us on the Streamlit community forum — we can't wait to see what you create ????
Resources
Documentation
GitHub
Changelog
Kudos
A shoutout to the Streamlit Community and Creators, whose feedback really shaped the implementation of Layout: Jesse, José, Charly, and Synode — and a special callout to Fanilo for going the extra mile to find bugs, suggest APIs, and overall try out a bunch of our prototypes. Thank you all so much ❤️
Bio: Austin Chen is a Senior Software Engineer at Streamlit.
Original. Reposted with permission.
Related:
- Build an app to generate photorealistic faces using TensorFlow and Streamlit
- Deploying Streamlit Apps Using Streamlit Sharing
- Deploying Secure and Scalable Streamlit Apps on AWS with Docker Swarm, Traefik and Keycloak